Showing posts with label pepper. Show all posts

Monday, April 8, 2024

One Pan Chicken and Rice

Certain recipes evoke core childhood memories. This is certainly one of them. Chicken and rice in a pan with some random veggies and pasta sauce. My mom used to make this regularly. She had no real printed recipe for it. Things just got thrown in a pan and heat was applied. Often, some of the rice would be crunchy and underdone. Other sections of the rice would be big clumps. However, it tasted good and was filling. The green olives were an odd addition, but they added a nice bit of zing to the flavor. 

Core Childhood Memory

It this gourmet? No, not at all. I use canned sauce here. I almost never used canned sauce. Everything in this recipe was about getting a meal together and on the table as quickly and easily as possible. This is comfort food, plain and simple. As always, notes are in blue.

One Pan Chicken and Rice

Ingredients

  • 4 chicken breasts, about 2 lbs. (bone in or out, it doesn't really matter. You can even use thighs if you prefer. In any case, make sure they are skinless)
  • 2 cups white rice
  • 3 cups water or chicken stock
  • 1 onion, cut into about 1" pieces
  • 1 bell pepper, cut into about 1" pieces
  • 1 can mushrooms (6.5oz), drained.
  • 1/2 cup green olives
  • 1 can (24 oz) pasta sauce (we used Hunt's Garlic & Herb)
  • 2 teaspoons garlic powder
  • 2 teaspoons dried Italian seasoning.
  • Grated parmesan cheese
Directions
  1. Preheat oven to 375F (190C, Gas Mark 5)
  2. In a 9x13 baking dish add the rice and water/stock
  3. Lay the chicken on top of the rice. 
  4. Sprinkle the garlic and Italian seasoning over the chicken.
  5. Distribute the vegetables around the pan. 
  6. Pour the pasta sauce over the top of everything.
  7. Cook uncovered for about 1 hour, or until the chicken and rice are both done. (a little bit of charring on the veggies is normal)
  8. Garnish with parmesan cheese.
Everything benefits from a bit of cheese.
Good Times!


Thursday, July 4, 2019

Slow Cooker Chicken Cacciatore

Summer around here means one thing: It's too damned hot to turn on the oven. Seriously. I can have the house at a comfortable 70 degrees, but if I cook anything in the oven, it shoots right up to 75. This is when the slow-cooker gets dragged out. This recipe came together super fast and is extremely good over pasta or rice. In other news, I somehow managed to lose every photo I had of this recipe. I checked every memory card I had. The pictures are totally gone. I don't know, maybe I was drunk and forgot to actually take the pictures. In any case, enjoy this picture of a chicken shrugging in place of the actual dish. As always, notes are in (blue).
Slow Cooker Chicken Cacciatore
Ingredients

  • 2-3 (about 1.5 lb.) boneless, skinless chicken breasts (feel free to use boneless, skinless thighs if you prefer)
  • 1 can (14.5oz) diced tomatoes, undrained
  • 1 onion, halved and sliced
  • 1 red bell pepper, cut into small slice
  • 1 can (8oz) sliced mushrooms, drained (you can certainly use fresh if you prefer)
  • 2-3 garlic cloves, finely chopped
  • 1 teaspoon dried oregano
  • 1 teaspoon dried basil
  • 1/4 teaspoon salt
  • 1/4 teaspoon red pepper flakes
Directions
  1. Put chicken in the bottom of slow cooker.
  2. Unceremoniously dump everything else on top of chicken
  3. Cook on LOW for 6 hours
  4. Give everything a good stir before serving.
Good times!

Tuesday, September 13, 2016

T-Bird Hot Sauce

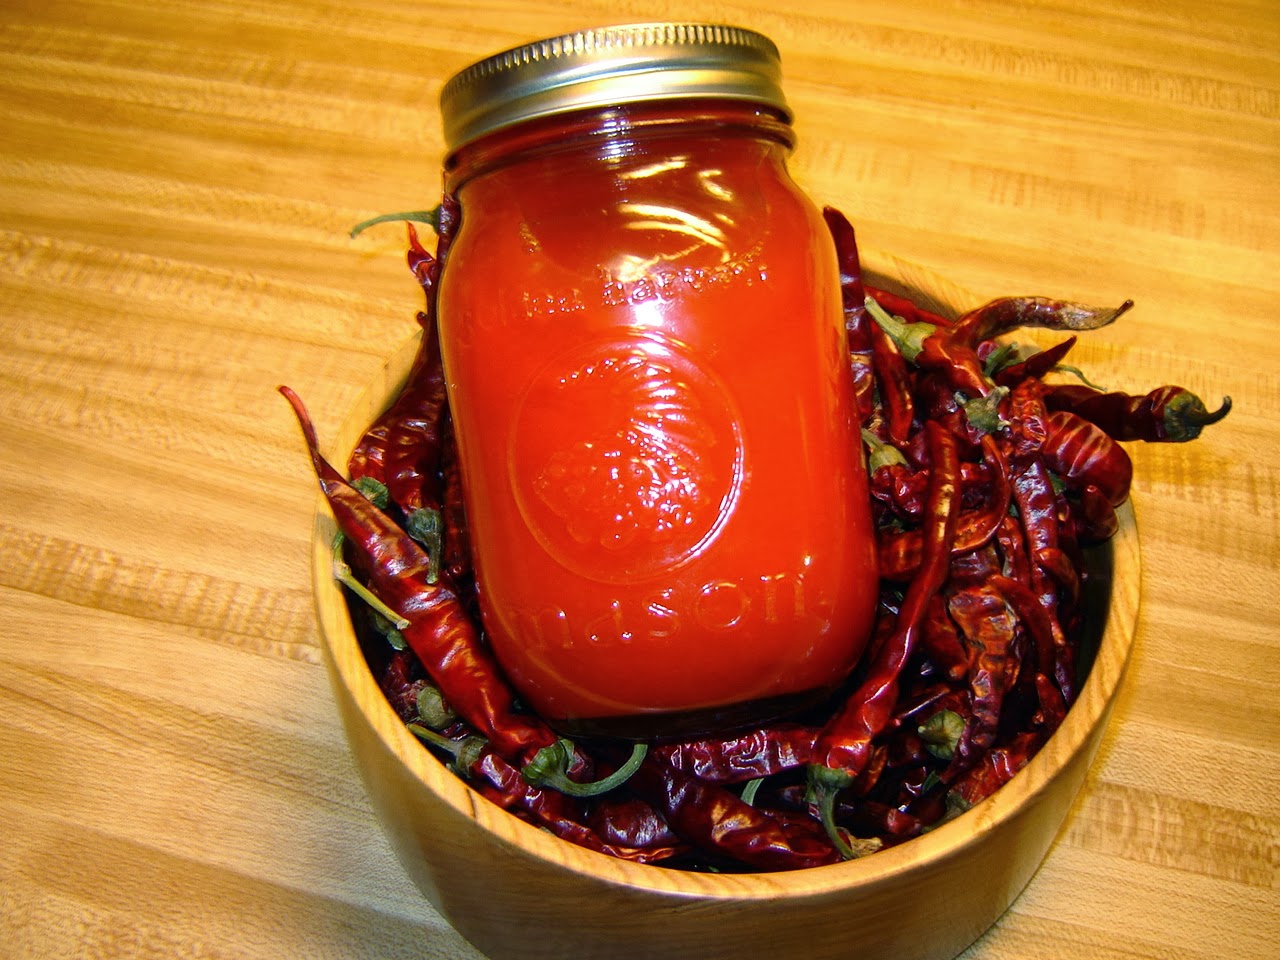
     Every year I plant way too many hot peppers and every year I find myself desperate to find ways to use them up. I have bags and bags of peppers that I've dried, but those really start to take up space. I am always looking for new and exciting ways to use up lots of peppers in one go. This particular sauce certainly fits the bill, using five dozen peppers. It also uses up some tamarind concentrate that I mistakenly bought when I was shopping for tahini. For whatever reason, I'm always mixing tahini and tamarind up, which generally doesn't end well in a recipe. Though very spicy, this sauce has a wonderful deep and mellow flavor underneath from the tamarind and guajilo. This is a go-to sauce for chicken or pork dishes. It's thick enough to hold up on the barbecue or hot wings. As for the name? I used Thai peppers in the recipe. I know "bird" specifically refers to the dried pepper, but the name was too good to pass up. "T" for Thai or Tamarind and "Bird" for the alternate pepper name. I am so damned clever it hurts. As always, notes are in blue.


Ingredients
  • 1 tablespoon tomato paste
  • 2 tablespoons red wine vinegar
  • 1 Tablespoon tamarind concentrate
  • 1 cup cider vinegar
  • 1/3 cup water
  • 60 Thai bird chili peppers, stemmed (cayenne or serrano can be substituted, but you may need to use less, as those peppers are generally larger)
  • 1 dried Ancho chili
  • 2 dried Guajillo chilis
  • 4 tomatoes, chopped
  • 1 onion, chopped
  • 1 carrot, chopped
  • 1 rib celery, chopped
Directions
  1. Add all ingredients to a food processor (make sure it is a large capacity processor, at least 7 cups. 10 would be better, unless you're a fan of leaking and caustic messes. Caustic Mess would be an outstanding punk band name). Process until smooth.
  2. Transfer mixture to a nonreactive pot and bring to a boil. Reduce to a simmer and let simmer for about 10 minutes. (If you're not planning on canning this sauce for storage, you're done. If you want to store this sauce long term, go on to the next steps)
  3. Prepare a boiling water canner and submerge 4 half pint jars (or two full pint jars) to sterilize in the boiling water. (You can be doing this while the sauce is simmering)
  4. Remove the jars and fill with the warm sauce. Leave 1/4" headspace in each jar.
  5. Seal the jars with a 2 piece lid and process in the boiling water bath for 12 minutes (If you're doing full pints, go for about 16 minutes).
  6. After 12 minutes, remove from the bath and set on a wire rack to cool. Eventually, you'll hear the satisfying "pop" that tells you the jar has sealed. If after a few hours, a jar hasn't sealed, put on a new lid and try reboiling for another 12 minutes. If it doesn't seal after that, just give up and use the sauce. It will hold for a long time in the fridge. Properly processed and sealed, the sauce is good for at least a year. As always, double check everything with the National Center for Home Food Preservation to ensure you don't poison anybody.

Good Times!


Wednesday, December 30, 2015

Kale, Chorizo and Potato Soup

This has been one of the goofiest winters on record. We've had a week of near sixty degree temperatures, then it rained hard for two days straight and everything flooded. This morning it snowed. This sort of weather makes it hard for me to plan meals. There are certain things I can make only if the weather permits. Soups, for instance. I generally won't make soup during the summer. Come winter, it's game on. Now that we have a snap of cold weather, I figured it was time to throw down some soup. I found this recipe lurking in one of my cookbooks. I tweaked it just a bit and was greatly satisfied with the results. It's a simple, hearty soup that's great with crusty bread. As always, notes and changes are in blue.

Kale, Chorizo and Potato Soup
via Best-Ever Soups

Ingredients
  • 8 ounces kale, stems removed
  • 8 ounce chorizo sausage (Italian or Spanish, not Mexican. You want the salami type chorizo)
  • 1 medium onion, cut in half and thinly sliced
  • 1-1/2 pounds red potatoes, skinned
  • 7-1/2 cups vegetable stock (we used chicken stock)
  • 1 teaspoon ground black pepper
  • 1/2 teaspoon cayenne pepper
  • Crusty bread
Directions
  1. Place the kale in a food processor and process for a few seconds to chop it finely (or just take out a goddamned knife and chop it yourself. I know I'm lazy, but even I have my limits)
  2. Prick the sausage *snicker* and place in a pan with enough water to cover (if you're using the onion option, add them here). Simmer for 10 minutes. Drain and cut sausage into thin slices.
  3. Cook the potatoes in lightly salted boiling water for about 15 minutes or until tender. Drain and place in a bowl. Mash, adding about a cup of the cooking liquid to make a thick paste.
  4. Bring the stock to a boil and add the kale, chorizo (and possibly onion) and lower heat. Simmer for 5 minutes. Add the potato paste, stir to incorporate and simmer another 20 minutes. 
  5. Season with black and cayenne pepper.
  6. To serve: Place a slice of bread in the bottom of each bowl, then pour over soup.
Good times!

Sunday, May 24, 2015

Farfalle with Broccoli, Anchovy and Cream

     It's been a while since I've done anything of value in the kitchen. Apparently getting ready for a baby is somewhat time consuming. I guess this is just a taste of things to come! I figure I should probably try out some quick and easy recipes to make sure The Wife is fed, as she is the feeding station for The Spud. Naturally, I turn to pasta for a quick and easy dish. The Wife loves pasta, and if Mama ain't happy, nobody's happy. I found this little gem in The Geometry of Pasta. You can never go wrong with a cookbook for nerds. This recipe made a very subtle, savory pasta with just a kick of heat. This could certainly be the base for adding shrimp or chicken. I call it a winner and will enter it into our regular rotation! As always, notes and changes are in blue.

Farfalle con Broccoli E Alici
(Pasta with broccoli, anchovy and cream)

via The Geometry of Pasta
Ingredients

  • 1/3 pound farfalle (we went with 1/2 pound and there was still plenty of sauce coverage)
  • 1 head broccoli (3/4 pound), cut into florets
  • 2 garlic cloves, thinly sliced (in retrospect, a third clove would have been great)
  • 3 tablespoons extra virgin olive oil (insert favorite virgin joke here)
  • 3/8 teaspoon crushed red pepper flakes (3/8? Who measures like that? We used 1/2 tsp)
  • 3-4 salted anchovy fillets, chopped (I used 4 anchovy fillets in olive oil, straight from the tin)
  • 1/4 cup heavy cream (our heavy cream had turned into a large cheese curd. We used half & half instead with no harm done)
  • Generous 1/2 cup grated Parmesan
  • Black pepper
Directions
  1. Cook farfalle and broccoli together in plenty of well-salted water. 
  2. In a pan, fry the garlic in oil until starting to color. Turn off the heat and add the red pepper flakes. When no longer sizzling, add the anchovies and crush with a wooden spoon to dissolve into oil (I never thought anchovies could dissolve, but sure enough, they do. SORCERY)
  3. When the pasta is almost ready, add the cream to the garlic mixture and return to the heat. Drain the pasta (pasta should be very al dente and the broccoli soft), and add it to the sauce. 
  4. Cook together until the sauce coats thickly, adding the Parmesan and black pepper to taste at the end.
Good times!

Thursday, April 9, 2015

RC-Tequila Carnitas

     I am a Goddamn genius. I'm just putting it out there right now. This recipe is proof of my towering intellect.  I have created a meal of such unsurpassed deliciousness that even the most accomplished chef would bow before it. I can say without fear of contradiction that this is one of the greatest things I have ever cooked. All bombast aside, this is truly a fantastic dish. It's also super easy to make, though it does take a while. I have always enjoyed the carnitas I would get at Mexican restaurants and wanted to make them at home. Granted, I don't think RC and bottom shelf tequila qualify as authentic Mexican, but such is life. It's good. So good. Change your pants good. Just make it. Then shower me with the praise I no doubt deserve.

RC-Tequila Carnitas
Ingredients
  • 2 pound pork shoulder (Boston Butt)
  • 1 sweet onion, cut in half and thinly sliced
  • 2 cans cola (we used RC)
  • 1/3 cup tequila (I imagine the tequila you use will slightly effect the flavor. We used Sauza white tequila)
  • 2 tablespoons vegetable oil
  • Salt, pepper, red pepper flakes, fennel seeds
Directions
  1. Rub meat (*snicker*) with salt, pepper, red pepper and fennel. Set aside.
  2. In a large enameled cast iron dutch oven, heat 2 tablespoons oil at medium-high heat. Add onion and cook for 5-7 minutes, stirring occasionally, until onions are golden brown. 
  3. Turn up heat a bit and add roast, searing on each side for a couple minutes or until it starts to brown.
  4. Add the cola and tequila. Liquid should be deep enough that at least half the meat is submerged. Bring to a boil, then reduce to a simmer. 
  5. Cover and put in oven preheated to 350F (180C, Gasmark 4) and cook for 3 hours. Check level of liquid, adding more if necessary to keep the roast about halfway in the liquid.
  6. Reduce heat to 250F (130C, Gasmark 1/2) and cook another hour. 
  7. Remove meat from dutch oven and use two forks to pull the meat into chunks (don't fully shred the meat. You want some nice quarter-sized chunks of meat)
  8. Spread the meat on a baking sheet or in a Pyrex dish. Put under the broiler for 5-10 minutes or until the meat starts to crisp a bit on the edges.
  9. Take any remaining liquid and onion from the dutch oven and stir it in with the meat. 
Better than the usual Good Times!

Sunday, August 10, 2014

Hot and Sour Soup

     Once again I turn to my trusty copy of The Thousand Recipe Chinese Cookbook. This time it's for soup. You can never go wrong with soup. Unless you undercook something and give everybody dysentery. Then I suppose you've gone wrong. You could also spill a scalding hot bowl on your crotch. I suppose that would be wrong, too. OK, you can go wrong with soup. This particular soup is worth the risk. One of my favorite treats at a Chinese restaurant is the hot and sour soup. I am always on the lookout for a recipe that replicates that experience. This does not even come close. Don't let that scare you away. This soup is really tasty and pretty easy to make. We really screwed around with the recipe and were very pleased with the results. If you can manage to keep the sodium down, you've got a really healthy meal. As always, notes and changes are in blue.


Hot and Sour Soup
via The Thousand Recipe Chinese Cookbook
Ingredients
  • 3 or 4 dried black mushrooms (as I do not normally engage in witchcraft, I do not normally stock these. We went with a 15-ounce can of straw mushrooms. Keep the liquid if you use the canned!)
  • 1/4 pound lean pork (none on hand. We went with an equal amount of ground turkey)
  • 2 bean curd cakes (that's kind of a nebulous measurement, so we went with a 1 pound block of firm tofu, cut into about 1/2 inch squares)
  • 1 scallion (we used 2 since the garden is overrun with them)
  • 1 15-ounce can stir fry vegetables, drained. We're talking water chestnuts, bamboo shoots, baby corn, sprouts, etc.)
  • 5 cups stock (we used a home made shrimp stock. Feel free to use the stock of your choice)
  • 1 cup mushroom soaking liquid (obviously you're only going to have these if you used the dried mushrooms. If you used the can like we did, just pour in the liquid along with the mushrooms)
  • 1 tablespoon sherry (none on hand, we used an equal amount of dry vermouth)
  • 2 tablespoons white vinegar (since this was hot and sour soup, we used an equal amount of pique sauce. It was still vinegar based, but had an extra hot pepper kick)
  • 1 egg
  • 2 tablespoons corn starch
  • 1/4 cup water
  • 3/4 to 1 teaspoon salt (omitted. There's already enough sodium in here)
  • 1 teaspoon soy sauce
  • 1/4 teaspoon pepper (doesn't say what kind. I used a bit of black and about 1/2 teaspoon of red pepper flakes)
  • A few dashes of Tabasco if you want more heat
  • Sesame oil
Directions
  1. Soak dried mushrooms. Reserve soaking liquid (or just open can and don't drain it)
  2. Sliver mushrooms, pork and bean curd. Mince scallion. Beat egg lightly. Blend cornstarch and cold water to a paste (we didn't cut the mushrooms at all. We used ground turkey so no slicing there. I decided to simply chop the scallions just to be a bastard).
  3. (The original recipe does not specify what to cook the soup in. I went with a 5-quart pot.) Bring stock and mushroom soaking liquid to a boil. Add pork (or turkey. Or both if you're feeling daring) and mushrooms (if you went with the canned mushrooms, just unceremoniously dump the entire contents of the can into the pot. If you're also using the optional can of stir fry vegetables, it goes in at this point, too) and simmer, covered, for 10 minutes. 
  4. Add bean curd and simmer, covered, for 3 more minutes.
  5. Stir in sherry (or vermouth), vinegar (or pique), salt (if using. It's your heart; do what you want), soy sauce and pepper. Pour in cornstarch paste to thicken. Stir gently. 
  6. Slowly add beaten egg, stirring gently once or twice (no more than twice! It would be bad. Try to imagine all life as you know it stopping instantaneously and every molecule in your body exploding at the speed of light) Remove from heat. Sprinkle with sesame oil and scallions.
    Total protonic reversal.

    Good times!


Tuesday, July 29, 2014

Master Ridley's Pepper Paste

     This particular concoction was my first foray into pepper sauces. I had a bumper crop of cayenne and needed to use them in bulk. The end result was my single most popular hot sauce recipe, at least among friends and coworkers. There is so much you can do with this. Toss it with melted butter and chicken wings and you'll never do hot wings any other way again. Mix it in chili for an extra punch. One of the guys at works just spreads it on his hamburger. You will not be the same after this. It has just enough heat and more than enough flavor. Since it's made with vinegar, it cans well, too. Just pack it in half-pint jars, making sure to work out the air bubbles. Then just process in a boiling water bath for 12-15 minutes (as always, consult the National Center for Home Food Preservation for tips on how not to get botulism). We actually have an open jar that's been in our fridge for over 2 years without going off. We just add leftovers from each season's batch. We figure in the next couple years it should achieve sentience. Remember, with great power comes great responsibility. And just who is Master Ridley, you ask? If you've read Fahrenheit 451, you'll know the reference: "Play the man, Master Ridley; we shall this day light such a candle, by God's grace, in England, as I trust shall never be put out."*

Master Ridley's Pepper Paste
Ingredients 
Ingredients can be easily multiplied for larger batches. A double batch of these ingredients should yield about a half pint of paste.
  • 1 dried Guajillo pepper
  • 10-12 Cayenne peppers (cut off and discard the stems and roughly chop. Don't remove the seeds unless you're a huge wuss. If that's the case, make sure you wear gloves and hike up your diaper, too)
  • 2 grated baby carrots
  • ½ teaspoon cumin
  • 1 teaspoon seasoning salt
  • 1 teaspoon garlic powder
  • 3 tablespoons white vinegar
Directions
  1. Combine ingredients in a food processor and blend until smooth 
  2. Another tablespoon of vinegar can be added if the sauce is too thick for your liking.
* Nicholas Ridley was a bishop burned at the stake for heresy in 1555
Good times!

Saturday, December 28, 2013

Shells with Bell Peppers and Feta

     If I ever lose my copy of Taste of Home Everyday Light Meals, I'm hosed. I am constantly digging through this recipe book for recipes and ideas. We really liked this recipe. It's super easy to put together and leaves plenty of room for personal interpretation. It's also fairly healthy. This is one of those meals that is perfect for the middle of a busy week. As a bonus, it's good cold, too! As always, any notes or changes are in blue.
Shells with Bell Peppers and Feta
via Taste of Home Everyday Light Meals
Ingredients
  • 2-1/4 cups uncooked penne (we used 5 cups of medium shells)
  • 3/4 cup chopped onion 
  • 1 tablespoon olive oil
  • 3 cloves garlic, minced
  • 1 cup chopped sweet red pepper
  • 1 cup chopped green pepper
  • 1/4 cup sliced ripe black olives (you bet. Ripe from the can.)
  • 1 teaspoon dried oregano
  • 1/4 teaspoon salt
  • 1/8 teaspoon cayenne pepper (I never understand measurements like this. 1/8 teaspoon? Really? Why not hold the jar of cayenne next to the bowl and call it a day? I used a full teaspoon)
  • 1/4 cup water
  • 1/2 cup crumbled feta cheese
Directions
  1. Cook and drain pasta according to package directions (It's important to use the right package for directions. You don't want to accidentally cook your pasta according to the directions on a package of suppositories)
  2. In a nonstick skillet, sautee onion in oil for 1-1/2 minutes. Add garlic; cook 30 seconds longer.
  3. Add the peppers; cook and stir for 2-3 minutes or until vegetables are tender.
  4. Stir in olives, oregano, salt, and cayenne. Add water; cook and stir until mixture comes to a boil. Stir pasta into skillet. Remove from heat. Stir in cheese. 

Tuesday, December 17, 2013

Slow Cooker Spanish-Style Couscous

     I'm still on the fence about slow-cooker recipes that require you to do cooking outside of the slow-cooker. I just want to chuck everything in there and forget about it. I'll make exceptions for ground meat. Nobody wants slow cooked ground meat. That just sounds nasty. After this recipe, I'll also make an exception for couscous, because it takes almost no time to make. The Wife and I really enjoyed this recipe. We tinkered with the ingredients and came up with a winner. It was simple and with a switch to turkey, a healthy meal. As always, any notes and changes are in blue.


Slow Cooker Spanish-Style Couscous
via Crock-Pot Quick & Easy Recipes
Ingredients
  • 1 pound ground beef (we had a bunch of ground turkey patties in the freezer, so we used 1.5 pounds of those instead)
  • 1 can (14 ounces) beef broth (I don't keep cans of broth on hand. I just filled an empty can with water and dissolved a beef bouillon cube in it)
  • 1 green bell pepper, cut into 1/2 inch pieces (you should know by now The Wife doesn't like green peppers, so we went with red instead)
  • 1/2 cup pimiento stuffed green olives, sliced
  • 1/2 onion, chopped
  • 2 cloves garlic, minced
  • 1 teaspoon ground cumin
  •  1/2 teaspoon dried thyme
  • 1 teaspoon Pilsen Latino Seasoning from the Spice House
  • 1-1/3 cup water (this is for the couscous. DON'T put it in the slow cooker!)
  • 1 cup uncooked couscous (we found a really good roasted garlic and olive oil couscous at ALDI)
Directions
  1. Brown meat in a large skillet over medium-high heat, stirring to break up meat (I've never seen a recipe tell you to break up the meat before. Are there people out there just chucking a big wad of meat in the pan and hoping for the best?) Drain fat.
  2. Combine broth, bell pepper, olives, onion, garlic, cumin, thyme and meat in slow-cooker. Cover; cook on LOW 5 hours or until bell pepper is tender. 
  3. Bring water to a boil over high heat in a small saucepan. Stir in couscous. Cover; remove from heat. Let stand 5 minutes. Fluff with fork (don't forget to take the cover off before fluffing or you may encounter some difficulties). Spoon couscous onto plates; top with beef mixture (use a slotted spoon for getting the beef mixture out. There's going to be a fair amount of liquid left in the slow cooker).
Good times!

Monday, November 11, 2013

Fruit Punch Hot Sauce

     Some time ago I held a little contest to determine the name of a hot sauce I had created. I picked a winner and then subsequently forgot all about it. I even managed to misplace the recipe. Having finally located the recipe, I am finally posting it! This is a cayenne sauce with a strong citrus base. It's excellent on seafood and chicken. I haven't tried it on anything else, but fully intend to. As far as heat, on a scale of 1 being no real heat to 10 being "Oh God, eventually this has to come out my anus," I'd give this a 4-5. As always, any notes are in blue.
Fruit Punch Hot Sauce
Ingredients

  • 5 ounces cayenne peppers, seeded and roughly chopped
  • 10 ounces red banana peppers, seeded and roughly chopped (not sure where you're going to find these; these peppers were mutants out of our garden)
  • juice of 2 lemons
  • 1/4 cup orange juice
  • 1 medium tomato, roughly chopped
  • 2 cloves garlic
  • 1 teaspoon salt
  • 2 cups cider vinegar
Directions
  1. Throw everything into a blender and blend the living shit out of it.
  2. Pour the blended mixture into a non-reactive saucepan and bring to a boil; boil for 2 minutes.
  3. Strain mixture into bottles/cans (This will make a little over a pint of sauce)
  4. If you are intending to store long term, process canning jars in a boiling water bath for 12 minutes for 1/2-pints and 15 minutes for pints (as always, please refer to the National Center for Home Food Preservation for detailed instructions and tips for giving everyone dysentery) 
Good times!

Tuesday, October 1, 2013

Tuna Casserole from The Wife

This recipe is a guest post from my lovely wife. It is one of my favorites. I turn things over to her.

     I don’t do much cooking in my house. It’s just easier to let my husband cook and tell him how good it is. However, there are a few dishes he occasionally asks me to make. A few nights ago, he had to stay late at work, so he requested I throw together a tuna casserole for dinner. I guess his incessant cooking has inspired me, because I decided my usual version needed some tweaking. Notes are in blue:

Tuna Casserolevia The Wife
Ingredients
  • 1-16oz. bag of egg noodles (This was my first tweak. I’ve always used macaroni for my tuna casseroles, but there was a bag of egg noodles in the cabinet – and they were calling to me.)
  • 2-5oz. cans of tuna in water (Use more if you like a lot of tuna. This seemed to be the right amount for our tastes.)
  • 1-10.5oz can of cream of mushroom soup (Of course…)
  • 1 cup (4oz) shredded cheddar cheese
  • 2/3 cup of peas (Husband’s request)
  • 1 small red pepper – chopped
  • 1 small yellow pepper – chopped (We had an overabundance of peppers, and not being a big fan of peas, I decided peppers would both add color and lessen the pea flavor.)
  • 1 cup crushed potato chips
  • Lake Shore Drive Seasoning to taste (from The Spice House)

Directions
  1. Preheat oven to 350.
  2. Cook noodles according to package directions.
  3. Drain egg noodles and return to pot. Add tuna, cream of mushroom soup, and cheese, and stir until incorporated. (In my original version, the shredded cheese was sprinkled over the top of the casserole.)
  4. Mix in peas and red and yellow pepper.
  5. Add Lake Shore Drive Seasoning to taste
  6. Pour mixture into greased Pyrex and top with crushed potato chips. (This may surprise some of you, but I had never made a tuna casserole with potato chips before. The inspiration came from a story my mother likes to tell. My grandmother would always make her children their favorite meals on their birthdays. My Uncle Steve’s favorite meal was tuna casserole with crushed potato chips on top. My mother hated it.)
  7. Bake at 350 for 25 minutes or until potato chips start to brown.
Good times!


Saturday, September 14, 2013

Slow-Cooker Korean Barbecue Beef

     If you work in a school, you are regularly assaulted by students shilling overpriced stuff for fundraisers. I have the standing rule of buying one item from any given fundraiser. Just one. First kid who asks gets the sale. It will always be the single cheapest item in the catalog. It is usually one of those tiny, spiral-bound cook books. This particular cook book was the Crock-Pot Potluck For All Occasions cook book.  The recipe I decided to cook from it was Korean Barbecue Beef. I made a big change by using a roast instead of ribs and wound up putting the ingredients in the cooker in the wrong order. Regardless of my ineptitude, the resulting meal was very tasty and versatile. We originally served some up on rice, and have since made burritos and hoagies. As always, any changes or notes are in blue.
Korean Barbecue Beef
via Crock-Pot Potluck For All Occasions
Ingredients

  • 4 to 4-1/2 pounds beef short ribs (we used a 3 pound beef roast)
  • 1/4 cup chopped green onions
  • 1/4 cup tamari or soy sauce (I'll be honest. I have no idea what the hell tamari sauce is without Googling it. I just used soy sauce)
  • 1/4 cup beef broth or water (we went with water)
  • 2 teaspoons minced fresh ginger (no fresh ginger on hand. We used 1 teaspoon ground ginger)
  • 2 teaspoons minced garlic
  • 1 tablespoon packed brown sugar
  • 1/2 teaspoon black pepper
  • 2 teaspoons dark sesame oil
  • 2 teaspoons sesame seeds, toasted (put out sesame seeds to use and then promptly forgot to use them)
Directions
  1. Place meat in slow cooker. Combine green onions, soy, broth, brown sugar, ginger garlic and pepper in medium bowl; pour over ribs (naturally I missed the part about combining in another bowl and just threw everything in on top of the meat. I just wound up stirring it all up in the slow cooker). Cover; cook on LOW for 7-8 hours or until meat is fork tender.
  2. Remove meat from liquid. Cool slightly (that didn't happen). Trim excess fat and discard. Cut meat into bite sized pieces, discarding bones, if any.
  3. Let cooking liquid stand 5 minutes to allow fat to rise. Skim off fat and discard (look, that's not going to happen. I'm eating now. After the leftovers have sat in the fridge overnight I can just pry the layer of fat off the top). Stir sesame oil into cooking liquid (WHOOPS! I put the oil in at the start. No harm, no foul). Sprinkle with sesame seeds (as mentioned, I totally forgot to use the seeds)
Good times!

Sunday, September 1, 2013

Too Damned Easy Cucumber Tomato Salad

     This is the point in the summer where we start trying to use our garden produce in vast quantities. That's where the wife's recipe for cucumber tomato salad comes into play. This recipe couldn't be any more simple. Just about any tomato will work, but we have been using these orange tomatoes since they are super sweet and mild.

Too Damned Easy
Cucumber Tomato Salad
Ingredients
  • 2-3 large cucumbers, sliced
  • 1 large onion, cut into about 1” pieces
  • 3-4 tomatoes of your choosing, sliced
Vinaigrette:
  • 1 cup white vinegar 
  • ¾ cup water 
  • ¾ cup sugar (or six packets of your favorite carcinogenic sweetener)
  • 1 teaspoon salt 
  • 1/8 teaspoon black pepper 
  • dash cayenne pepper 
  • dash parsley 
  • dash basil
Directions
  1. Mix vinaigrette ingredients in large bowl until sugar is dissolved. 
  2. Add vegetables. 
  3. Let marinate in refrigerator 1-2 hours.
Good times!

Thursday, August 22, 2013

Penne with Veggies and Black Beans from the Wonderful Wife

NOTE: This is another guest post from my lovely wife. She's been on a roll using up garden vegetables. This is just a great recipe. I love what she did with it.

     The husband started back to work last week, and I wanted to make a big batch of something he could take to school for lunches. I vaguely remembered making a cold veggie pasta salad last summer that he really liked. I was positive it was in the Everyday Light Meals cookbook, but after going through it page by page, I wasn't able to find it. Huh… So, I went through it again – page by page. And there it was. Why couldn't I find it the first time, you ask? Simple. I made so many alterations to it the first time I made it that I didn't recognize it in the cookbook. I will give you the recipe as it was intended to be made and also my changes. Don’t worry. If it’s delicious my way, it’s probably more delicious when made properly.

Penne with Veggies 'n Black Beans
via Taste of Home Everyday Light Meals
Ingredients
  • 10 ounces uncooked penne pasta (Let the substitutions begin! I make this with elbow macaroni. Maybe we were out of penne when I made it the first time, or maybe I felt a veggie pasta salad could only be made with macaroni. Heck, use bow-ties if you want. It’s pasta. It all tastes the same.)
  • 1 cup sliced zucchini (I did a combo of zucchini and squash.)
  • 1 cup sliced carrots (The first time I made this, I believe I grated the carrots. Worked fine. This time, I didn’t have regular carrots – just baby. So I cut them lengthwise down the middle and then did it again, effectively quartering them.)
  • ½ cup fresh mushrooms (No fresh mushrooms in the house. I just omitted them entirely and made up the difference with other veggies. I’ve also used canned mushrooms, but I didn’t sauté them with the other veggies.)
  • ½ cup julienned green or sweet red pepper (I used green.)
  • 1 garlic clove, minced (I used 1 teaspoon of minced garlic from the jar.)
  • 1 tablespoon each minced fresh basil, oregano, and thyme or 1 teaspoon each dried basil, oregano, and thyme (We don’t grown thyme in the herb garden, but we did have fresh basil and oregano, so I used a tablespoon of each, and a teaspoon of dried thyme.)
  • ½ teaspoon salt
  • ¼ teaspoon pepper
  • 2 tablespoons olive oil, divided
  • 1 can (15 ounces) black beans, rinsed and drained
  • 2/3 cup chopped seeded tomatoes (I prefer to use halved cherry tomatoes.)
  • 1/3 cup shredded Parmesan cheese (I used 4 oz of cubed mozzarella cheese.)
  • 2 tablespoons minced fresh parsley
The aforementioned ingredients in no particular order.

Directions
  1. Cook pasta according to package directions.
  2. Meanwhile, in a large nonstick skillet, sauté the zucchini, carrots, mushrooms (omitted), green pepper, onion, garlic, and seasonings in 1 tablespoon of olive oil until crisp-tender. Stir in the beans.
  3. Add drained pasta to vegetable mixture. Add tomatoes and remaining olive oil; toss gently. Sprinkle with Parmesan cheese and parsley. (Here’s where I really deviate from the recipe. This dish is supposed to be served hot, but my husband said it was even better cold. So, after tossing the tomatoes and olive oil into the pasta mixture, I put the whole thing in the refrigerator for a few hours. In the meantime, I cube up the mozzarella cheese. After the pasta has had time to cool, I take it out and toss in the mozzarella and parsley.)

One serving (1 1/3 cup) equals 315 calories.
Good times!

Sunday, August 18, 2013

She Simmers Caribbean-Style Sauce via Hot Sauce!

     Apparently I need to visit the Caribbean at some point. So many wonderful sauces come out of that area! This particular riff on the style is out of the Hot Sauce! cookbook. I love this sauce so much. There is so much going on here, flavor-wise. It is reminiscent of a jerk sauce, but to me has a fun mix of flavors. The best way I can explain it is everything in here is fighting to get noticed. Imagine a bar-room brawl and all the spices are slapping each other around. Then the habanero busts in the front door and starts breaking chairs over everyone and throwing them out windows. It's just like that, but in your mouth. As always, notes and changes are in blue.


She Simmers
via Hot Sauce!
Ingredients

  • 6 fresh red, yellow, or orange habanero chiles (I used mostly red and one orange. They were also frozen from last season. As long as they were fresh at one time you should be fine)
  • 1/2 cup freshly squeezed orange juice (for all of the freshly squeezed juices, you can more than likely get away with bottled, but the flavor will not be quite the same. The main reason I did the freshly squeezed was because my aunt Ruthie bought us an electric reamer for our wedding. As much as that sounds like a marital aid, it's not. Just Google "orange reamer" and settle down, you pervert)
  • 1/2 cup distilled white vinegar
  • 2 tablespoons freshly squeezed lemon juice
  • 2 tablespoons freshly squeezed lime juice
  • 1 teaspoon salt
  • 2 teaspoons freshly ground black pepper (I will tell you right now, grinding them by hand is a Colossal Pain In The Ass. Next time I'll just use the coffee bean grinder. I just have to remember to clean it out or the wife will be Righteously Pissed when she goes to make coffee)
  • 4 garlic cloves, minced
  • 2 tablespoons minced fresh ginger
  • 1 tablespoon curry powder
  • 1 teaspoon ground allspice
  • 1/2 teaspoon ground or freshly grated nutmeg (I went with the ground)
  • 1/2 teaspoon ground cinnamon
Directions
  1. Stem and seed the habaneros, reserving the seeds. Combine the chiles and all of the remaining ingredients in a blender and puree until silky. Taste and add a sprinkling of the seeds if you want to ratchet up the heat (be careful when you're doing this. It doesn't take too many seeds to change the heat level from "pleasant burn" to "OH MY GOD, THIS WILL EVENTUALLY REACH MY SPHINCTER.")
  2. Pour into bottles. (I processed mine in a half pint jar for 15 minutes in a boiling water bath for long term storage. As always, please read up on canning at the National Center for Home Food Preservation before attempting canning. This sauce can tear up your insides just fine without the help of harmful bacteria.)
Good times!

Wednesday, August 14, 2013

Summer Garden Chicken Stir Fry guest post from my Wonderful Wife

NOTE: As I am in the classroom for a new school year, my loving wife has picked up a bit of the slack on the Facebook page and the blog. At least until her school year starts. She wrote this post and did all the work on making this meal. She did a fantastic job, and I'm not just saying that so I can continue to sleep inside the house.
   
     As the title of this recipe suggests, this will use up some of your garden’s produce…provided the produce in the recipe is what you grow in your garden. It is also a fairly simple recipe, and that was what I was looking for this past Monday. My husband was working late, and I needed something easy.
Theoretically, this should be easy.
     Unlike my husband, I am not at my best in the kitchen. Want me to teach your child English? Recommend a good book? I can do that, but I’d rather not be evaluated on my culinary skills. So, here is the recipe, and as my husband always does, notes and changes are in blue.

Summer Garden Chicken Stir-fry
Ingredients

  • 1 lb. boneless skinless chicken breast, cut into 1-inch pieces
  • 2 cloves garlic, finely chopped (Not going to happen when I am cooking alone. I used 2 teaspoons of minced garlic instead.)
  • 2 teaspoons finely chopped gingerroot
  • 1 medium onion, cut into thin wedges (I used a red onion. It was all we had and it made for a nice color combo with the other veggies.)
  • 1 cup ready-to-eat baby-cut carrots, cut lengthwise in half (I thought they looked too big, so I cut them lengthwise in half a second time…I believe math teachers would refer to this as quartering. I am not a math teacher.)
  • 1 cup fat-free chicken broth (I used a cup of home-made chicken broth.)
  • 3 tablespoons reduced-sodium soy sauce
  • 2 to 3 teaspoons of sugar (I used two.)
  • 2 cups fresh broccoli florets
  • 1 cup (3 oz) sliced fresh mushrooms (I didn’t have any fresh mushrooms. Also, I had half a dozen yellow squash in the refrigerator and more threatening in the garden. So, I made an executive decision and substituted yellow squash for the mushrooms – daring, I know. Like the red onion, I thought the color of the squash added something to the dish, and while I’m never sure my food will taste good, I want it to at least look nice.)
  • ½ cup chopped bell pepper, any color (I used green as our peppers haven’t ripened to red yet.)
  • 2 teaspoons corn starch (I ended up needing four. See directions for details.)
  • Hot cooked brown rice, if desired (White rice worked just as well. It’s important to note that the “if desired” portion of the recipe is not included in the calorie calculations. Without the rice, one serving of this dish is 200 calories.)
Directions

  1. Heat 12-inch nonstick skillet over medium-high heat. Add chicken, garlic, and ginger root; cook and stir 2 to 3 minutes or until chicken is brown.
  2. Stir in onion, carrots, ¾ cup of broth, the soy sauce, and sugar. Cover and cook over medium heat 5 minutes, stirring occasionally.
  3. Stir in broccoli, mushrooms (yellow squash), and bell pepper. Cover and cook about 5 minutes, stirring occasionally, until chicken is no longer pink in center and vegetables are crisp-tender (I think 5 minutes might have been overkill here. The veggies didn't come out as crisp as I would have liked. My chicken pieces were pretty well-cooked by the time I got to this step, so no worries there.)
  4. In small bowl, mix cornstarch and remaining ¼ cup of broth; stir into chicken mixture. Cook, stirring frequently, until sauce is thickened. Serve over rice. (Everything had been going exactly as described until I added the cornstarch. And then…nothing happened. No thickening. In hindsight, this might have been due to the added moisture from the yellow squash. In any case, I simply mixed two more teaspoons of cornstarch with a tablespoon of water and added it to the pan. Thickening occurred – crisis averted.)
Good times!


Monday, August 12, 2013

Pork and Chinese Cabbage Soup

     I really enjoy Chinese food and have been making it a point to try cooking more of it. I'm also trying to try stuff that isn't just stir-fry. Since the wife enjoys soup, I decided to try out a very simple Chinese recipe for pork and cabbage soup. I got the recipe from my copy of The Thousand Recipe Chinese Cookbook by Gloria Bley Miller. I messed around with the quantities in this recipe, mostly because I wanted to make sure I used up all the ingredients. The result was wonderful. The soup was mild and flavorful. It paired very well with the steamed pork buns I made that day. As always, any notes or changes are in blue.

Pork and Chinese Cabbage Soup
via The Thousand Recipe Chinese Cookbook
Ingredients

  • 1/4 pound lean pork (we used 1/2 pound)
  • 2 slices fresh ginger root (we used 4 slices)
  • 1/2 pound Chinese (Napa) cabbage (we used a full pound)
  • 6 cups stock or water (we used about 9 cups shrimp stock)
  • 1 tablespoon peanut oil (didn't have it, we used sesame oil)
  • 3/4 to 1 teaspoon salt (only used 1/2 teaspoon since there would be plenty of salt from the soy sauce)
  • 1/2 teaspoon sugar (we used a little more than 1/2 teaspoon)
  • 2 teaspoons soy sauce (used 3 teaspoons)
  • Dash of pepper
Directions
  1. Mince or shred pork (we used ground pork so did not need to do this step), mince ginger root (don't forget to peel it), slice cabbage thin or shred. Bring stock to a boil.
  2. In a deep pan, heat oil. Add ginger and brown lightly. Add heated stock, then salt and cabbage (I just used one pot for the whole process. First I did the ginger and oil, then added the stock and brought it to the boil), reduce heat to a simmer. Cover and simmer for 10 minutes.
  3. Add pork, sugar, soy sauce and pepper. Simmer, covered 15 minutes more (I let it go an extra five minutes to make entirely sure the pork was done and I wouldn't poison anyone to death).
Good times!

Wednesday, August 7, 2013

Tomato and Hot Pepper Jam

     We are currently experiencing a glut of tomatoes. That's fine, because it's one of our favorite things to can. In the past we've canned sauce, chili tomatoes, chutney and preserves from tomatoes. This time we decided to try our hand at jam! We pulled this recipe from Preserve It! The jam came out a touch savory; the heat from the cayenne and the Italian herbs gave it a nice flavor. You could certainly omit the peppers (if you're ok with being lame) and mess around with the herb choice and come up with a flavor that suits you. As always, notes and changes are in blue.
Tomato and Hot Pepper Jam
via Preserve It!
Ingredients

  • 1-1/8 lb tomatoes, plunged into boiling water for 1 minute and then peeled and coarsely chopped
  • 1 teaspoon crushed red chile pepper (we took 4 fresh cayenne peppers and pasted them in the food processor)
  • 1 teaspoon dried mixed herbs (we went with an Italian seasoning blend)
  • Juice of 1 lemon
  • Pinch of salt
  • 1-1/4 cup granulated sugar
Directions
  1. Add all the ingredients except the sugar to a preserving pan or a large heavy bottomed sauce pan (I just used a stainless steel pot). Bring to a boil and simmer gently for about 8 minutes or until the tomatoes break down and soften (it almost sounds like an interrogation)
  2. Add all the sugar and heat gently, stirring until the sugar has dissolved. Turn up the heat and bring to a boil. When jam reaches a rolling boil, cook for 10-15 minutes or until it starts to thicken and become glossy and reaches the setting point. Stir occasionally to keep the jam from sticking or burning (if you haven't done this before, leaving this on the boil for this long will give you an anxiety attack. Just stir it regularly, it won't boil over). Remove the pan from the heat while you test for a set
  3. Ladle the jam into warm sterilized mason jars, leaving 1/4" headspace (this recipe yielded a bit over a half pint. Too much for a half pint jar, not enough for a full pint. We canned a half pint and put the rest in a container in the fridge for immediate use). If you are canning for long term storage, seal the canning jar and process in a boiling water bath for 5 minutes (again, if you're unfamiliar with this process, check with the National Center for Home Food Preservation for more information)
Good times!


Wednesday, June 26, 2013

Couscous and Vegetable Salad via 400 Calorie Fix

     If this week's weather is any indication, the summer is going to be horrifyingly hot and humid. If you're like me, on days like this you want to run the stove as little as possible. When the weather gets like this I also don't want super heavy meals. Like I said last week, salads are a great alternative. This week's recipe comes from the book 400 Calorie Fix. This particular recipe is about as healthy as you can hope for. A 1-1/2 cup serving is only 260 calories. If you wanted to bulk it up, you could add some tuna or chicken.

Couscous and Vegetable Salad
via 400 Calorie Fix

Ingredients

  • 1-1/2 cups water
  • 1/4 teaspoon salt
  • 1 teaspoon + 1 tablespoon olive oil
  • 1 cup whole wheat couscous
  • 1 can (15 ounces) chickpeas, rinsed and drained, 3 tablespoons of liquid reserved
  • 1/2 cup frozen peas, thawed
  • 1 medium carrot, coarsely shredded
  • 1 small tomato, chopped
  • 1 small red or yellow pepper, chopped (we went with red. The wife's not a huge fan of green peppers)
  • 2-1/2 tablespoons currants (we didn't have any. We also weren't sold on currants being a good idea in here)
  • 2-1/2 tablespoons finely chopped fresh chives
  • 1-1/2 tablespoons pistachios or pine nuts (we used pistachios. Any time we have a choice between pistachios and pine nuts, I'm using pistachios)
  • 1-1/2 tablespoons lemon juice (spring for a fresh lemon here. The bottled stuff doesn't have the fresh taste you want in this dish)
  • 1/4 teaspoon dried thyme
  • 1/4 teaspoon dried oregano
  • Angostura Bitters (optional)
Directions
  1. Bring water, salt and 1 teaspoon of the oil to a boil in a medium saucepan over high heat. Stir in the couscous. Remove from heat and cover. Let stand for 5 minutes or until liquid is absorbed. Fluff with fork.
  2. Transfer the couscous to a large bowl. Add the chickpeas (setting aside the liquid), peas, carrot, tomato, pepper, currants (not for me), chives and nuts. Toss gently until mixed.
  3. Whisk together lemon juice, thyme oregano, bitters, reserved chickpea liquid and remaining tablespoon of oil in a small bowl (why do recipes always make restrictions on bowl size? What if I wanted to use a big bowl for this? Who's going to stop me. I'll tell you straight up, I used a medium sized bowl. I have no regrets). Mix and pour over the salad. Toss to mix well. 
  4. Cover and refrigerate for 30 minutes to blend the flavors.
Good times!