Showing posts with label National Center for Home Food Preservation. Show all posts

Sunday, September 12, 2021

'Nero Fiddles Hot Sauce

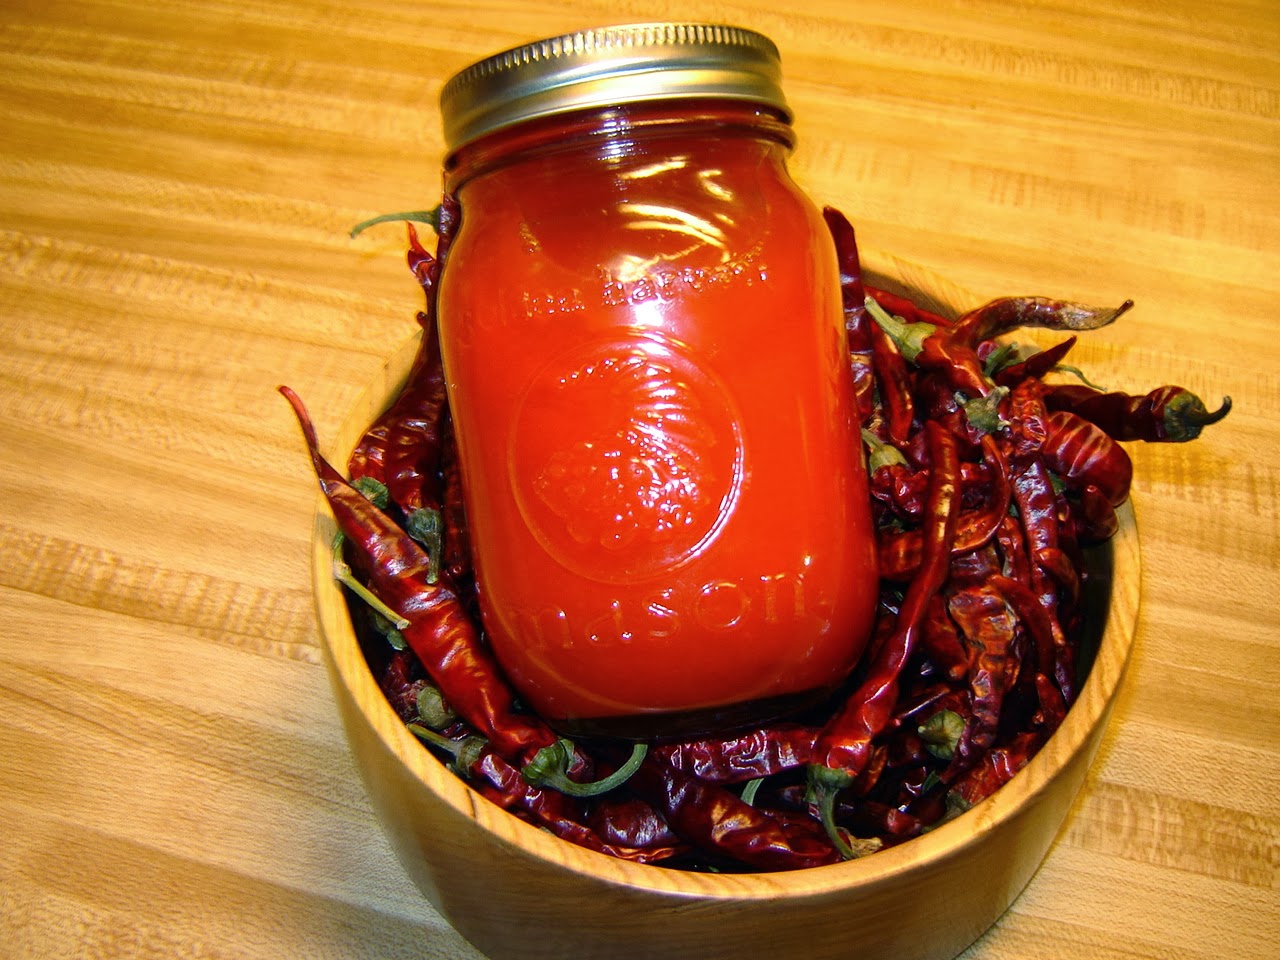
 We are about halfway through September and the garden is still throwing habanero peppers like it's mad at us. The Wife is making noises about giving some of them away, and that just won't do. So I decided to make a hot sauce recipe that uses two dozen peppers a batch. I did. This one is a real roller coaster ride. It's like a Saturday morning with a six-year old in the house. It starts off nice and pleasant and then all of a sudden all hell breaks loose. That's the best way I can describe it. More specifically, it's got a bright, slightly fruity taste. I have no idea what I'm going to do with it. I could probably make some absolutely deadly hot-wings. Possibly add a few drops to a Bloody Mary. Maybe just drink it straight if I wanted to scream for a while. Basically a lovely flavor plays around in your mouth as you burn.

This recipe will yield 1-1/2 pints of sauce. If you own a Insta-Pot Ace blender, you can actually do everything but the canning step in the blender by running the puree program. 

Give it a spin and tell me what you think, as long as it's positive. As always, notes are in blue.

'Nero Fiddles Hot Sauce

Ingredients

  • 2 dozen habanero peppers, stems removed (don't you even think about removing the seeds, you big baby)
  • 2 red bell peppers, chopped
  • 1 white onion, chopped
  • 2 teaspoons chopped fresh sage
  • 1/2 teaspoon salt
  • 1 cup white vinegar
  • 1/4 cup lime juice
  • 1/4 cup white tequila (if you don't do alcohol, just omit and split the difference between more vinegar and lime juice)
Directions
  1. Put all the ingredients in a blender. Blend until smooth.
  2. Pour contents of blender into a non-reactive pot. Heat to a simmer for about 10 minutes. 
  3. Return to the blender (or use an immersion blender) to ensure everything is totally liquefied. 
  4. If you're not going to can this sauce, you're done. 
    Fire in the hole!
  5. If you are canning, fill three half pint jars to 1/4 inch headspace and secure lid and ring. Process in a boiling water bath for about 12-15 minutes. As always, review canning procedures at The National Center for Home Food Preservation to make sure you don't accidentally poison anyone. 
Good times!


Monday, August 30, 2021

Cucumber-Jalapeno Hot Sauce

 Holy shit did the garden throw a lot of cucumbers at us. There's only so many cucumber sandwiches, or tomato/cucumber/onion salad you can eat. I decided to use the vast surplus along with the bumper crop of jalapenos were also blessed with. The end result was a rock-solid hot sauce. It starts with an unmistakable cucumber flavor. Then the heat builds quickly but then levels off with a nice sweet finish. This would be great with fish or chicken. Or, as The Wife prefers, unceremoniously shoveled into her gob with Aldi Lime Nacho Chips. To each their own. This recipe will yield about 2-1/2 pints of sauce. 

Cucumber-Jalapeno Hot Sauce
aka Green Meanie

Ingredients

  • 2 decent sized cucumbers, peeled, seeded, and chopped
  • 12 jalapenos, chopped (I suppose if you're a HUGE BABY you could seed them to cut down on the heat, but then why are you even looking at a hot sauce recipe?)
  • 1 medium onion, chopped
  • 1/4 cup lime juice
  • 3/4 cup water
  • 2 cups white wine vinegar
  • 1 tablespoon dry cilantro
  • 1 teaspoon salt
  • 1 tablespoon garlic powder
  • 1 teaspoon amchoor (dried mango) powder
Directions
  1. In a medium pot, combine all ingredients. Bring to a boil. Reduce to a simmer for about 10 minutes.
  2. Pour mixture into a blender or use an immersion blender to blend until as smooth as possible.
  3. Feel free to strain the sauce if you want something closer to a liquid-only hot sauce, or leave it as-is for something closer to a thin salsa.
  4. If you plan on canning this sauce, we went with 5 half pint jars, 1/4" headspace, and 12 minutes in the boiling water bath. As always please go to the National Center for Home Food Preservation and brush up on canning so you don't accidentally kill anyone.
Good times!


Tuesday, September 13, 2016

T-Bird Hot Sauce

     Every year I plant way too many hot peppers and every year I find myself desperate to find ways to use them up. I have bags and bags of peppers that I've dried, but those really start to take up space. I am always looking for new and exciting ways to use up lots of peppers in one go. This particular sauce certainly fits the bill, using five dozen peppers. It also uses up some tamarind concentrate that I mistakenly bought when I was shopping for tahini. For whatever reason, I'm always mixing tahini and tamarind up, which generally doesn't end well in a recipe. Though very spicy, this sauce has a wonderful deep and mellow flavor underneath from the tamarind and guajilo. This is a go-to sauce for chicken or pork dishes. It's thick enough to hold up on the barbecue or hot wings. As for the name? I used Thai peppers in the recipe. I know "bird" specifically refers to the dried pepper, but the name was too good to pass up. "T" for Thai or Tamarind and "Bird" for the alternate pepper name. I am so damned clever it hurts. As always, notes are in blue.


Ingredients
  • 1 tablespoon tomato paste
  • 2 tablespoons red wine vinegar
  • 1 Tablespoon tamarind concentrate
  • 1 cup cider vinegar
  • 1/3 cup water
  • 60 Thai bird chili peppers, stemmed (cayenne or serrano can be substituted, but you may need to use less, as those peppers are generally larger)
  • 1 dried Ancho chili
  • 2 dried Guajillo chilis
  • 4 tomatoes, chopped
  • 1 onion, chopped
  • 1 carrot, chopped
  • 1 rib celery, chopped
Directions
  1. Add all ingredients to a food processor (make sure it is a large capacity processor, at least 7 cups. 10 would be better, unless you're a fan of leaking and caustic messes. Caustic Mess would be an outstanding punk band name). Process until smooth.
  2. Transfer mixture to a nonreactive pot and bring to a boil. Reduce to a simmer and let simmer for about 10 minutes. (If you're not planning on canning this sauce for storage, you're done. If you want to store this sauce long term, go on to the next steps)
  3. Prepare a boiling water canner and submerge 4 half pint jars (or two full pint jars) to sterilize in the boiling water. (You can be doing this while the sauce is simmering)
  4. Remove the jars and fill with the warm sauce. Leave 1/4" headspace in each jar.
  5. Seal the jars with a 2 piece lid and process in the boiling water bath for 12 minutes (If you're doing full pints, go for about 16 minutes).
  6. After 12 minutes, remove from the bath and set on a wire rack to cool. Eventually, you'll hear the satisfying "pop" that tells you the jar has sealed. If after a few hours, a jar hasn't sealed, put on a new lid and try reboiling for another 12 minutes. If it doesn't seal after that, just give up and use the sauce. It will hold for a long time in the fridge. Properly processed and sealed, the sauce is good for at least a year. As always, double check everything with the National Center for Home Food Preservation to ensure you don't poison anybody.

Good Times!


Friday, August 5, 2016

Mulberry Jam

     There is great debate around here as to the standing of the mulberry tree. Many see it as a weed. And you know what?  They're totally right. Left unchecked, you can watch mulberries inexorably take over your yard. We have the damned things poking out from about every bush in our yard. They even grow out of rocks. Not even joking. They're next to impossible to kill once they get established. Then, there's the fruiting mulberries. These aren't so bad. I mean, ok, they're bad. They're just as invasive and if the birds get to the berries before you do, everything in the area is covered in purple shit. So I think what we can take away from this discussion is that mulberries are the worst thing ever. That's why I collect like ten pounds of berries each season. As awful as the trees may be, the berries are actually pretty good. They have a nice color and a mild sweetness. I decided to make them into jam this year. I'm going to come out and admit I think I did something wrong. I'm thinking I used either too much sugar, too much pectin, or possibly both. This stuff is thick.
Also useful for caulking doors and windows,
if you don't mind the ants.

As far as jam (jelly? conserve? I can't tell that shit apart) goes, it's quite tasty, but a little tough to work with. It helps to warm it up a bit before you use it. It's great on a bagel with a schmear of cream cheese, or even over some vanilla ice cream. Give it a try and mess around with the pectin and sugar and let me know what you come up with. As always, notes are in blue.

Mulberry Jam
(yields: 7 half pint jars)
Ingredients

  • 4 cups mulberries
  • 7 cups sugar
  • 1 box (1.75 ounce) powdered pectin

Directions
  1. Run fruit through a food mill. 
  2. Take the milled fruit and resulting juice into a stainless steel pot
  3. Add pectin, stir and bring to a rolling boil on high heat
  4. Add the sugar. Bring back to a rolling boil and boil EXACTLY one minute (this is straight off the Sure-Jel instructions and they are not kidding. I've screwed this up and ended with quarts of cinnamon-apple syrup. Not with this recipe, mind you. We're using mulberries here. If we started with mulberries and ended with cinnamon-apple, we'd be dealing with some sort of alchemy.) 
    Wrong alchemy
  5. Watch in horror as the entire mixture foams up over the top of the pot and makes a huge fucking mess of the stove top (alternatively, stir constantly and be ready to adjust the heat to prevent foaming)
  6. Get the pot off the heat and start getting it into half pint jars. This stuff will start setting fairly quick. 
  7. Seal the lids and process in a boiling water bath for five minutes (as always, check with the National Center for Home Food Preparation to ensure you're not accidentally poisoning anyone)
  8. After five minutes, remove jars to a wire rack and wait for the satisfying "thunk" that means they're sealed. Store in a cool dark place for up to a year or until you're too afraid to open it.
  9. Reflect on how "Mulberry Jam" would be an awesome name for a funk band.
Good Times


Sunday, November 22, 2015

Pepper Jelly

At the end of any growing season, we usually end up with tons of produce we are desperate to find a use for. That's when it's time to have fun. A few years ago we found this recipe online for pepper jelly and it has become a staple in our pantry. Sadly, it's been so long that I have no idea where I found this. If anybody can tell me, I'll gladly give credit where credit is due. This is a great recipe. Even with hot peppers it is still nice and sweet. We've used it on every thing from toast to pork roast. It makes a great glaze. It's a bit labor intensive, but totally worth the effort. Give it a try. As always, notes are in blue.

Pepper Jelly
Ingredients

  • 2-1/2 cups finely chopped red bell peppers
  • 1-1/4 cups finely chopped green bell peppers
  • 1/4 cups finely chopped jalapeno peppers (other peppers can be substituted depending on whether or not you want to bring the heat. Go banana pepper to keep it sweet, swap in a ghost pepper to really tear shit up)
  • 1 cup apple cider vinegar
  • 1 (1.75 ounce) package powdered pectin
  • 5 cups white sugar
Directions
  1. Get yourself 6 sterilized half pint jars. Just chuck them in the boiling water canner while you're working and all will be good.
  2. Place  peppers in a large, nonreactive saucepan over high heat. Mix in vinegar and fruit pectin. Stirring constantly, bring mixture to a full rolling boil. Quickly stir in sugar. Return to full rolling boil, and boil exactly 2 minutes, stirring constantly. Remove from heat, and skim off any foam (when it says 2 minutes it MEANS 2 minutes. I've ended up totally ruining jellies by screwing up the timing. Also, don't blow off the part where you skim the foam. This shit's an exact science, and you'll likely end up with syrup instead of jelly if it goes wrong)
  3. Quickly ladle jelly into sterile jars, filling to within 1/4 inch of the tops. Cover with flat lids, and screw on bands tightly.   
  4. Process in a boiling water canner for 5 minutes. Set on a rack to cool and await the satisfying clunk noise when the can seals. As always, check with the National Center For Home Food Preservation to make sure you don't accidentally kill anyone.
Good Times!

Monday, November 16, 2015

Potentially Irresponsible Hot Pickled Green Tomatoes

     It's the end of the season. That means I've got an assload of green tomatoes and I need to find ways to use them. Last year I made some chow-chow which I thought was absolutely nasty. Fortunately, a co-worker loved it so it all found a home. We really enjoyed the hot pickles we've made in the past, so we decided on hot pickled tomatoes. The irresponsible part came about when I decided I'd just chuck the bulk of my surplus peppers in with the tomatoes. I'm going to tell you right now, I haven't tasted these. They're canned and marinating for now. If I eat them, I'll update you. Just know that if you make these and they suck or make your asshole fall out, don't come crying to me. This recipe will yield a bit over six QUARTS of pickled excitement.

Potentially Irresponsible
Hot Pickled Green Tomatoes
based on a recipe from Southern Living Little Jars, Big Flavors
Ingredients

  • 5 pounds green tomatoes (cut medium ones into quarters, large into eights)
  • 2 red onions, halved and sliced
  • 2 pounds assorted banana peppers (sweet or hot, your choice) stemmed and sliced into 1/2" in rounds
  • 2 pounds assorted hot peppers (I went batshit crazy and did a mix of cayenne, jalapeno and Thai bird), stemmed and sliced into 1/2" rounds
  • 8 tsp canning and pickling salt, divided 
  • 8 cups white vinegar (5% acidity)
  • 4 cups water
  • 1 cup sugar
  • 2 tablespoons pickling spice
  • 2 tablespoons mustard seeds
  • garlic cloves
  • bay leaves
Directions
  1. Sterilize a half dozen quart jars. 
  2. Get a huge bowl, (I'm not kidding. The biggest you can find).
    That's right. We used a punch bowl. 
    Throw all the veggies in there with 2 tablespoons (6 teaspoons of the salt). Toss all that to get the salt incorporated. Wait about half an hour then drain off all the water that built up in the bottom of the bowl. Toss the veggies again to make sure everything is evenly distributed. You don't want a jar of one tomato and the rest hot peppers (maybe you do. HILARIOUS!) Spill some. Make a mess. Swear a bunch and curse ever following my blog.
  3. In a nonreactive pan, add vinegar, water, sugar and remaining salt. Bring to a boil until sugar and salt have dissolved. Lower the heat to low. Just keep the liquid hot.
  4. In each quart jar add a bay leaf, a couple garlic cloves, a teaspoon of mustard seed and a teaspoon of pickling spice. Cram as much of the veggie mix into the jar as you can, keeping 1/2" headspace. Add hot liquid to jars until veggies are covered. Make sure to keep that 1/2" headspace.
  5. Seal jars and process in a boiling water canner for 20 minutes (as always, double check with the National Center for Home Food Preservation to ensure you're not going to end up on the wrong side of a lawsuit)
  6. Set jars on a cooling rack and hope you hear the thunking noise that lets you know the jars sealed. If they didn't you can either try reboiling them or put all the jars in the fridge for later use (don't be a dummy and put super hot jars into the fridge unless you're a big fan of replacing your shelves).
Good times!

Tuesday, September 29, 2015

Spud's Choice Hot Noggin Sauce

     First, a couple clarifications. We did NOT give any hot sauce to our The Spud. Also, for those who like to needlessly panic, that's a sweet red banana pepper on her noggin'. We know better than to handle our little tater with hot peppery hands. To review: No Spuds were harmed in the making of this sauce. This particular sauce came about as an attempt to use up surplus peppers. I chose only red colored peppers since that was what I had the most of. I ended up with what can best be described as a sriracha variant. The sauce starts sweet and a bit garlicky, then you get a serious punch of heat that quickly levels off before slowly fading. Much like sriracha, I see this being a multipurpose sauce, topping everything from eggs to meats. As always, notes and changes are in blue.

Spud's Choice
Hot Noggin Sauce
Ingredients
(yields just shy of 3 half pint jars)
  • 1 cup cayenne peppers, stemmed and roughly chopped
  • 1 cup red jalapeno or Serrano peppers, stemmed and roughly chopped
  • 1 cup bird or Thai peppers, stemmed and roughly chopped
  • 1 cup red banana peppers, stemmed and roughly chopped
  • 12 cloves garlic
  • 1/2 cup white vinegar
  • 3 tablespoons sugar
  • 3 teaspoons seasoning salt
Directions
  1. Load peppers and garlic into a food processor. Blend until a thick paste (the peppers, not you)
  2. Dump the peppers into a nonreactive pot. Add the remaining ingredients and stir to incorporate.
  3. Place on medium-high heat and bring to a boil, reduce to simmer and simmer for 5 minutes, stirring regularly.
  4. If you plan to use the sauce right away, you're done. It will keep in the fridge for a couple weeks. If you plan to can the sauce, proceed to the next step.
  5. Load sauce into 1/2 pint jars, leaving about 1/4" headspace. Seal with a 2 piece lid. Place in boiling water bath for 12 minutes. Remove to wire rack to cool. As always, make sure to refer to the National Center for Home Food Preservation for useful tips on how not to accidentally poison your friends and family.
Good times!

Wednesday, August 5, 2015

Three Mustard Pepper Relish

     The weather this summer has absolutely sucked. It started off cold and raining for weeks. Then it was hot and raining. Then it was hot and humid. Weeds are rampant, Bugs are rampant. All our cucumbers died. The tomatoes are running late. Our peppers, however, are growing out of control. Once again I am inundated with banana peppers. I could always do my Sriracha Stuffed Banana Peppers but I'm pretty sure I still haven't eaten the ones I froze last season. I perused the interwebz and found a likely recipe at BetterRecipes. I liked the idea, but it used only yellow mustard. That's a pretty commanding flavor profile here. I like yellow mustard, but not enough to risk that much. I decided on a mix of three different types instead. The result was absolute dynamite. This would be great on a brat, Polish sausage, pork, chicken, just about anything. The Wife even put it on her eggs. My only complaint is it probably could use more peppers. You could probably add another half dozen peppers easy. If you like mustard, give it a try and see what you think. As always, notes and changes are in blue.

Three Mustard Pepper Relish
Ingredients

  • 3 dozen banana peppers
  • 3 cups white vinegar
  • 1/2 cup yellow mustard 
  • 1/2 cup spicy brown mustard
  • 1/2 cup Kentucky's Smokin' Grill Grand Spiced Honey Mustard (this really brings this recipe together. You could probably find another spicy honey mustard, but it's not going to be the same. This stuff is the bomb-diggety)
  • 3 cups white sugar
  • 3/4 cups water
  • 3/4 cups flour
  • 1 tablespoon dried minced onion
  • 1 heaping teaspoon garlic powder
  • 1 heaping teaspoon onion powder
Directions
  1. Cut the stems off the peppers and discard (the stems, not the peppers) Finely chop the peppers into tiny little pieces. If you have a food processor, pulse the peppers in small batches. You're looking for pieces less than 1/8". 
  2. Put the peppers, water and vinegar in a nonreactive pot. Bring to a boil. Reduce to simmer and let simmer for about 10 minutes.
  3. Add sugar and stir until sugar is completely dissolved. 
  4. Add remaining ingredients and turn the heat down a bit. You don't want the flour to overthicken (is that even a word? It is now. SCREW YOU, SPELLCHECK). Stir everything for a few minutes to make sure the flour is incorporated. If you have a whisk, use it.
  5. If you are terrified of canning, stop here. You now have a quart  of relish that's only going to last about a month in the fridge. 
  6. If you like canning, this will yield about 8 half pint jars. Seal them with a two-part lid. Process them in a boiling water canner for 12 minutes. If you decide on pint jars, process for 15 minutes. As always, double check with the National Center for Home Food Preservation for tips on how to not accidentally poison your loved ones.
Good times!

Tuesday, January 20, 2015

Ham and Pea Soup

     Peas are a bit of an oddity with The Wife. Normally, she'll pick the peas out of most anything she's eating and wouldn't eat them as a side dish. However, if I make ham and pea soup, she goes batshit crazy over it and will eat it with gusto. This particular recipe is super simple and can be pressure canned for later use. Just remember to consult The National Center for Home Food Preservation to make sure you don't accidentally poison anyone. As always, notes are in blue.

Ham and Pea Soup
adapted from Better Homes and Gardens Home Canning Cookbook
Ingredients (Yields 4 pints)

  • 5 cups frozen green peas (you can use fresh if you'd like)
  • 2 cups finely chopped ham 
  • 3/4 cup celery
  • 1 teaspoon salt (Use the full teaspoon if your ham isn't salty. We dropped it to 1/4 teaspoon since our ham was super salty)
  • 1/2 teaspoon black pepper
  • 1/2 teaspoon dried marjoram
Directions
  1. Add 3-1/2 cups water, peas, ham, onion, celery and seasonings in a 4-6 quart pot. Bring to boil and reduce to simmer. Simmer, covered for about 20-30 minutes.
  2. Blend until smooth (If you've got steady hands, you can do it in batches in a blender. We used our immersion blender since I'm likely to spill everywhere trying to transfer scalding hot soup)
  3. If you plan on eating this right away, stop here. If you plan on canning this for later use, carry on:
    Heat soup back to the boil Ladle hod soup into hot jars, leaving 1/2 inch headspace. Secure lids and process in a pressure canner at 10 pounds pressure. 60 minutes for pints and 75 minutes for quarts. 
  4. Before serving and pressure canned food, make sure to boil it at least 10 minutes before you try to eat it.
    Optional: If you're not a fan of thick soups, thin this out with 1/2 cup of milk per pint when you go to serve. 
Good times!

Saturday, January 10, 2015

Ham & Bean Soup

     I think I may no longer be completely terrified of pressure canning. I've done it a half-dozen or so times and haven't caused any notable damage. I haven't poisoned anybody yet, which is a real surprise. It's a good thing I'm comfortable with it, because it was a great way to use up some of the HUGE surplus of ham from the holidays. For not having many ingredients, this soup was surprisingly tasty. I have no regrets canning a gallon of it. You can serve this up right after it's done, or pressure can it for long term storage. Just be careful if you do. As always, notes and changes are in blue.

Ham and Bean Soup
via Better Homes and Gardens Home Canning Cook Book
Ingredients
  • 2 pounds dry navy beans (about 4 cups)
  • 1 meaty ham bone
  • 1 cup chopped ham
  • 1 cup chopped onion
  • 12 whole black peppercorns
  • 2 bay leaves
Directions
  1. Rinse beans. Add to 4 quarts water. Bring to a boil; reduce heat to simmer. Simmer for 2 minutes. Remove from heat and cover for one hour. 
  2. Add ham bone, ham, onion and one teaspoon salt (we omitted the salt because the ham we used was plenty salty on its own). Tie peppercorns and bay leaf in cheesecloth and add to mixture (or do like we did and load it into a tea ball and hang it in off the edge of the pot)
    Sometimes I'm so clever it hurts.
  3. Simmer, covered for 1 hour.
  4. After 1 hour, remove spice bag/ball and ham bone. Cut off meat and dice. Use about 1-1/2 cups meat. (Use more if you want. We didn't because the ham was so salty and it would have thrown off the flavor of the soup).
  5. If you plan on serving the soup, you're done. If you want the soup a bit thinner, cut it with about 1 cup of water per quart of soup. From here on out these steps are for pressure canning the soup. 
  6. Keep soup hot. Pack hot soup into hot jars, leaving 1 inch of headspace. Adjust lids. Process in a pressure canner at 10 pounds pressure. Process pints for 75 minutes, quarts for 90 minutes. This recipe will yield 4 quarts, but is easily halved. 
  7. Before serving from a processed can: add 1-1/2 cups water to each quart of soup. Boil, uncovered at least 10 minutes before tasting or serving. As always, it's a good idea to consult the fine folks at the National Center for Home Food Preservation for detailed information on pressure canning. Check the site especially if you've never pressure canned before. Not only can you accidentally poison everyone if you screw up, you can also burn the shit out of yourself or explode your kitchen. Remember, we're trained professionals working in a controlled environment. 

Thursday, September 11, 2014

Kosher Dill Pickles

     First off, let me make it clear that these pickles are not truly Kosher. Our house would never pass a Kosher certification. The six pound pork shoulder in the freezer pretty much locks that one up. We don't even grow the veggies right. According to Leviticus 19:19 and Deuteronomy 22:19, we screwed up since we grew our cucumbers in a field with a bunch of other seeds. So, semantics (or Semetics "I'll be here all week! Try the veal and tip your servers! Don't forget the 9:30 show is nothing like the 6:30 show; you can't bring your kids to the 9:30 show!") aside, these are just some tasty pickles to nosh on as you see fit. Eat them from the jar, use them in a potato salad, or slap them on a hot dog (WITHOUT KETCHUP. Please, I'm begging you, don't put ketchup on a hot dog). As always, notes and changes are in blue. 

Kosher Dill Pickles
via Better Homes and Gardens Home Canning Cook Book
Ingredients

  • 2-1/4 pounds 4-inch cucumbers (we just used whatever cucumbers we had on hand. No clue as to type. If they weren't 4 inches, we just cut them down to make sure they'd fit in a pint jar)
  • Fresh dill heads (LOL WUT? No clue as to what they're asking for. I, for one, refuse to decapitate an innocent dill. We used a teaspoon of dill weed in each pint jar)
  • Garlic cloves
  • Hot red peppers (we used whole dehydrated cayenne)
  • Pickling salt
  • 4 cups cider vinegar
Directions
  1. Wash cucumbers. Pack them in hot quart jars, leaving 1/2-inch headspace (we derail almost immediately. One, we used pint jars. Two, we used full sized cucumbers, so we cut ours into spears, then shortened them as needed to get them in pint jars. We did, however, wash them. I think.)
  2. To each quart, add 2 heads fresh dill, 1 clove garlic, 1 hot pepper and 1 tablespoon pickling salt
    (if you're doing it our way, you'll be adding to each pint, 1 teaspoon dill weed, 1 clove garlic, 1 dried cayenne and 1-1/2 teaspoons pickling salt)
  3. In a medium saucepan, combine vinegar and 3 quarts of water. Bring to a boil.
  4. Pour boiling liquid over cucumbers, leaving 1/2 inch headspace. Adjust lids.
  5. Process in boiling water bath (20 minutes for quarts, 15 for pints)
  6. Yields will depend on how committed you are to violently jamming cucumbers into the jars.
  7. As always, if you're not familiar with canning, go to the National Center for Home Food Preservation to avoid poisoning anyone.
Good times!

Sunday, September 7, 2014

Peach Bourbon Applesauce

     There's really not a whole lot to making applesauce. It's pretty much just apples and sugar. It's not really missing anything. Except booze. Everything is better with booze. I took a basic recipe from The Better Homes and Gardens Home Canning Cook Book and added a fantastic peach liquor. The booze cooks out but leaves behind a subtle peach flavor in the applesauce that is just wonderful. If you want the original recipe, just leave out the booze. Canned, this will hold for around a year on the shelf. We like to make a gallon at a time and just put it aside in quart jars. It's nice to get a taste of summer in the middle of winter. As always, notes are in blue.

Peach Bourbon Applesauce
adapted from Better Homes and Gardens Home Canning Cook Book 
Ingredients

  • 6-7 pounds apples (use whatever type you like. We just stole ours from our neighbor's apple trees)
  • 2 cups white sugar
  • 1/2 cup Benchmark Peach Whiskey
Directions
  1. Wash, quarter and core apples. Combine apples, 4 cups of water and color keeper. Bring to a boil; reduce to simmer for about 15 minutes or until apples are tender.
  2. Press apples through food mill (if you have a KitchenAid with a food mill attachment, this part is wonderfully easy. If you're using a manual food mill, this recipe qualifies as a Pain In The Ass)
  3. Put milled apples in a large pot with the sugar and booze. Cook over low heat until sugar dissolves. Bring to a boil, stirring to prevent scorching or sticking. Taste and add sugar or more booze as needed. 
  4. If you plan on eating a gallon of applesauce on the spot, you can skip this and the next step. Pack into hot jars, leaving 1/4-inch headspace. 
  5. Process for 10 minutes in a boiling water bath (as always, defer to the National Center for Home Food Preservation to make sure you are canning correctly)
Good times!

Tuesday, August 12, 2014

Cabbage Borsch

     As you may already know, we do a lot of canning in our house. We have a fairly abundant garden and are always looking for ways to preserve all those great foods until we really want to eat them. The freezer will only hold so much and there's only so many things that take well to dehydration. That leaves canning. We have exclusively done water bath canning largely due to the fact that I am a big baby and live in fear of leveling the kitchen in a pressure canning incident.

Terrifying.
     This summer, we finally gave in. We admitted that not everything should be pickled.


     We set up for pressure canning. Our first attempt was a cabbage soup out of a 41 year old cookbook. I figure if we made it safely through the initial danger of running the pressure canner, the worst that would happen is botulism when we ate the soup. It turned out that my fears were unfounded. At least the pressure canning fears. We still might get botulism when we eat the soup down the line. If you follow the instructions for your canner and in the link provided below, you might be able to keep insurance claims to a minimum. If you don't want to pressure can, simply stop after step 2, though you might want to cook the soup a bit longer. As always, notes and changes are in blue.

Cabbage Borsch
via Better Homes and Gardens Home Canning Cookbook
Ingredients
  • 5 pounds tomatoes
  • 8 cups coarsely shredded cabbage
  • 6 cups water
  • 2 cups chopped onion (The Wife just informed me we apparently forgot to add the onion. Whoops.)
  • 2 medium apples, peeled and cut into pieces (no specification was made as to type of apple. We used Red Delicious.)
  • 2 tablespoons beef bouillon granules (we used the cubes with a ratio of 2 for every 3 cups of water. Feel free to toy with the measures to get the salt fix you crave.)
  • 2 tablespoons sugar
  • 2 tablespoons lemon juice
  • 1 teaspoon salt
  • 1/8 teaspoon pepper
  • dried cayenne peppers (1 per pint jar)
Directions
  1. Wash, peel, remove stem end and cores and quarter tomatoes. Use a small spoon to scrape out excess seeds, if f desired (no, it was not desired. You already had us do everything other than declare allegiance to these damned tomatoes.)
  2. In a 4-6 quart kettle or Dutch oven, combine all ingredients (that includes the onions. Don't forget the onions like we did and live with the regret). Bring mixture to a boil. Boil, uncovered, for 5 minutes.
  3. Ladle soup into hot jars, leaving 1/2-inch headspace. Adjust lids. Process in pressure canner at 10 pounds. Process pints for 45 minutes, process quarts for 55 minutes. If you're a wuss like me, who is even afraid to open a tube of biscuit dough, you'll wisely spend this time outside behind the safety of a brick wall. IF YOU'RE GOING TO PRESSURE CAN, PLEASE VISIT THE NATIONAL CENTER FOR HOME FOOD PRESERVATION AND READ UP ON THE PROCESS. We don't want you inadvertently remodeling your kitchen or making a needless trip to the emergency room.
Soup's done!
Good times!

Tuesday, August 5, 2014

Too Damned Easy Pickled Cabbage

     Ah, the humble cabbage. Really, there's not a whole lot I can say other than to head into a bunch of cabbage fart jokes. That's too obvious, so we'll get to it. Fermentation is all the rage right now and everybody is fermenting all sorts of things. Unfortunately, I don't follow current trends (as anybody who has seen my wardrobe or listened to my music can attest). I am also lazy and impatient. Fermenting takes time. If I want sauerkraut, I would have to put in the time. That's not happening. Instead, I made this pickled mixture. It's got a nice tang, some big flavor and a bit of a snap. There's room for interpretation, too. This stuff makes a great side dish, or cut up some smoked sausage and mix it in for a gastric bludgeon! By no means do you actually have to boil can this stuff. If you plan on eating it right away, skip steps 4 and 5 and serve it up. I think the extra time gives it some extra flavor. Plus, I like looking at the cans. As always, notes are in blue.

Too Damned Easy
Pickled Cabbage
Ingredients

  • 2 medium heads cabbage, cut into 1/2-inch wide ribbons
  • 6 banana peppers, sliced into 1/2-inch wide rings (if you want to add a bit of spice, use Hungarian Wax peppers instead)
  • 1 medium white onion, quartered and sliced
  • 12 peppercorns
  • 1 tablespoon fennel seeds
  • 1 teaspoon red pepper flakes
  • 2 cups cider vinegar (make sure it has 5% acidity)
  • 2 cups water
Directions
  1. Toss cabbage, peppers and onion in a large bowl. Make sure everything is evenly distributed.
  2. In a large, non-reactive pot, combine vinegar, water, peppercorns, red pepper flakes and fennel seeds. Heat to a boil.
    We've discussed the issue with non-reactive pots. 
  3. Add the vegetables and stir for 3-5 minutes (you want everything mixed in the vinegar. You don't want to overcook the veggies though. They should still have some snap when you can them).
  4. With a slotted spoon, load vegetables into quart jars. Top with the hot liquid, leaving 1/4 inch head space (make sure to load the peppercorns, pepper flakes and fennel seeds in there, too. Nothing is wasted here).
  5. Seal jars with a canning lid and ring and process in a boiling water bath for 15 minutes. As always, refer to the National Center for Home Food Preservation to see how to not accidentally kill anyone. Properly sealed jars should be good for around a year (don't quote me on that. If you make yourself sick, we never met). 
Good times!

Tuesday, July 29, 2014

Master Ridley's Pepper Paste

     This particular concoction was my first foray into pepper sauces. I had a bumper crop of cayenne and needed to use them in bulk. The end result was my single most popular hot sauce recipe, at least among friends and coworkers. There is so much you can do with this. Toss it with melted butter and chicken wings and you'll never do hot wings any other way again. Mix it in chili for an extra punch. One of the guys at works just spreads it on his hamburger. You will not be the same after this. It has just enough heat and more than enough flavor. Since it's made with vinegar, it cans well, too. Just pack it in half-pint jars, making sure to work out the air bubbles. Then just process in a boiling water bath for 12-15 minutes (as always, consult the National Center for Home Food Preservation for tips on how not to get botulism). We actually have an open jar that's been in our fridge for over 2 years without going off. We just add leftovers from each season's batch. We figure in the next couple years it should achieve sentience. Remember, with great power comes great responsibility. And just who is Master Ridley, you ask? If you've read Fahrenheit 451, you'll know the reference: "Play the man, Master Ridley; we shall this day light such a candle, by God's grace, in England, as I trust shall never be put out."*

Master Ridley's Pepper Paste
Ingredients 
Ingredients can be easily multiplied for larger batches. A double batch of these ingredients should yield about a half pint of paste.
  • 1 dried Guajillo pepper
  • 10-12 Cayenne peppers (cut off and discard the stems and roughly chop. Don't remove the seeds unless you're a huge wuss. If that's the case, make sure you wear gloves and hike up your diaper, too)
  • 2 grated baby carrots
  • ½ teaspoon cumin
  • 1 teaspoon seasoning salt
  • 1 teaspoon garlic powder
  • 3 tablespoons white vinegar
Directions
  1. Combine ingredients in a food processor and blend until smooth 
  2. Another tablespoon of vinegar can be added if the sauce is too thick for your liking.
* Nicholas Ridley was a bishop burned at the stake for heresy in 1555
Good times!

Thursday, January 16, 2014

Spiked Apples

     We rustic types love to preserve our own food. Fortunately for us, our in-laws both have access to apple trees. Each year, they bring us somewhere around eighty pounds of apples over the course of the season. One of our favorite ways to process them is to can them in syrup and booze. The original formula came out of the Better Homes and Gardens Home Canning Cookbook. We found it was great fun to use bourbon or other liquor in place of some of the liquid in these recipes. If you don't want to use booze, just swap water back in. Depending on the booze, the flavor will change dramatically. With regular bourbon, the apples are sweet and mellow. When I use an herbal liquor like Elisir M.P. Roux, the herbals really come through in the apples. No matter how you make them, they're great. We use them in cakes, on pancakes, over vanilla ice cream or just straight out of the jar! Since this recipe does involve boiling water canning, as always, please refer to the National Center for Home Food Preservation for tips on how to prevent giving everyone the green apple splatters. As always, any notes or changes are in blue.


Spiked Apples
Ingredients

  • 3 pounds of apples for each quart you intend to make
  • 3 cups sugar
  • 3 cups water
  • 1 cup booze (pick your favorite. I use Jim Beam for my bourbon apples and Elisir M.P. Roux for my herbal elixir apples. I imagine cinnamon or honey whiskey would be outstanding, too).
  • 6-8 whole cloves per quart
Directions
  1. Prepare a boiling water canner. Load your empty jars in while the water is boiling so they will be hot and clean when you go to use them.
  2. Wash, peel and core the apples. (Cut the apples however you want. I use small apples which I cut into wedges) Load them in a bowl with some color keeper so they don't brown.
  3. In a large pot, add liquid and sugar. Stir over medium heat until sugar dissolves. Bring syrup to boil.
  4. Add apples to syrup and boil for 5 minutes.
  5. Lower heat on the apples to a simmer and load the hot apples into the jars (yes, take the jars out of the canner and empty the water first, you goof. If I find out anybody was trying to fill the jars while they were still in the canner, I'm going to be very upset). Add the cloves to the jar. Cover with hot syrup, leaving about 1/2 inch of headspace. Secure with a clean lid and ring. Load into the canner. 
  6. Process for 20 minutes (20 minutes is fine for either pints or quarts)
  7. Remove jars to a wire rack with about 1" between them. Wait a while until you hear the satisfying thunk of the jar sealing. If you don't hear it after a few hours, you can either run it through another water bath and try again or just put them in the fridge for immediate devouring.
Good times!


Saturday, December 14, 2013

Tomato and Roasted Pepper Chutney

     Over the summer, chutneys became one of our go-to ways to process surplus veggies. If you were following us this summer, you'll know we were absolutely laden down with bell peppers and tomatoes. Whenever we have crazy amounts of produce to use, we usually end up consulting Preserve It! This book has a few wonderful chutney recipes. Fair warning, making chutney does qualify as a PITA (Pain In The Ass). It's time consuming and requires a fair amount of attention. The result is totally worth it, though. This stuff is great on crackers with cream cheese or brie. It's also good on bagels. If you do decide to process this for long term storage, I once again recommend consulting the National Center for Home Food Preparation for information on how not to accidentally make someone's anus fall out. As always, notes and changes are in blue.
Tomato and Roasted Pepper Chutney
via Preserve It!
Ingredients

  • 1 red bell pepper
  • 1 orange bell pepper (no orange peppers on hand. We just used another red pepper)
  • 1 yellow bell pepper
  • 3 lb. ripe tomatoes, plunged into boiling water for 1 minute and then peeled
  • 2 onions, coarsely chopped
  • 2-1/4 cups granulated sugar
  • 2 cups white wine vinegar
Directions
  1. Preheat the oven to 400F. Place the peppers on a baking sheet and cook for about 25-30 minutes, until they begin to char slightly. Remove from the oven, put in a plastic bag and leave to cool.
  2. Remove the pepper stems, skins and seeds (we core, stem, seed and slice the peppers before actually cooking them. It just seems more logical. Also, peeling the peppers has never failed to be a total Pain In The Ass). Coarsely chop the tomatoes. Transfer the peeled tomatoes, roasted peppers and onions to a food processor; pulse briefly until chopped but not mushy.
  3. Transfer the mixture to a preserving pan (couldn't even tell you what that is)  or a large, heavy-bottomed, stainless steel saucepan (I do have one of those!) with the sugar and vinegar. Cook over low heat, stirring continuously, until the sugar has dissolved. Bring to a boil, then reduce to a simmer and cook for about 1 to 1-1/2 hours, stirring occasionally, until it starts to thicken and turn sticky (try to read that last bit again without snickering). You may need to increase the heat a little toward the end of cooking, but stir continuously so the chutney doesn't stick to the bottom of the pan. 
  4. Ladle into warm, sterilized, half-pint jars, leaving about 1/4" head space, and making sure there are no air gaps. Cover and seal with a two part lid. Process in a boiling water bath for 12 minutes (If you want to do pint jars, boil for 15-16 minutes. You can thank me now for changing this step from the cookbook. The book says to process in the water bath, THEN put on the lids. I assure you, that won't work unless you're some sort of sorcerer). Store in a cool, dark place. Allow the flavors to mature for 1 month. Refrigerate after opening.  
Good times!

Monday, November 11, 2013

Fruit Punch Hot Sauce

     Some time ago I held a little contest to determine the name of a hot sauce I had created. I picked a winner and then subsequently forgot all about it. I even managed to misplace the recipe. Having finally located the recipe, I am finally posting it! This is a cayenne sauce with a strong citrus base. It's excellent on seafood and chicken. I haven't tried it on anything else, but fully intend to. As far as heat, on a scale of 1 being no real heat to 10 being "Oh God, eventually this has to come out my anus," I'd give this a 4-5. As always, any notes are in blue.
Fruit Punch Hot Sauce
Ingredients

  • 5 ounces cayenne peppers, seeded and roughly chopped
  • 10 ounces red banana peppers, seeded and roughly chopped (not sure where you're going to find these; these peppers were mutants out of our garden)
  • juice of 2 lemons
  • 1/4 cup orange juice
  • 1 medium tomato, roughly chopped
  • 2 cloves garlic
  • 1 teaspoon salt
  • 2 cups cider vinegar
Directions
  1. Throw everything into a blender and blend the living shit out of it.
  2. Pour the blended mixture into a non-reactive saucepan and bring to a boil; boil for 2 minutes.
  3. Strain mixture into bottles/cans (This will make a little over a pint of sauce)
  4. If you are intending to store long term, process canning jars in a boiling water bath for 12 minutes for 1/2-pints and 15 minutes for pints (as always, please refer to the National Center for Home Food Preservation for detailed instructions and tips for giving everyone dysentery) 
Good times!

Thursday, October 3, 2013

Corn Relish

     I've loved corn relish ever since I was little. It was on a salad bar in a rib joint. It was thick, almost like a chutney. This recipe is not. I guess I wasted your time with that little bit of nostalgia. This version is not thick, probably due to the fact that it doesn't use a ton of sugar or cook for very long. I suppose if you let it cook for a lot longer. It is, however, delicious. It is just the right combination of sweet and tangy. Plus it looks great. You can toy with the ingredients, shifting different kinds of peppers in and out. The last batch we made added a couple of chopped jalapenos. Fair warning, this stuff stains the crap out of anything it touches. If you're a sloppy eater, I hope you're a fan of little yellow spots on your clothes.
Corn Relish
Ingredients
  • 2 quarts sweet corn kernels 
  • 4 cups chopped cabbage 
  • 1 cup chopped onion 
  • 1 cup chopped green bell pepper (sometimes we'll use yellow pepper in place of green)
  • 1 cup chopped red bell pepper 
  • 1 cup white sugar 
  • 2 tablespoons ground dry mustard 
  • 1 tablespoon celery seed 
  • 1 tablespoon mustard seed 
  • 1 tablespoon salt 
  • 1 tablespoon ground turmeric 
  • 1 quart apple cider vinegar 
  • 1 cup water
Directions
  1. In a large saucepan, mix corn, cabbage, onion, green bell pepper, red bell pepper, white sugar, ground dry mustard, celery seed, mustard seed, salt, turmeric, apple cider vinegar and water. Bring to a boil. Reduce heat and simmer 20 minutes. 
  2. Transfer the mixture to sterile containers. Seal and process in boiling water bath. Process 25 minutes for quart jars. As always, refer to the National Center for Home Food Preservation for tips on how to not accidentally poison yourself or loved ones.
Good times!