Sunday, June 29, 2014

Onion Fritters (Pyaz Ki Bhajia)

     I had no idea that the food fritter actually is named accurately. Merriam Webster has an archaic definition of fritter as: verb divide (something) into small pieces. That's what fritters are! Small pieces! I had no idea. The Wife is an English teacher. She should have pointed this out to me. Oh well. These particular fritters are an Indian recipe and filled with oniony goodness. These would be great with the All Purpose Curry Sauce for dipping! There is a fair amount of work in this recipe and thus will earn it P.I.T.A. status. Totally worth it, though. As always, any notes or changes are in blue.

Onion Fritters
pyaz ki bhajia
via Madhur Jaffrey's Quick and Easy Indian Cooking
Ingredients

  • 1 large egg
  • 4 tablespoons water
  • 1 tablespoon fresh lemon juice (I used the bottled kind. Don't judge me harshly)
  • 1 cup chickpea flour (I actually keep this in the house. Since I started cooking Indian food regularly, this just seemed like a good thing to keep in stock)
  • 3/4 teaspoon salt
  • 1/2 teaspoon cayenne pepper
  • 1/2 teaspoon garam masala
  • 1/2 teaspoon cumin seeds
  • 1 teaspoon ground cumin
  • 1/4 teaspoon ground turmeric
  • 1 fresh, hot green chile, finely chopped (I used a jalapeno from the garden. You leave the seeds in there or you're a huge baby)
  • 2 tablespoons chopped fresh cilantro (my cilantro isn't doing particularly well this season; I used 2 teaspoons dried)
  • 1 medium-large onion, peeled and chopped into medium sized dice (I tried chopping them into dice but it was too hard to draw those little pips on the side. I just chopped them and called it a day)
  • vegetable oil for frying
Directions
  1. Break the egg into a bowl and beat well. Add the water and the lemon juice. Mix. Add the chickpea flour and mix very well with a whisk. Put in the salt, cayenne, garam masala, cumin seeds, ground cumin, green chile, and cilantro. Mix and set aside for at least 10 minutes. The batter should be of a droppable consistency (technically, anything is "droppable" consistency. It could be light and fluffy or hard as a rock and I can just drop that shit right on the floor and let the dogs have it)
  2. Put the oil in a wok or deep fryer (I used my trusty cast iron skillet) set over medium heat. You should have at least 3 inches of oil in the center of the wok (obviously this will vary based on the size of your wok/skillet. If I used 3 inches of oil, I'd have a spectacular fire on my hands. And face. And stove.) When the oil is hot, put the onion in the batter and mix. This should always be done just before frying (well, duh. If you tried to add the onion to the batter after you fried it, you'd look like a total schmuck.)
    If you've gotten to this point, it's probably for the best if you don't attempt to add the onions now.
  3. Drop heaping teaspoons of the batter into the hot oil. Use up all the batter this way (resist the urge to put it all in at once and make an Uber-Fritter!)
  4. Stir and fry the fritters (turning them over if you're not using deep oil) for 7-8 minutes or until they are a golden red. Remove the fritters with a slotted spoon and drain on a plate lined with paper towels. Serve hot, as soon as the fritters are made (this is generally not an issue in our home as anything coming out of the frier is quickly shoved into our craws as soon as it is safe)
Good times!


Wednesday, June 25, 2014

Too Damned Easy Elvis Pie

     Sometimes I get a bit reckless in the kitchen and just start throwing things together. This pie is a prime example. We had a jar of marshmallow cream sitting in the cabinet that had mocked us for far too long. I took it and a couple other ingredients and came up with a damned fine dessert. It got its name due to the fact that it features peanut butter and bananas (sort of. It's banana cream. I would have certainly added banana slices if I had any on hand). I figure you can't go wrong with an Elvis themed dessert.

Too Damned Easy
Elvis Pie
Ingredients
  • 1 9" graham cracker pie crust
  • 1 can (21 ounce) banana creme pie filling (a lot of people have expressed difficulty in locating this. If you can't find it, make a batch of instant vanilla pudding and cut up a banana or two into it)
  • 4 tablespoons marshmallow cream (marshmallow fluff, whatever it is you call it)
  • 4 tablespoons creamy peanut butter (make sure the peanut butter is at room temperature or you're going to have a hell of a time trying to spread it over the marshmallow)
  • 1/2 cup chocolate chips
Directions
  1. Spread a layer of marshmallow cream on the bottom of the pie crust (not the underside or you're in for a lot of disappointment). You're looking for a layer a little over 1/8" thick.
  2. Spread a layer of peanut butter over the marshmallow. It should be the same thickness as the marshmallow layer.
  3. Dump the can of banana cream pie filling on top and spread it evenly over the peanut butter layer.
  4. Sprinkle the chocolate chips over the top.
  5. Set in the freezer for about an hour for it to set up.
Yes, I know this is Bruce Campbell, but he makes an excellent Elvis.
Good times!

Monday, June 23, 2014

Shaker Bread

     I hope I never develop a gluten intolerance, because I love bread dearly. I love baking bread. I imagine The Wife, in large part, stays with me because I regularly bake bread. We could easily just sit and stuff our faces with hot buttered bread. This particular bread, a "Shaker Daily Loaf," comes out of one of my old Frugal Gourmet cookbooks. It's a simple, yeasty bread that toasts well and has a great crust. This would be a rock solid PB&J bread. As always, notes or changes are in blue.


Shaker Bread
via The Frugal Gourmet Cooks American
Ingredients

  • 2 packages fast-acting dry yeast
  • 1/4 cup warm water
  • 1-3/4 cup milk
  • 3 tablespoons butter
  • 2 tablespoons sugar
  • 2 teaspoons salt
  • 5 cups all-purpose flour
  • Soft butter for greasing the bowl and top of dough, about 2 tablespoons (or if you're like me and counting calories, just use non-stick cooking spray instead)
Directions
  1. Dissolve the yeast in warm water in a large mixing bowl. Warm the milk and melt the 3 tablespoons of butter in it. Stir in the sugar and salt and allow to cool to lukewarm. Add this to the yeast bowl along with 3 cups of the flour. Beat until smooth (I used the KitchenAid since I am too lazy to do the beating/mixing by hand)
  2. Add the remaining flour and knead on a floured surface until smooth and elastic, about 10 minutes (3-4 minutes on the KitchenAid if you're using the dough hook)
  3. Place the dough on a plastic counter and butter the top of the dough with half of the remaining butter. Cover the dough with a very large stainless steel bowl and allow to rise until double in bulk (let it rise for about an hour. That should double it. As for the plastic counter nonsense, I just took the dough out of the mixing bowl, sprayed the bowl with nonstick cooking spray and rolled the dough in it and then left it in the bowl with a towel over the top.)
  4. After the dough has risen, punch down and shape into two loaves for loaf pans (spray the pans with nonstick cooking spray). Again brush the top of the dough and allow to rise until doubled in bulk (this will be about 30 minutes. I skipped the butter brush and just put a little cooking spray on the tops of the loaves)
  5. Bake at 400F (200C, Gasmark 6) for 30 minutes (this took exactly 30 minutes for us. Cooking times may vary)
Good Times!

Saturday, June 21, 2014

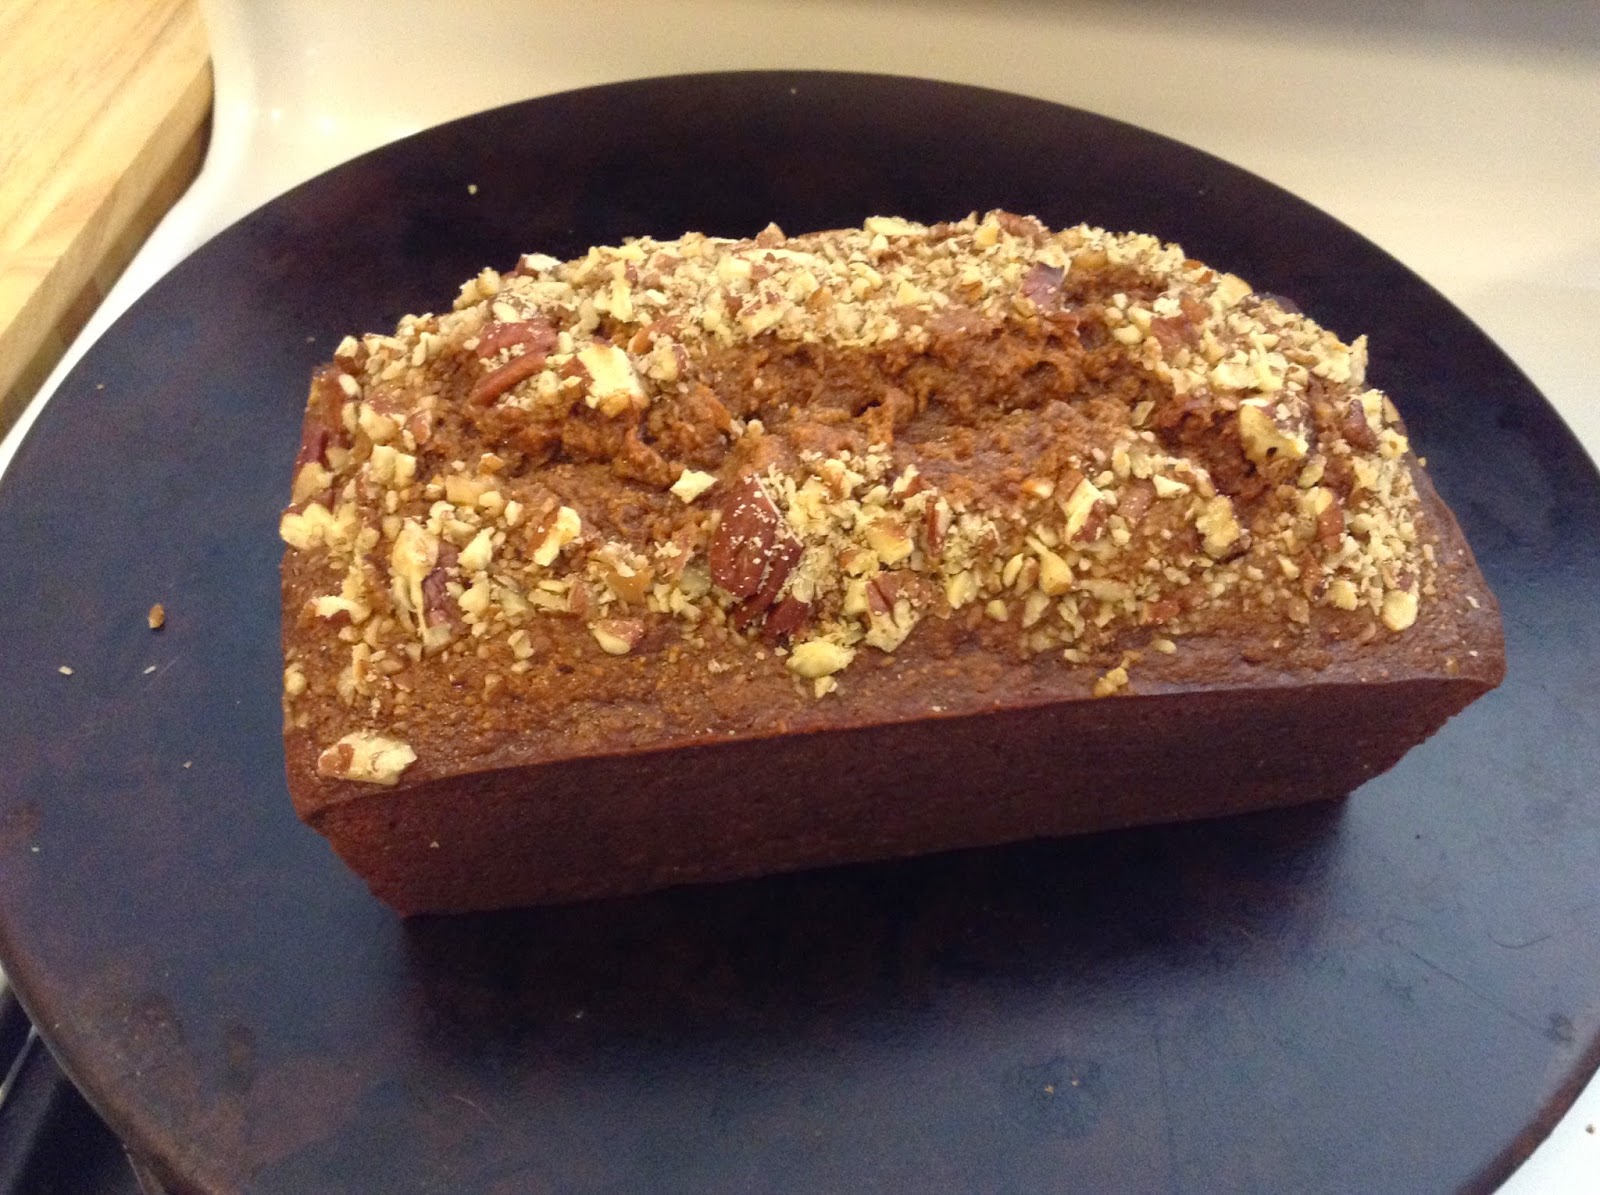
Banana Nut Bread

     There's nothing like remembering you had a bag of bananas sitting on the counter for a week. You go to pick them up and they just sort of snap off their little connectors, exposing the mushy banana. You're screwed. You can't just throw them out; you spent good money on them. The only logical course of action is to make banana bread. You can never go wrong having a loaf or six of banana bread in the house. You may have seen The Wife's Banana Bread Recipe. This is not the same thing at all. Using whole wheat flour seems to really change things up. Both are really good and I'd welcome either on my plate. Make them both and let me know which you like more. As always, notes and changes are in blue.

Banana Nut Bread
via Taste of Home Everyday Light Meals
Ingredients

  • 2 tablespoons butter, softened 
  • 3/4 cup sugar
  • 1 egg
  • 1 egg white (what the hell am I going to do with ONE egg yolk? I just went ahead and used the whole egg)
  • 2 cups (about 4 medium) mashed ripe bananas
  • 1/4 cup unsweetened applesauce (we used our own apple butter)
  • 1/4 cup honey
  • 1 tablespoon vanilla or rum extract (we used vanilla extract and I drank some rum for good measure)
  • 1-1/3 cup all-purpose flour
  • 2/3 cup whole wheat flour
  • 1 teaspoon baking soda
  • 1/2 teaspoon salt
  • 1/4 cup chopped pecans
Directions
  1. In a mixing bowl, beat butter and sugar for 2 minutes or until crumbly. Add egg, then egg white (or just 2 eggs if you're a lazy bastard like me), beating well. Beat on high speed until light and fluffy (It's too bad the recipe totally neglects to mention you're using a mixer. Granted, you might be a robot with speed settings. I just used the Kitchenaid on speed 4. Anything higher than that and it sounds like somebody is trying to land a Harrier in the kitchen and I'll be cleaning batter off the ceiling)
  2. Stir in the bananas, apple sauce, honey and extract. Combine the flours, baking soda and salt; stir into banana mixture until just moistened. 
  3. Pour into 9x5x3 inch loaf pan coated with nonstick cooking spray. Sprinkle with nuts. 
  4. Bake at 325F (170C, Gasmark 3) for 60-65 minutes (this took almost 90 minutes in our oven. Cooking times will vary) or until a toothpick inserted near the center comes out clean.
  5. Cool for 10 minutes before removing to a wire rack.
Good times!

Wednesday, June 18, 2014

Black Bean and Rice Enchiladas

     Call me a purist, but I like my enchiladas filled with meat. When I see fillings like beans and rice I tend to wonder why somebody would put the side dishes inside my main course. However, The Wife wanted to try this recipe and if The Wife ain't happy, nobody's happy. After making these, I will grudgingly admit they are pretty good. Granted, they would be much better if there was shredded chicken or ground beef in there. Next time I may add that along with the regular filling. We made a few notable changes and it resulted in a pretty spicy enchilada. These even served as a breakfast with some scrambled eggs and hot sauce. All in all, we'll call this one a winner and likely add it into the rotation. As always, notes and changes are in blue.

Black Bean and Rice Enchiladas
via Taste of Home Everyday Light Meals
Ingredients
  • 1 green pepper, chopped (we used a yellow bell pepper)
  • 1 medium onion, chopped
  • 3 garlic cloves, minced
  • 1 tablespoon olive oil
  • 1 15-ounce can black beans, rinsed and drained
  • 1 14.5-ounce can diced tomatoes with green chiles (didn't have this. We used a can of fire roasted tomatoes and added a couple teaspoons of chopped pickled jalapenos)
  • 1/4 cup picante sauce (I never have picante in the house. I doctored up a sauce from a leftover can of chipotle peppers in adobo)
  • 1 tablespoon chili powder
  • 1 teaspoon ground cumin
  • 1/4 teaspoon crushed red pepper flakes
  • 2 cups cooked brown rice
  • 8 flour tortillas (8-10 inch size), warmed
  • 1 cup salsa
  • 1 cup shredded cheddar cheeze
  • 3 tablespoons chopped fresh cilantro
Directions
  1. In a large, nonstick skillet, saute pepper, onion and garlic in oil until tender. Add the beans, tomatoes, picante, chili powder, cumin and red pepper flakes; bring to a boil. Reduce heat; simmer uncovered until heated through and mixture thickens. Add rice; cook 5 minutes longer or until heated through.
  2. Coat a baking dish with nonstick cooking spray.
  3. Spoon a rounded 1/2 cup of the filling down the center of each tortilla. Fold sides over fill and roll up (sides? How does a circle have sides? Maybe the top and the bottom side, but I don't think that's what they mean. Possibly the edge? Fold the edges over? That sounds right. I'm guessing they must have failed geometry) Place the rolled-up tortillas in the baking dish. Spoon salsa over each tortilla. Cover with foil and bake at 350F (180C, Gasmark4) for 25 minutes.
    Here's The Wife hard at work assembling the enchiladas.
    Her tiny little hands are perfect for this sort of precision work.
  4. Uncover and sprinkle with cheese and cilantro. Bake 1-2 minutes longer or until cheese is melted.
Good times!

Friday, June 13, 2014

Rigatoni With Tomato and Chorizo

     There was a long period of time during which I had no idea there was more than one type of chorizo. I was used to the Mexican-style of chorizo, which is like a ground meat. I couldn't figure out what to do when recipes called for "sliced chorizo." There was lots of swearing while I desperately tried to slice something the consistency of braunschweiger. I eventually was given an Italian cookbook where it dawned on me that the chorizo I wanted was Spanish chorizo, which is like salami. Everything changed. Now recipes like the one here weren't greasy messes. This recipe is just wonderful. It has a nice balance of sweet and spicy, with a touch of heat. Give it a try. I bet you'll like it as much as we did. If not, send me the leftovers. As always, notes or changes are in blue.

Rigatoni With Chorizo and Tomato
via The Essential Pasta Cookbook
Ingredients

  • 2 tablespoons olive oil (I used 3 tablespoons of extra virgin. You may use as many virgins as you feel necessary)
  • 1 onion, sliced (I used 1-1/2 Vidalia onions. I imagine most onions would work here)
  • 8 ounces chorizo sausage, sliced (Spanish chorizo, not Mexican. As mentioned, you can't really slice Mexican chorizo. Plus, it's the totally wrong ingredient. We used a 10 ounce chorizo)
  • 14 ounce can crushed tomatoes (I used a full quart of my home-canned tomatoes with garlic and basil)
  • 1/2 cup dry white wine (I used 3/4 cup Charles Shaw Sauvignon Blanc. There's not much other use for Three Buck Chuck dry white wine)
  • 1/2-1 teaspoon chopped chili, optional (Not optional for me! I used 1/2 teaspoon red pepper flakes)
  • 12 ounces rigatoni (the box was 1 pound, so I used a full pound)
  • 2 tablespoons chopped fresh parsley
  • 2 tablespoons freshly grated Parmesan
Directions
  1. Heat the oil in a frying pan. Add the onion and stir over low heat until tender.
  2. Add the sausage to the pan and cook, turning frequently (the sausage, not you. You'll look like a schmuck pirouetting in front of the stove while everything burns), 2-3 minutes. Add the tomato, wine, chili and salt and pepper to taste; stir. Bring to a boil, reduce heat and simmer uncovered for 15-20 minutes. 
  3. While the sauce is cooking, cook the rigatoni until al dente (You'll notice I'm not explaining this step. Seriously, if I have to instruct you on how to boil pasta, please go order a pizza before you start a fire in the kitchen). Drain the pasta and return to the pan. Add the sauce to the hot pasta. Toss well to combine (we always just toss it in our own bowls. If we mix it all up on the spot, the pasta gets gooey when we go to eat the leftovers later in the week). Serve sprinkled with the combined fresh parsley and Parmesan cheese. 
UPDATE:
Here's the YouTube video for this recipe!

Good times!

Tuesday, June 10, 2014

Red Lentils Tarka (Masoor Dal)

     The humble bean. There are so many different kinds and so many different ways to prepare them. In the end, however, they all give me wicked gas.
You know I'm not going to make it through a bean recipe without a fart reference.
     This particular bean recipe is another Indian recipe by way of Madhur Jaffrey. It is an extremely simple recipe and makes for a nice side dish. It's not packing a ton of flavor, but I think that's the point. It's a nice mild side to take some of the edge off a spicier dish. Granted, it does use dried cayenne, but they don't really bring a ton of heat. The wife and I both really liked it, so it's likely this will find a place in our Indian cooking rotation. As always, any notes are in blue.

Red Lentils Tarka
Masoor Dal
via Madhur Jaffrey's Quick & Easy Indian Cooking
Ingredients

  • 1-1/2 cups red lentils
  • 1/2 teaspoon ground turmeric
  • 1-1/4 - 1-1/2 teaspoons salt (I went with the lower amount of salt since it makes me hold water like a sponge)
  • 3 tablespoons vegetable oil or ghee (as I am too lazy to make clarified butter, I went with the vegetable oil)
  • Generous pinch of asafetida (if you're going to cook Indian food, you probably should get yourself a small jar of this stuff)
  • 1 teaspoon cumin seeds (NOT the powder! They are not interchangeable. Or do what you want. It's your food. Throw Pop Rocks in there for all I care. Don't say I didn't warn you)
  • 3-5 dried, hot red chiles (I used the cayenne I dried from my garden since I have about 56,000 of them on hand)
Directions
  1. Pick over the lentils and wash in several changes of water. Drain. (How about no?)
  2. Put lentils in a heavy saucepan. Add 5 cups water and the turmeric. Stir and bring to a simmer. Do not allow to boil over (does a recipe really need to clarify that? Have you ever gone to cook something and said to yourself, "Fuck it, I'm just letting the whole thing boil over.) Cover, leaving the lid slightly ajar. Turn heat to low and let simmer gently for 35-40 minutes or until tender. Stir a few times during the cooking (this is good advice, especially if you have the heat up a bit too high. No stirring = bean caulk fused to the pan). Add salt and mix. Leave covered on low during the next step.
  3. Put the oil in a small frying pan and set over medium-high heat. When the oil is hot, stick your face directly in the oil for 8-10 seconds (just kidding. I wanted to see if you were paying attention. DO NOT STICK YOUR FACE IN THE HOT OIL.) Put in the asafetida, then, a second later, add the cumin seeds. Let the cumin seeds sizzle for a few seconds. Put in the red chiles. As soon as the turn dark red, lift the lid of the lentil saucepan and pour in the contents of the frying pan, oil as well as spices (Watch out here. There's going to be some water in the bean saucepan, so the oil is going to splatter a bit) Cover the saucepan immediately to trap the aromas. (When the aromas have died of asphyxiation, the beans are ready to eat and you may uncover the saucepan)
Good times!

Saturday, June 7, 2014

All-Purpose Curry Sauce

     Let me preface this recipe by stating that it is not truly "all-purpose." While it would go great on eggs, I'd probably think twice before putting it on your ice cream. I do admit to dipping a pancake in this sauce and it was not bad in a French-fries-in-a-McDonald's-chocolate-shake sort of way. The sauce was pulled from a recipe for fish in a curry sauce. I wasn't really keen on the idea of curried fish at the time, so I wound up using this to cover some chicken tenders. This is a really tasty sauce. I used a sweet curry, so the more delicate eaters should have no complaint. If you want heat, use hot curry powder or throw in some cayenne. All I want is for you to be happy. Is that so much to ask? As always, notes are in blue.


All-Purpose Curry Sauce
via Madhur Jafrey's Quick & Easy Indian Cooking
Ingredients

  • 2-1/4 cups milk
  • 4 tablespoons butter (as usual, we went with margarine)
  • 1/4 cup good curry powder (our good curry powder was a sweet curry powder from The Spice House)
  • 2 tablespoons all-purpose flour
  • 3 tablespoons finely chopped fresh cilantro (our garden is chugging right along, so we actually had fresh on hand!)
  • 2-3 teaspoons fresh lemon juice (no fresh on hand, I used the lemons to make limoncello. I had to use bottled)

Directions

  1. Melt butter in a small saucepan over medium heat. Add curry powder, stir for a minute to incorporate. Add flour, stir for 2 more minutes (fundamentally, you're making a roux here. Don't let it get too hot or it will burn and then you're screwed and have to start over).
  2. Using a whisk, beat in the milk. Bring the heat to medium-high. Bring to a boil, whisking constantly. When the mixture hits the boil, add the cilantro and lemon juice. Lower the heat so the mixture comes off the boil. Stir for a couple more minutes and then remove from the heat. The sauce should be creamy.
Good times!

Tuesday, June 3, 2014

Chicken and Broccoli with Lemon Vinaigrette

The Wife really likes lemon. I mean really, really likes lemon. She also really likes broccoli. And pasta. She also likes reading Jane Austen books, so I guess nobody's perfect. I'm not sure where I'm going with this.  Anyway, we had a pound of broccoli and a bag of lemons that weren't going to survive much longer so I went to work making a new recipe. I figured I would go with the whole salty/tart vibe. The result was a very tasty pasta dish. Though I served it hot, I imagine this would be a pretty good cold pasta dish for summer. Give it a try! Tell me what you think. As long as it's positive feedback. I figure as long as nobody is paying me to do this, I don't have to listen to any negativity. As always, notes are in blue.

Chicken and Broccoli
with Lemon Vinaigrette
Ingredients

  • 1/2 cup olive oil (use as many virgins as you like)
  • 1 teaspoon balsamic vinegar
  • 1 teaspoon Worcestershire sauce
  • juice of 4 medium lemons
  • 1/2 teaspoon dried basil
  • 2 small crowns broccoli (about 1 pound)
  • 1-1/2 pound chicken (I used breast meat. There's no reason you can't use thighs if you prefer)
  • 3 cloves garlic, minced
  • 1 teaspoon capers, drained
  • 1/4 cup grated Parmesan
  • 1 pound rotini pasta
  • 1/4 cup shredded Parmesan (for garnish)
Directions
  1. Combine first 5 ingredients in a bowl. Whisk to incorporate.
  2. In a large pan, heat 1/4 cup of the vinaigrette. Add garlic and capers. Cook for about 3 minutes. Add the chicken. Cook until chicken is cooked through and juices run clear. 
  3. Drain the liquid from the chicken and cook another minute or two until the chicken starts to get a bit of brown.
  4. Cook the broccoli however you prefer (Some like to steam it. We prefer to give it a quick boil. Use a microwave bag of frozen if you want. I won't tell anyone.)
  5. Cook the pasta until al dente (I went to school with him. Nice guy). Drain the pasta and return it to the pot you cooked it in (If you didn't cook the pasta in a pot, I guess you're screwed. Just throw everything out and order a pizza)
  6. Now that you have a pot full of drained pasta, add the chicken, broccoli, a generous 1/2 cup of the vinaigrette (you'll have some extra vinaigrette. That's fine. You can use more on the pasta if you'd like or maybe use it as a salad dressing), then add the 1/2 cup grated Parmesan. Give it all a stir until the cheese incorporates. The pot should still be hot enough to melt the cheese.
  7. Garnish with the shredded Parmesan when serving.
Good times!