Showing posts with label taste of home. Show all posts

Tuesday, July 21, 2015

Apple Gingerbread

     Let's get this straight. Calling this recipe "bread" is not accurate. This is leaning well into "cake" territory. Especially because I decided to frost it. Everything is better with frosting. EVERYTHING. New York strip steak? Slap a layer of buttercream frosting on that bastard. Trust me on this. As for this recipe, it is dense and moist (I really hate that word since it can also describe my underwear after a day of yardwork) and delicious (unlike my underwear after a day of yardwork). As always, notes and changes are in blue.
Apple Gingerbread
(via Taste of Home EveryDay Light Meals)

Ingredients
  • 2/3 cup sugar
  • 1/3 cup unsweetened applesauce (we used our own homemade sweetened applesauce made with brown sugar whisky)
  • 1 egg
  • 3 tablespoons molasses
  • 1 cup all-purpose flour
  • 1/2 cup whole wheat flour
  • 2 teaspoons ground ginger 
  • 1 teaspoon baking powder
  • 1 teaspoon baking soda
  • 1 teaspoon ground cinnamon
  • 1/4 teaspoon ground nutmeg
  • 1/8 teaspoon ground allspice
  • 1/2 cup reduced-fat plain yogurt (none on hand, we used sour cream)
  • 1-1/2 cups chopped peeled Granny Smith or other tart apples (we used an equal amount of our home-made Spiked Apples)
  • 1 cup plus 2 tablespoons reduced-fat whipped topping (omitted)
  • 1 can store-bought buttercream frosting. HELL YEAH.
Directions
  1. In a mixing bowl, combine the sugar, applesauce, egg and molasses; mix well. 
  2. Combine the flours, ginger, baking powder, baking soda and spices; add to the molasses mixture alternately with yogurt (sour cream), beating until just combined (because I'm lazy, I just put all the dry ingredients in the bowl for my KitchenAid, put all the wet ingredients in another bowl, then poured the wet ingredients in while the mixer was running). Fold in the apples.
  3. Pour into an 8-inch square baking dish coated with nonstick cooking spray (I used a round dish just to be difficult). Bake at 350F (180C, Gasmark4) for 30-35 minutes or until a toothpick inserted near the center comes out clean (ours took about an hour. I think it may be due to the extra liquid in our canned apples.)
  4. Cool on a wire rack, Cut into squares, top with a dollop of whipped topping (feeling exceptionally lazy, I took a can of buttercream frosting and frosted the entire thing like a cake. Next time I think I'll make some cream cheese frosting for it!)
Good times!

Monday, July 13, 2015

Whole Wheat Bread

     I do believe we've found our favorite wheat bread recipe so far. Most of the wheat bread recipes we've found have resulted in breads that, while tasty, were dense enough to hammer nails. This particular recipe, with a couple changes (firstly we omitted the nuts. The Wife is not a fan of nuts in her bread), resulted in a beautiful loaf of soft, delicious bread with just a hint of sweetness. I used this for a salami and provolone sandwich with some red onion and spicy brown mustard and it was amazing. Truly this bread is fantastic and could easily supplant Shaker or Sally Lunn for our weekly loaf. The first loaf we made didn't even survive two days in our house! You need this bread. Even if you're gluten intolerant, it's worth the pain. As always, notes and changes are in blue.

Whole Wheat Bread
(via Taste of Home Everyday Light Meals)
Ingredients

  • 2-1/4 cups all-purpose flour
  • 1-1/4 cups whole wheat flour
  • 3/4 cup finely chopped walnuts (omitted)
  • 2 tablespoons brown sugar
  • 1 package (1/4 ounce) quick-rise yeast
  • 1 teaspoon salt
  • 1 cup water
  • 1/3 cup reduced-fat plain yogurt (no yogurt on hand, we used sour cream)
  • 2 tablespoons butter
Directions
  1. In a mixing bowl, combine 1 cup all-purpose flour and the rest of the dry ingredients (I used the bowl from my KitchenAid, since that's where I'd be doing the mixing/kneading).
  2. In a saucepan, heat water, yogurt (sour cream) and butter to about 120-130F (I just heated until the butter melted in. Either way, let it cool to 110F or below before you move to the next step)
  3. Pour liquid ingredients into dry ingredients. Beat until smooth. Add enough remaining all-purpose flour to form a soft dough (we always wind up using all the flour). Turn out onto a floured surface; knead until smooth and elastic, about 4 minutes (On the KitchenAid, I used the dough hook the entire time. I turned it on low, added the liquid, then slowly added the remaining flour and let it knead for about 2-3 minutes)
  4. Shape dough into a ball and place on a baking sheet coated with nonstick cooking spray (we used a lightly greased pizza stone). Cover and let rest in a warm place for 20 minutes. (I highly suggest lightly scoring an "X" into the top of the ball with a knife to prevent a mushroom shaped bread. Unless you're into that sort of thing, then do what feels natural)
  5. Bake at 400F (200C, Gasmark 6) for 25-30 minutes, (we generally go about 27 minutes) or until golden brown. Turn out on a wire rack to cool.
Good times!

Saturday, November 15, 2014

Cinnamon Raisin Sweet Rolls

     Let me come out and warn you right off the bat that this recipe is a P.I.T.A. There's a bunch of steps, and rolling and brushing and separating and dividing. It also takes like 3 hours start to finish including rising time. I will also tell you these things are the bomb-diggety, yo. They are just wonderful. They are soft and chewy and gooey and frosted and wonderful. I mean holy shit, wow, are they good. They just are a colossal pain in the ass to make. Totally worth it, though. As always, notes and changes are in blue.

Cinnamon Sweet Rolls
via Taste of Home Everyday Light Meals
Ingredients

  • 2 medium potatoes, peeled and diced
  • 1 package (.25 oz) active dry yeast
  • 1/2 teaspoon plus 1/4 cup sugar, divided (I realized that I have no recollection of including the 1/4 cup sugar. I did not realize it until I re-read the recipe. That tells me it probably wasn't necessary. Or maybe it was and I just forgot. Who knows.)
  • 1/2 cup evaporated milk
  • 1/4 cup honey
  • 3 tablespoons canola oil (omitted)
  • 1 teaspoon salt
  • 1/2 teaspoon butter flavoring (omitted)
  • 4 tablespoons butter/margarine only if you're following my changes
  • 5 cups all-purpose flour
  • 2 egg whites, lightly beaten, divided
  • 1-1/4 cups packed brown sugar
  • 1/2 cup raisins
  • 2 teaspoons ground cinnamon
  • For Glaze
  • 1-1/2 cups confectioners' sugar
  • 3 tablespoons milk
  • 1/2 teaspoon vanilla extract
Directions
  1. In a saucepan, cook potatoes in 1-1/2 cups water until very tender. Drain, reserving 3/4 cup of cooking liquid. Mash potatoes; set aside 1 cup (if you have extra, find some use for it. My suggestion is loading it on a spoon and unceremoniously launching it at your spouse)
  2. In a mixing bowl, dissolve yeast in warm reserved liquid. Add 1/2 teaspoon sugar; let stand for 5 minutes
  3. Add the milk, honey, oil (if using), salt, butter flavoring (or butter), sugar, 2 cups flour (screwed up again here. I totally didn't add any flour in this step. I added it all at once later. No harm done as far as I can tell), and potatoes. Beat until smooth. Stir in enough remaining flour to form a soft dough. Turn out onto a floured surface and knead until smooth and elastic, 6-8 minutes (or just throw the dough hook on the KitchenAid and let it do the work). Place in a bowl coated with non-stick cooking spray, turning once to coat. Cover and let rise in a warm place until doubled, about 90 minutes.
  4. Punch dough down. Turn onto a lightly floured surface. Roll into an 18"x13" rectangle (my rectangle was 20"x14" because I'm a total badass). Brush with some of the egg whites.
  5. Combine brown sugar, raisins and cinnamon; sprinkle over dough to within one inch of the edges. Roll up jelly-style, starting with the long side. Pinch seam to seal. Cut into 18 slices (we ended up with 16 slices because I didn't feel like measuring. I just started cutting shit in half). Place cut side down (technically if you're slicing dough, everything except the ends is cut on both sides) in two 9" square baking pans (I willfully ignored this and used to regular baking sheet which resulted in these wonderful round rolls). Brush with remaining egg white, Cover and let rise until doubled, about 30 minutes.
  6. Bake at 350F (180C, Gasmark 4) for 20-25 minutes or until golden brown (we went 23 minutes and were very pleased). Cool on a wire rack.
  7. Combine glaze ingredients and drizzle over cooled rolls. 
Good times!

Tuesday, July 8, 2014

Bagels!

     For the longest time, our house has had a huge stockpile of bagels. Our local market carries Pepperidge Farm overstock, so we could get bags of six bagels for 99 cents! Our freezer was stuffed. Lately, they haven't been stocking the bagels, so I was forced to take drastic measures and make them myself. I once again turned to my trusty copy of Taste of Home Everyday Light Meals. There just happened to be a pretty good looking bagel recipe. While the bagels are really, really good, they are a bit labor intensive, pushing P.I.T.A. status. It's worth the effort, though. You end up with bagels with a nice crust and a chewy middle. I'm talking deli-delicious. As always, any notes or changes are in blue. 

Bagels!
via Taste of Home Everyday Light Meals
Ingredients

  • 1 tablespoon active dry yeast (2 of the little packets)
  • 1-1/4 cup warm (110-115F) water
  • 3 tablespoons canola oil (we used vegetable oil)
  • 3 tablespoons sugar
  • 3 tablespoons, plus 1/4 cup honey, divided (we omitted the other 1/4 cup of honey, as you'll only use it for boiling the bagels. It just seemed wasteful)
  • 1 teaspoon brown sugar
  • 2 teaspoons salt
  • 1 egg
  • 4-5 cups bread flour (we use 5 cups every time)
  • 2 tablespoons dried minced onion
  • 2 tablespoon sesame seeds
  • 2 tablespoons poppy seeds (omitted. We didn't have any on hand)
  • 2 tablespoons garlic powder
Directions
  1. In a large mixing bowl, dissolve yeast in warm water. Add the oil, sugar, 3 tablespoons honey, brown sugar, salt and egg. Mix well. Stir in enough flour to form a soft dough. Turn out onto a floured surface and knead 8-10 minutes (we mixed and kneaded everything in the KitchenAid. If we have it, we're going to use it until it explodes.) Cover and let rest for 10 minutes.
  2. Shape dough into 12 pieces. Roll each piece into a 10" rope (we just set out a tape measure on the counter to make it simple). Form bagels by overlapping the ends; pinch to seal. Place on a lightly floured surface. Cover and let rest for another 20 minutes.
  3. In a large post bring 8 cups of water and remaining honey to a boil (again, we left out that extra honey. Honey is expensive and I don't think I'm really losing anything by not using it. Maybe once the Bugatti gets back from the shop, we'll try it with the extra honey). Drop bagels, one at a time (that is dumb. The pot will hold three! I boiled three at a time), into boiling water. Boil for 45 seconds. Flip the bagels and boil for another 45 seconds. Remove bagels and allow to drain. 
    See? Plenty of room.
  4. Place bagels on baking sheets lined with parchment paper (2 times in a row I forgot to buy parchment paper. We used foil sprayed with nonstick cooking spray and nothing terrible happened). Sprinkle with the minced onion, sesame seeds and garlic (or whatever topping you choose).
  5. Bake at 425F (220C, Gasmark 7) for 12 minutes. Flip bagels and cook another 5 minutes (the cooking time was pretty accurate, but keep an eye on things as cooking times may vary).
Good Times!


Saturday, June 21, 2014

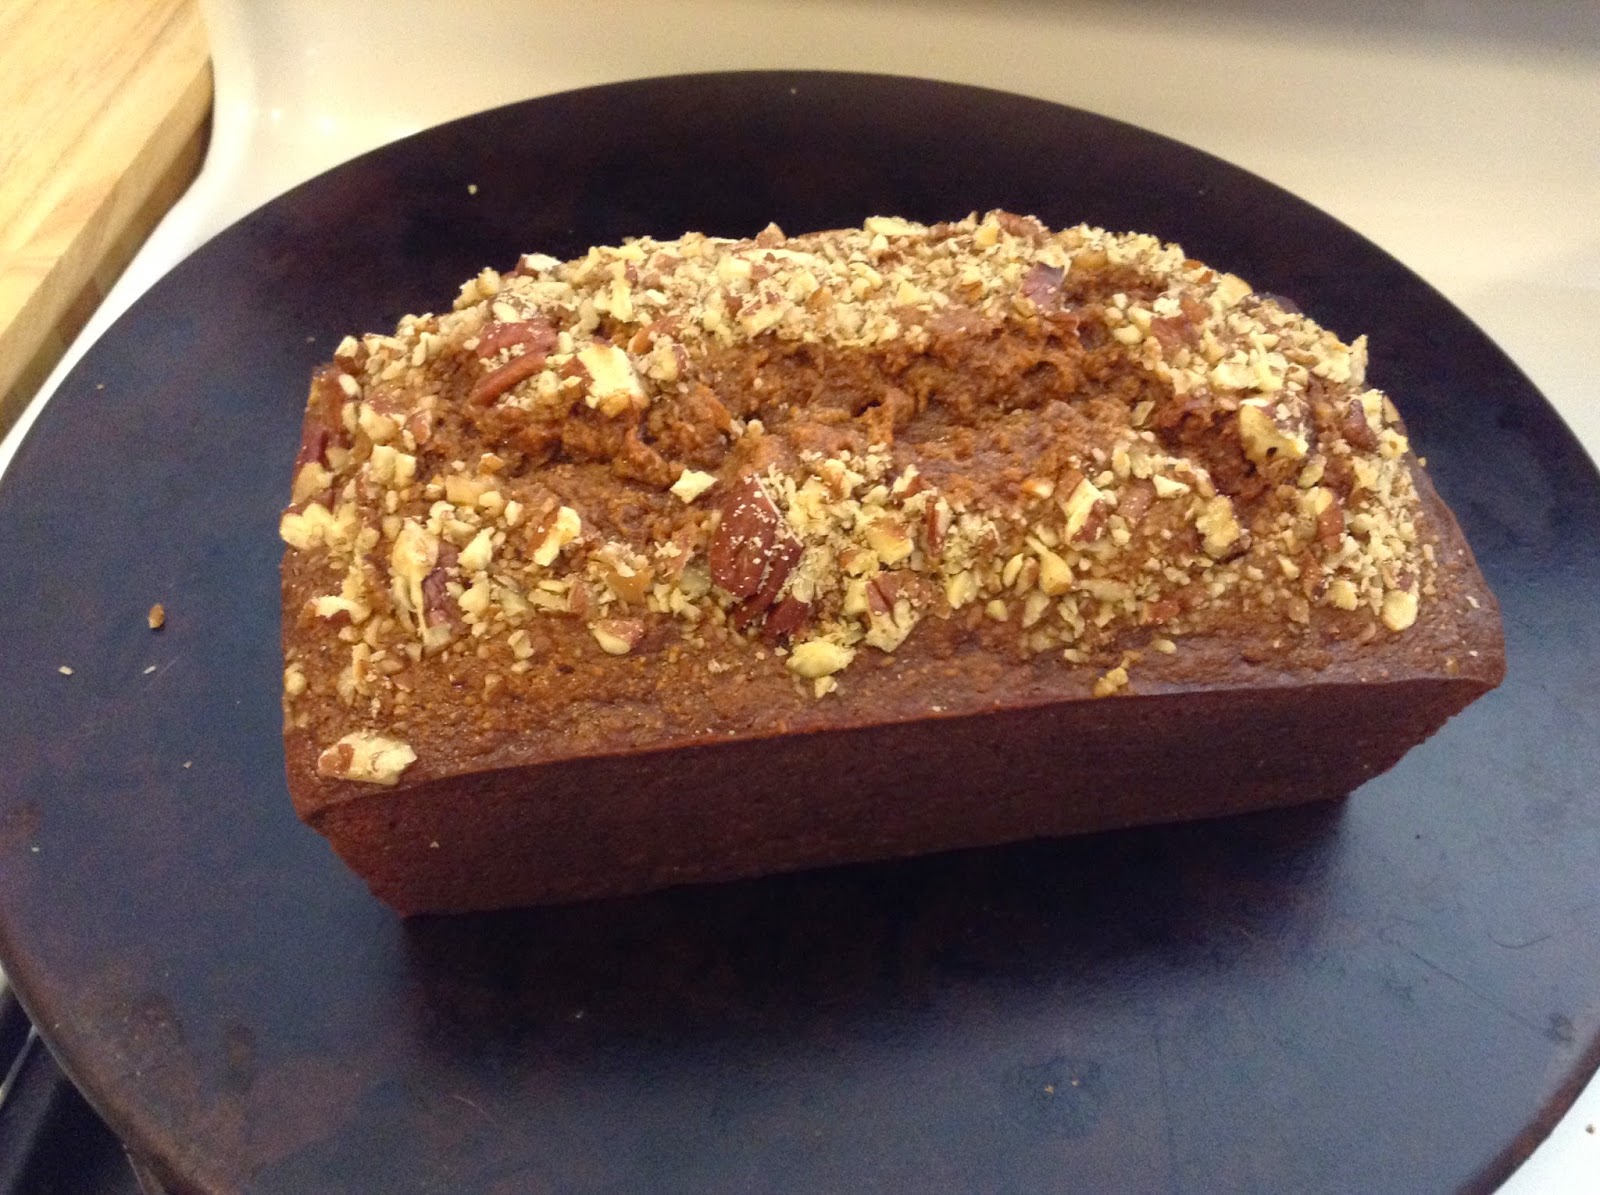
Banana Nut Bread

     There's nothing like remembering you had a bag of bananas sitting on the counter for a week. You go to pick them up and they just sort of snap off their little connectors, exposing the mushy banana. You're screwed. You can't just throw them out; you spent good money on them. The only logical course of action is to make banana bread. You can never go wrong having a loaf or six of banana bread in the house. You may have seen The Wife's Banana Bread Recipe. This is not the same thing at all. Using whole wheat flour seems to really change things up. Both are really good and I'd welcome either on my plate. Make them both and let me know which you like more. As always, notes and changes are in blue.

Banana Nut Bread
via Taste of Home Everyday Light Meals
Ingredients

  • 2 tablespoons butter, softened 
  • 3/4 cup sugar
  • 1 egg
  • 1 egg white (what the hell am I going to do with ONE egg yolk? I just went ahead and used the whole egg)
  • 2 cups (about 4 medium) mashed ripe bananas
  • 1/4 cup unsweetened applesauce (we used our own apple butter)
  • 1/4 cup honey
  • 1 tablespoon vanilla or rum extract (we used vanilla extract and I drank some rum for good measure)
  • 1-1/3 cup all-purpose flour
  • 2/3 cup whole wheat flour
  • 1 teaspoon baking soda
  • 1/2 teaspoon salt
  • 1/4 cup chopped pecans
Directions
  1. In a mixing bowl, beat butter and sugar for 2 minutes or until crumbly. Add egg, then egg white (or just 2 eggs if you're a lazy bastard like me), beating well. Beat on high speed until light and fluffy (It's too bad the recipe totally neglects to mention you're using a mixer. Granted, you might be a robot with speed settings. I just used the Kitchenaid on speed 4. Anything higher than that and it sounds like somebody is trying to land a Harrier in the kitchen and I'll be cleaning batter off the ceiling)
  2. Stir in the bananas, apple sauce, honey and extract. Combine the flours, baking soda and salt; stir into banana mixture until just moistened. 
  3. Pour into 9x5x3 inch loaf pan coated with nonstick cooking spray. Sprinkle with nuts. 
  4. Bake at 325F (170C, Gasmark 3) for 60-65 minutes (this took almost 90 minutes in our oven. Cooking times will vary) or until a toothpick inserted near the center comes out clean.
  5. Cool for 10 minutes before removing to a wire rack.
Good times!

Wednesday, June 18, 2014

Black Bean and Rice Enchiladas

     Call me a purist, but I like my enchiladas filled with meat. When I see fillings like beans and rice I tend to wonder why somebody would put the side dishes inside my main course. However, The Wife wanted to try this recipe and if The Wife ain't happy, nobody's happy. After making these, I will grudgingly admit they are pretty good. Granted, they would be much better if there was shredded chicken or ground beef in there. Next time I may add that along with the regular filling. We made a few notable changes and it resulted in a pretty spicy enchilada. These even served as a breakfast with some scrambled eggs and hot sauce. All in all, we'll call this one a winner and likely add it into the rotation. As always, notes and changes are in blue.

Black Bean and Rice Enchiladas
via Taste of Home Everyday Light Meals

Ingredients
  • 1 green pepper, chopped (we used a yellow bell pepper)
  • 1 medium onion, chopped
  • 3 garlic cloves, minced
  • 1 tablespoon olive oil
  • 1 15-ounce can black beans, rinsed and drained
  • 1 14.5-ounce can diced tomatoes with green chiles (didn't have this. We used a can of fire roasted tomatoes and added a couple teaspoons of chopped pickled jalapenos)
  • 1/4 cup picante sauce (I never have picante in the house. I doctored up a sauce from a leftover can of chipotle peppers in adobo)
  • 1 tablespoon chili powder
  • 1 teaspoon ground cumin
  • 1/4 teaspoon crushed red pepper flakes
  • 2 cups cooked brown rice
  • 8 flour tortillas (8-10 inch size), warmed
  • 1 cup salsa
  • 1 cup shredded cheddar cheeze
  • 3 tablespoons chopped fresh cilantro
Directions
  1. In a large, nonstick skillet, saute pepper, onion and garlic in oil until tender. Add the beans, tomatoes, picante, chili powder, cumin and red pepper flakes; bring to a boil. Reduce heat; simmer uncovered until heated through and mixture thickens. Add rice; cook 5 minutes longer or until heated through.
  2. Coat a baking dish with nonstick cooking spray.
  3. Spoon a rounded 1/2 cup of the filling down the center of each tortilla. Fold sides over fill and roll up (sides? How does a circle have sides? Maybe the top and the bottom side, but I don't think that's what they mean. Possibly the edge? Fold the edges over? That sounds right. I'm guessing they must have failed geometry) Place the rolled-up tortillas in the baking dish. Spoon salsa over each tortilla. Cover with foil and bake at 350F (180C, Gasmark4) for 25 minutes.
    Here's The Wife hard at work assembling the enchiladas.
    Her tiny little hands are perfect for this sort of precision work.
  4. Uncover and sprinkle with cheese and cilantro. Bake 1-2 minutes longer or until cheese is melted.
Good times!

Tuesday, May 13, 2014

Bacon Pecan Sweet Rolls

     It began one morning when I asked The Wife if she wanted bacon for breakfast. She replied that if we did that, we'd have a bunch left over and what would we do with it? The conversation quickly degenerated into a discussion of bacon-related ideas. This recipe is the culmination of those ideas. We never did have bacon for breakfast. I think I had a bagel and lox and she had grits and fried eggs. Anyways, I found a breakfast roll recipe in my trusty copy of Taste of Home: Everyday Light Meals and promptly cannibalized it. The result was well beyond our expectations. These rolls are phenomenally good and frighteningly large. We generally have to split one. Good luck not eating the whole pan. As always, any notes are in blue.
Bacon Pecan Sweet Rolls

Ingredients
  • 1 package (.25 ounce) active dry yeast
  • 1/2 cup warm water (110-115F, 43-46C)
  • 2 cups warm milk (110-115F, 43-46C)
  • 1 teaspoon salt
  • 1 cup whole wheat flour
  • 6 cups all purpose flour
  • 1 cup brown sugar, separated into one 1/2 cup and two 1/4 cup measures
  • 1/2 cup maple syrup, separated into two 1/4 cup measures
  • 1 teaspoon vanilla extract
  • 1-1/2 cup pecans
  • 12 ounces applewood smoked bacon
For Icing
  • 1 cup confectioner's sugar
  • 4 teaspoons milk
  • 1 tablespoon of crumbled bacon and pecans (you'll see where they get crumbled down in the instructions. Remain calm)
Directions
  1. Line two baking sheets with foil. Spray with nonstick cooking spray. 
  2. On one sheet, lay out the bacon in strips. Sprinkle evenly with one of the 1/4 cups of brown sugar
  3. On the other pan, spread the pecans in a single layer. Sprinkle evenly with the other 1/4 cup of brown sugar.
  4. Put the pans in an oven preheated to 350F (180C, Gasmark 4). (things get a bit tricky here. You're going to want to make sure the bacon is getting crispy and the sugar caramelized, without burning the sugar or the nuts. You're going to just have to check in every 5 minutes or so. After 10 minutes, the nuts were as caramelized as they were going to get without burning.The bacon went another 5-10 minutes. If you smell smoke, you fucked up and burned everything. At that point, just stop and fix yourself a drink) When done, remove from oven and allow to cool.
  5. Crumble the bacon and crush the nuts (You could do this by hand if you prefer large pieces. I put mine in a small blender and pulsed it until there were small pieces and the nuts were starting to turn to dust). Reserve 1 tablespoon of this mixture for later use.
  6. In a mixing bowl, dissolve yeast in warm water. Stir in warm milk, salt, whole wheat flour, 1/4 cup maple syrup, vanilla extract and 3 cups of flour. Beat until smooth (I used the Kitchenaid with a dough hook for this step) Add in enough of the remaining flour to form a soft dough (the syrup makes this dough super sticky. I added a full 3 extra cups of flour before the dough was workable) Knead dough 6-8 minutes, until smooth and elastic. Cover and let rise in a warm place until doubled, about 1-1/4 hours.
  7. Punch dough down. Turn onto a floured surface and knead a few more times. Roll into an 18 inch square. Spread bacon and pecan mixture to within 1/2 inch of the edges. Do the same with the remaining 1/2 cup of brown sugar. Evenly pour the other 1/4 cup of maple syrup over the rest (why the hell not? At this point, you might as well just turn in your pancreas) Roll up jelly-roll style. Pinch seam to seal. Cut into 12 pieces. Place in a 13"x9"x2" baking dish coated with nonstick cooking spray. Cover and let rise, about 30 minutes (I suggest covering it loosely with some plastic wrap coated with nonstick cooking spray, then lay a towel over the whole thing. If you put the towel right on top, you're going to get the towel stuck to the rolls. Don't ask me how I know this)
    It took The Wife and I both to roll this thing up
    because the damned thing was sticking to the counter.
  8. Bake at 350F (180C, Gasmark 4) for 30 minutes or until lightly browned (cooking times may vary.) Cool on a wire rack for 30 minutes.
  9. For the glaze, combine confectioner's sugar, reserved bacon/pecan mix and 4 teaspoons of milk. Stir until sugar has dissolved (you may need to add more milk to keep this from being the consistency of Spackle) Pour evenly over the tops of the rolls. 
Good times!

Tuesday, April 22, 2014

Peanut Butter & Jelly Muffins

     Who doesn't love peanut butter and jelly? I suppose people with severe peanut allergies, so if you're one of those people, you might as well move along. I had been considering this recipe for some time, but kept putting it off because I never had the jelly component on hand. Naturally, I bought grape jelly when the title of the recipe called for "strawberry spreadable fruit," which is clearly not the same thing. Turns out I also didn't have crunchy peanut butter, but I feel that's for the best. I think that would have added an odd texture. In the end, I went ahead with the jelly, and as you can see, it leaked a bit and made strange colored crevasses in the muffins. Despite the odd looks, the muffins are damned tasty. I'm calling them a win and will make them again. As always, any notes or changes are in blue.

Peanut Butter & Jelly Muffins
via Taste of Home Everyday Light Meals
Ingredients
  • 2 cups all-purpose flour
  • 2 teaspoons baking powder
  • 3/4 teaspoon baking soda
  • 1/4 teaspoon salt
  • 2 eggs
  • 3/4 cup apple juice concentrate (none on hand. I used apple juice from concentrate, which I feel is certainly close enough)
  • 1/2 cup reduced fat chunky peanut butter (I only had smooth on hand, so I went with that)
  • 1/4 cup fat-free milk (I used 2%, same as always)
  • 3 tablespoons butter, melted
  • 1/3 cup 100% strawberry spreadable fruit (grape jelly is almost exactly the same thing, so I used grape jelly. Plus, the recipe specifically says jelly, not spreadable fruit)
Directions
  1. In a large bowl, combine the flour, baking powder, baking soda and salt. Combine the eggs, apple juice concentrate, peanut butter, milk and butter; stir into dry ingredients just until moistened (it's going to take a bit of work to get the peanut butter to completely incorporate into the batter. I had to run mine in the Kitchenaid until everything was evenly distributed)
  2. Coat 12 muffin cups with nonstick cooking spray. Spoon half of the batter into cups (somebody at Taste of Home needs to work on their sentence structure. This makes is sound like I should fill all the cups, using half the batter. What they mean is "fill each muffin cup halfway with batter. You're welcome. I consider it my civic responsibility to prevent people from making schmucks of themselves). Spoon about 1-1/4 teaspoons spreadable fruit into the center of each muffin (if you use grape jelly it will be about 1 teaspoon per muffin. Go figure that one out); top with remaining batter.
  3. Bake at 350F (180C, Gasmark 4) for 15-20 minutes or until a toothpick comes out clean (these took 20 minutes, and if you manage to poke the toothpick through the jelly/fruit spread, there's no chance it will come out clean. Aim for the actual muffin part. Also, if you use grape jelly, it's going to leak out a bit and may give your muffins some exciting coloration). Cool for 5 minutes before removing to a wire rack to cool completely. 
Good times!


Wednesday, March 19, 2014

Slow Cooker Creamy Ham and Potatoes by The Wife

     In a feat of scheduling wizardry, the school districts where the husband and I work PLUS the school district in which we live all have their Spring Breaks at different times. Last week, Joel was on break. This week, I am on break. I don’t even know when our town has break; I just know it wasn't this week or last week because the buses were running. Anyway, my being home alone means I’m expected to do some cooking. Joel requested ham and potatoes (we've been working through a ten pound Honey Baked ham for 2 weeks now), and I found this REALLY easy Creamy Ham and Potatoes recipe (as always, notes and changes are in blue):

Slow Cooker Creamy Ham and Potatoes
via Taste of Home Slow Cooker
Ingredients
  • 4 medium red potatoes, thinly sliced (Potatoes are potatoes. We didn’t have any red ones, so I used what we did have – I don’t even know what they were. To thinly slice the potatoes, I used the mandolin.)
  • 2 medium onions, finely chopped (Mine were of the smaller variety. Regardless, they had me crying.)
  • 1 ½ cups cubed fully cooked ham
  • 2 tablespoons butter
  • 2 tablespoons all-purpose flour
  • 1 teaspoon ground mustard (Yeah…Somehow that’s not what I read this morning. I used a teaspoon of spicy brown mustard. No harm, no foul.)
  • ½ teaspoon salt (Omitted. I think the ham and the can of cream soup contributes plenty of salt, thank you.)
  • ½ teaspoon pepper
  • 1 can (10 ¾ ounces) condensed cream of celery soup, undiluted (I made an executive decision here. This is called Creamy Ham and POTATOES. I had a can of cream of POTATO soup. That’s what I used even though cream of celery was available.)
  • 1 1/3 cups of water (Just fill the soup can with water.)
  • 1 cup (4 ounces) shredded cheddar cheese – optional (Cheese is never optional.)

Directions
  1. In a 3-qt slow cooker (I actually used the right size!), layer potatoes, onions, and ham.
  2. In a large saucepan, melt butter. Stir in flour, mustard, salt (omitted), and pepper until smooth. Combine soup and water gradually into flour mixture. Bring to a boil; cook and stir for 2 minutes or until thickened and bubbly. Pour over ham.
  3. Cover and cook on low for 8-9 hours (8 hours was more than enough time for the potatoes to completely disintegrate) or until potatoes are tender (disintegrated). If desired, sprinkle with cheese before serving (only a Communist doesn't desire cheese).
Good times!


Monday, March 10, 2014

Chocolate Peanut Butter Cookies

     I don't know why I don't bake cookies more often. Actually, I know exactly why: the wife and I tend to stand in the kitchen and stuff them mindlessly into our faces until we swell up like ticks. Fortunately, I've got my trusty copy of Taste of Home Everyday Light Meals to hook me up with 90 calorie cookies! If you like the chocolate/peanut butter combo, these are right up your alley. The peanut butter flavor really comes through. If you wanted to really do peanut butter overload, you could always swap in peanut butter chips! As always, notes and changes are in blue.

Chocolate Peanut Butter Cookies
via Taste of Home Everyday Light Meals
Ingredients

  • 1 cup chunky peanut butter (I used creamy. Fair warning, if you use natural peanut butter, the batter will be extremely oily. This is nothing to worry about; the cookies will come out fine)
  • 1/4 cup canola oil (I used corn oil)
  • 3/4 cup packed brown sugar
  • 1/2 cup white sugar
  • 2 eggs
  • 1 tablespoon vanilla extract
  • 1 cup all-purpose flour
  • 1/3 cup baking cocoa
  • 1 teaspoon baking soda
  • 1/2 teaspoon salt
  • 1/2 cup miniature chocolate chips (I used full sized and learned why I shouldn't. The cookies are pretty small. Full sized chips tend to just fall out when you're scooping the dough. Either make the cookies bigger or use the miniature chips).
Directions
  1. In a large mixing bowl, combine peanut butter and oil. Add brown sugar and white sugar; mix well. Add vanilla an eggs; mix well (I did all the mixing in the Kitchenaid).
  2. In  another bowl, combine flour, cocoa, baking soda and salt. Add to peanut butter mixture; mix until blended. Dough will be sticky (as I said, my dough was more oily than sticky). Stir in chocolate chips.
  3. Drop by rounded teaspoons 2 inches apart on ungreased baking sheets. Flatten slightly with a glass (I have made these cookies three times and only now have I noticed the part with the glass. Obviously, you can just skip that. No need to dirty a glass unless it's to put booze in it).
  4. Bake at 350F (180C, Gasmark 4) for 8-10 minutes or until set and tops are cracked (if you want a softer cookie, take them out at 8 minutes. If you prefer a crunchy cookie, go the full 10) Cool for 2 minutes before removing to wire racks (no fooling with this part. When the cookies come out, it's going to look like they're not done. They will be notably soft. They will firm up during the cooling).
Good times!

Tuesday, March 4, 2014

Chocolate Chip Banana Muffins

     I am a sucker for deals. One of my favorite deals is the sack of ripe bananas at the grocery store. They will pack nearly 3 pounds of ripe bananas into a sack and charge you one dollar. How can I walk past that? Most of the time we end up dehydrating them for banana chips. Sometimes they end up in banana bread. This time they ended up in muffins with chocolate chips. The recipe for these muffins came from my much abused copy of Taste of Home Everyday Light Meals. These muffins came out great. They were moist with a great banana flavor. These will serve as a great quick breakfast during the work week. As always, any notes or changes are in blue.


Chocolate Chip Banana Muffins 
via Taste of Home Everyday Light Meals
Ingredients
  • 3/4 cup all-purpose flour
  • 3/4 cup whole wheat flour
  • 1/2 cup wheat bran (this is on the master list of Shit That Is Never In My Pantry. I substituted with 1/2 cup additional whole wheat flour)
  • 1/2 cup packed brown sugar
  • 3/4 teaspoon baking powder (am I the only one who repeats "baking powder, baking powder" to themselves as they walk to the pantry, then come back to the counter with baking soda anyway?)
  • 1/2 teaspoon salt
  • 2 eggs, lightly beaten
  • 1/4 cup fat-free milk (you might as well just use water at that point. I used 2%)
  • 1-1/3 cup (2-3 medium sized) mashed ripe bananas 
  • 1/3 cup unsweetened applesauce (we used our own homemade applesauce, which is sweetened. I see no harm in sweetened applesauce here unless you have a dietary concern about the additional sugar)
  • 1 teaspoon vanilla extract
  • 1/2 cup miniature chocolate chips (we used an additional 1/4 cup, but did not add it to the batter. We stuffed those chips in our faces as we made these muffins)
  • 1/3 cup chopped pecans (omitted. We're not huge fans of nutty breads or muffins)
Directions
  1. Preheat oven to 375F (190C, Gasmark 5)
  2. In a large bowl, combine the first seven ingredients (don't think I didn't consider being an asshole and listing the ingredients out of order up top just to screw things up. I didn't. Or did I?)
  3. In another bowl, combine the egg and milk; stir in the bananas, applesauce and vanilla. Stir into dry ingredients until moistened. Stir in chocolate chips. 
  4. Coat muffin pans with nonstick cooking spray; fill 3/4 full with batter. Sprinkle with pecans (if using pecans. Otherwise just jam another handful of chocolate chips into your mouth)
  5. Bake for 18-22 minutes or until a toothpick comes out clean (this time ours finished in 20 minutes. Cooking times may vary). Cool for 5 minutes before removing from pan to a wire rack.
Good times!

Monday, February 24, 2014

Whole Wheat Bread

     Shockingly, I once again turn to my well-worn copy of Taste of Home Everyday Light Meals for a bread recipe. This time it's a simple whole wheat bread. The original recipe called for walnuts, but as you may know, The Wife isn't a big fan of nuts in her bread. I tend to agree with her. I think this bread is fine without the added texture. This makes for a rustic, crusty loaf that's great with soups, or toasted and covered in butter at breakfast. One warning, if the bread doesn't cook evenly, it will rise funny in the oven and end up looking like a mushroom cloud. It still will taste fine, it will just look goofy. A friend has told me that scoring an "X" about 1/2" deep in the top of the dough before baking will prevent that from happening. As always, any notes or changes are in blue.


Whole Wheat Bread
via Taste of Home Everyday Light Meals
Ingredients

  • 2-1/4 cup all-purpose flour
  • 1-1/4 cup whole wheat flour
  • 3/4 cup finely chopped walnuts (omitted)
  • 2 tablespoons brown sugar
  • 1 package (1/4 ounce) quick-rise yeast
  • 1 teaspoon salt
  • 1 cup water
  • 1/3 cup reduced-fat plain yogurt
  • 2 tablespoons butter
Directions
  1. In a mixing bowl, combine 1 cup all-purpose flour, whole wheat flour, nuts (if using), brown sugar, yeast and salt.
  2. In a saucepan, heat the water, yogurt and butter to 120-130F. Add to dry ingredient; beat until smooth.
  3. Stir in enough remaining all-purpose flour to form a soft dough (we wound up using the full amount of flour listed in the ingredients). Turn out onto a floured surface; knead until smooth and elastic, about 4 minutes (I just ran it in the Kitchenaid with the dough hook), Do not let rise.
  4. Shape dough into a ball; place on baking sheet coated with nonstick cooking spray. Cover and let rest in a warm place for 20 minutes (I know for sure that if I cover this dough and put it in a warm place, it's going to rise. They just told me not to let it rise. Is this some sort of test? What do I do if it starts to rise? Talk it down?) 
  5. Bake at 400F (200C, Gasmark 6) for 25-30 minutes or until golden brown (we went close to 40 minutes. Baking times may vary). Remove from pan to cool on wire rack. 
Don't forget to cut an "X" about 1/2" deep in the top before baking
to prevent the loaf from looking like a nuclear bomb test.
Good times!

Sunday, February 2, 2014

Cranberry Cheese Danish

     I'm not sure what compelled me to try out this recipe. A quick look will tell you this recipe is going to be a Pain In The Ass. However, my love for Danish trumps my laziness. I decided to give this recipe a go. It originally called for blueberries, which I did not have on hand. I wound up using some cranberries we had in the freezer. You could certainly use raspberries or blackberries. The end result will be well worth it. This is a great bit of pastry. The cranberries complemented the lemon icing perfectly. It was everything I could do to keep the wife from just standing at the counter and eating the whole thing at once. As always, any notes or changes are in blue.

Cranberry Cheese Danish
via Taste of Home Everyday Light Meals
Ingredients
  • 3/4 cup 1% cottage cheese (there's no telling what the other 99% is)
  • 1/3 cup sugar
  • 1/3 cup 1% milk (I used 2% just to be difficult)
  • 1/4 cup canola oil (I used corn oil)
  • 1 teaspoon vanilla extract
  • 2 cups all-purpose flour
  • 1/2 teaspoon salt
Filling
  • 4 ounces reduced-fat cream cheese (as always, I used Neufchatel)
  • 1/4 cup sugar
  • 1 egg, separated 
  • 1 teaspoon grated lemon peel (I'm assuming they meant fresh. I didn't have fresh. I used 1/2 teaspoon dried lemon peel from a jar)
  • 1 cup fresh or frozen blueberries (we substituted cranberries we inexplicably stashed in the freezer some time back)
  • 1 tablespoon water
Glaze
  • 1/2 cup confectioners' sugar
  • 2 teaspoons lemon juice (that is NOT enough liquid to do anything other than give you a chewy ball of sugar. It took us 4 teaspoons of lemon juice to get the sugar into a usable consistency. The extra lemon flavor worked great with the cranberries, too. This goes to prove that I'm a friggin' genius)
Directions
  1. In a blender or food processor, cover and process cottage cheese until smooth (did I just really get told to put the lid on the blender or food processor before running? I can't even turn the damned processor on with the lid off! Do they think I'm stupid? Do they think I'm going to say, "Holy shit! I think I'll run the blender with the lid off!" *BLAM!* "Fucking A! Look at the the cottage cheese on the ceiling! That's great!") Add sugar milk, oil and vanilla; process until smooth (Wait! They didn't tell me to take the lid back off! How the hell am I going to get the rest of the shit in there?)
  2.  Combine the flour, baking powder and salt; add to cheese mixture. Process until dough forms a ball (I was leery about doing this in the processor. I transferred it all to the Kitchenaid). Dough will be sticky. Turn onto a floured surface; knead 4-5 times. Place in a bowl; cover and refrigerate for 30 minutes.
  3. In a mixing bowl, beat cream cheese and sugar until smooth. Add egg yolk, lemon peel and vanilla; mix well. 
  4. Turn dough out onto a 17"x13" piece of parchment paper. Roll dough into a 16"x12" rectangle. Transfer with paper to a baking sheet. Spread cream cheese mixture lengthwise in a 3-1/2" wide strip down the center of the dough; sprinkle with berries. 
    Looking berry good! I'm not apologizing for that pun.
  5. On each long side, cut 1" wide strips about 3-3/4" into center. Fold alternating strips at an angle across berries. Pinch ends to seal and tuck under (I tucked on the top just to be an asshole). Beat egg white and water; brush over dough.
  6. Bake at 400F for 20-22 minutes or until golden brown (we went about 25 minutes. Cooking times may vary). Remove to a wire rack.
  7. Combine glaze ingredients; drizzle over warm pastry. Refrigerate leftovers.
Good times!

Saturday, December 28, 2013

Shells with Bell Peppers and Feta

     If I ever lose my copy of Taste of Home Everyday Light Meals, I'm hosed. I am constantly digging through this recipe book for recipes and ideas. We really liked this recipe. It's super easy to put together and leaves plenty of room for personal interpretation. It's also fairly healthy. This is one of those meals that is perfect for the middle of a busy week. As a bonus, it's good cold, too! As always, any notes or changes are in blue.
Shells with Bell Peppers and Feta
via Taste of Home Everyday Light Meals
Ingredients
  • 2-1/4 cups uncooked penne (we used 5 cups of medium shells)
  • 3/4 cup chopped onion 
  • 1 tablespoon olive oil
  • 3 cloves garlic, minced
  • 1 cup chopped sweet red pepper
  • 1 cup chopped green pepper
  • 1/4 cup sliced ripe black olives (you bet. Ripe from the can.)
  • 1 teaspoon dried oregano
  • 1/4 teaspoon salt
  • 1/8 teaspoon cayenne pepper (I never understand measurements like this. 1/8 teaspoon? Really? Why not hold the jar of cayenne next to the bowl and call it a day? I used a full teaspoon)
  • 1/4 cup water
  • 1/2 cup crumbled feta cheese
Directions
  1. Cook and drain pasta according to package directions (It's important to use the right package for directions. You don't want to accidentally cook your pasta according to the directions on a package of suppositories)
  2. In a nonstick skillet, sautee onion in oil for 1-1/2 minutes. Add garlic; cook 30 seconds longer.
  3. Add the peppers; cook and stir for 2-3 minutes or until vegetables are tender.
  4. Stir in olives, oregano, salt, and cayenne. Add water; cook and stir until mixture comes to a boil. Stir pasta into skillet. Remove from heat. Stir in cheese. 

Saturday, December 21, 2013

Slow Cooker Parmesan Potato Soup

     The Wife loves her soup. It doesn't matter the weather. It could be 115F outside and she'll ask me to make soup. She'll also be drinking hot coffee, so I may be dealing with some larger defect here. Anyways, she loves soup, so I make soup. This particular recipe came out of Taste of Home Slow Cooker.  This is a great cold weather soup. Big hunks of potato, lots of bacon and a creamy broth. One bowl of this and I'm full. But not for long because I'm also lactose intolerant and this uses a goodly amount of heavy cream. I'll leave you to come up with your own imagery. As always, any notes or changes are in blue.


Slow Cooker Parmesan Potato Soup
via Taste of Home Slow Cooker
Ingredients

  • 8 medium potatoes, peeled and cut into 1/2 inch cubes (I actually peeled the potatoes this time!)
  • 1 large onion, chopped
  • 1 jar (7 ounces) roasted red peppers, drained and chopped (make sure you peel off any skin on the peppers unless you like it floating around in the soup)
  • 1 small celery rib, chopped
  • 6 cups chicken broth
  • 1/2 teaspoon garlic powder
  • 1/2 teaspoon seasoned salt
  • 1/2 teaspoon pepper
  • 1/8 teaspoon rubbed sage
  • 1/3 cup all-purpose flour
  • 2 cups heavy whipping cream, divided
  • 1 cup grated Parmesan cheese, divided
  • 8 bacon strips, cooked and crumbled
  • 2 tablespoons minced fresh cilantro (we went with a teaspoon of dried)
Directions
  1. In a 5 or 6 quart slow cooker, combine the vegetables, broth and seasonings (naturally, I attempted to load it all in a 2.5 quart cooker. It was fine until the part where I had to add more liquid). Cover and cook on LOW for 5-6 hours or until vegetables are tender.
  2. In a small bowl, combine flour and 1/2 cup cream until smooth; add to slow cooker. Stir in 3/4 cup cheese, bacon, cilantro and remaining cream. Cover and cook for 30 minutes or until slightly thickened. 
  3. Ladle into bowls; sprinkle with remaining cheese (I always love recipes that instruct you to plate your food. You know, in case you were planning on just standing there at the stove shoveling soup into your craw right out of the pot. Maybe you were. I'm not here to judge).
Good times!

Wednesday, December 4, 2013

Lentil Bread

     It's been a while since I've tried a new bread recipe. I've been leaning pretty heavily on that Sally Lunn recipe. I've been wanting to try this recipe, but I never had lentils on hand. This is a great sandwich bread. It has a nice, sturdy crust and a soft inside. You can just get a hint of the lentil taste in the bread. I don't think you'll want to make French Toast with this bread; this is more of a straight up sandwich bread. Give it a try and see what you think. As always, notes and changes are in blue.

Lentil Bread
via Taste of Home Everyday Light Meals
Ingredients
  • 3/4 cup lentils, rinsed
  • 1-1/2 cups water
  • 4-1/2 teaspoons finely chopped onion (you're going to be running this through a food processor, you don't need to chop finely. Work smarter, not harder)
  • 1 garlic clove, minced (again, food processor. I just threw the damned thing in whole)
  • 2 packages (.25 ounce each) active dry yeast
  • 1 cup warm water (110-115F)
  • 1/4 cup olive oil
  • 1/4 cup sugar
  • 1 tablespoon grated Parmesan cheese
  • 1 tablespoon salt
  • 1 cup whole wheat flour
  • 6 to 7 cups bread flour (I hope that's the same thing as all-purpose flour, because that's what I used)
Directions
  1. In a saucepan, combine lentils, water, onion and garlic; bring to a boil. Reduce heat; cover and simmer for about 30 minutes or until lentils are tender. Cool slightly. Transfer mixture to a blender or a food processor. Cover and process until smooth. Cool to 110-115F.
  2. In a mixing bowl dissolve yeast in warm water. Add the milk, lentil mixture, oil, sugar, Parmesan cheese, salt, whole wheat flour and 3 cups bread flour. Beat until smooth. Stir in enough remaining flour to form a soft dough (I wound up using about 6-1/2 cups)
  3. Turn onto a floured surface (do it. The dough will be a bit sticky). Knead until smooth and elastic, about 6-8 minutes (as always, I let the Kitchenaid do the hard work. Feel free to do it by hand if you're the industrious type)
  4. Place in a bowl coated with nonstick cooking spray, turning once to coat top. Cover and let rise in a warm place until doubled, about 1 hour.
  5. Punch dough down. Turn onto a lightly floured surface. Divide into thirds; shape into loaves. Place in three greased 9"x5"x3" loaf pans. Cover and let rise until doubled, about 30-40 minutes. 
  6. Bake at 375F for 35-45 minutes or until golden brown (mine took about an hour!). Remove from pans to wire racks to cool. 
Good times!

Sunday, November 17, 2013

Pork Chops in Mushroom Sauce

     One of my biggest complaints about slow-cooker recipes is they often end up tasting very similar. I've had chicken recipes that taste like beef recipes that taste like pork recipes. It doesn't matter what the ingredients are, the meals all end up with an inoffensive flat taste. That's why this particular recipe took us by surprise. While the recipe ends up uniformly beige, there's actually a definable flavor. I imagine that's due to the Dijon mustard. Regardless of the reason, this made for a very tasty meal. As always, any notes or changes are in blue.

Pork Chops in Mushroom Sauce
via Taste of Home Slow Cooker
Ingredients
  • 1 can (10.75 ounce) condensed cream of mushroom soup, undiluted
  • 1/4 cup chicken broth
  • 1/4 cup country-style Dijon mustard (never in my life have I heard of "country-style" Dijon mustard. I'm calling bullshit and just using regular old Dijon)
  • 1 garlic clove, minced (feeling lazy, just used 1 teaspoon minced from a jar)
  • 1/2 teaspoon dried thyme
  • 1/4 teaspoon salt
  • 1/4 teaspoon pepper
  • 6 medium red potatoes, sliced (I used russet potatoes and everybody survived)
  • 1 medium onion, halved and thinly sliced
  • 6 boneless loin pork chops (5 ounces each) (I used 5. SO THERE)
  • 8 ounces sliced mushrooms of your choice
Directions
  1. In a 5 quart slow cooker, combine the soup, broth, mustard, garlic and seasonings. (I managed to stuff everything into a 2.5 quart slow cooker)
  2. Stir in potatoes and onions; top with pork chops
  3. Cover and cook on LOW for 3-1/2 to 4-1/2 hours or until meat is tender
"Sir, you are being chauffeured around in a $250,000 Rolls Royce. Buy your own damned mustard."
Good Times! 

Wednesday, November 13, 2013

Slow Cooker Thai-Style Peanut Chicken

     I'm on the fence about peanut butter based recipes. I do enjoy a good satay, but too much peanut butter can overwhelm me and make me run for some white bread and grape jelly. This recipe works around that by using an alarming amount of teriyaki sauce and red pepper flakes. This has, as the chefs would say, umami out the asshole. We swapped in chicken for the pork and were very happy with the results. As always, changes and notes are in blue.

Slow Cooker Thai-Style Peanut Chicken
via Taste of Home Slow Cooker
Ingredients

  • 2 pounds boneless pork loin chops (we decided to use an equal amount of chicken)
  • 1/4 cup teriyaki sauce
  • 2 tablespoons rice vinegar
  • 1 teaspoon crushed red pepper flakes
  • 1 teaspoon minced garlic
  • 1 tablespoon cornstarch
  • 1/4 cup cold water
  • 1/4 cup creamy peanut butter
  • Hot cooked rice
  • 1/2 cup chopped green onions
  • 1/2 cup dry roasted peanuts (omitted)
  • Lime juice, optional
Directions
  1. Place meat in a 3 quart slow cooker (we used a 2.5 quart cooker. NOW WHAT!). In a small bowl, combine the teriyaki sauce, vinegar, pepper flakes and garlic; pour over meat. Cover and cook on LOW for 6 hours or until meat is tender.
  2. Remove meat and cut into bite-sized pieces; keep warm (the meat, not you. I suppose you could put on a sweater if you're chilly). Skim fat from cooking juices, transfer juices to a small saucepan. Bring liquid to a boil. 
  3. Combine cornstarch and water and stir until smooth. Gradually stir into the pan. Bring to a boil; cook and stir for 2 minutes or until thickened. Stir in peanut butter and meat. 
  4. Serve with rice. Sprinkle with onions and peanuts (if you really want them). Drizzle with lime juice if desired.
Tie Peanuts...Get it?
Good times!