Showing posts with label bread. Show all posts

Sunday, June 28, 2020

Cottage Cheese Bread

It's been a long time since I've bought a loaf of bread from the store. Baking fresh bread on a Sunday has become a favorite activity in my house. The Spud loves to help with the dry ingredients and is mystified by the rising of the dough. She is under the impression that if she kisses the dough, that provides the magic to make it rise for baking. No clue where she got that idea. We like to keep a basic loaf available for sandwiches and toast. Normally I used a Dill-Seed bread recipe, and just left out the dill. However, that, and many other of our standard loaf recipes called for whole-wheat flour. If the pandemic lockdown has caused any odd impact, it's that I absolutely can't find whole-wheat flour anywhere in two counties. I wound up altering the recipe and came up with a very serviceable white bread that is great for sandwiches and toasts very well.

Cottage Cheese Bread
adapted from James Beard's Dill-Seed Bread recipe

Ingredients
  • 1 package fast-rising yeast
  • 2 teaspoons sugar
  • 1/2 cup warm water (100-115F, 38-46C) 
  • 1 cup cottage cheese at room temperature
  • 1 egg, beaten
  • 2 teaspoons salt
  • 1/4 teaspoon baking soda
  • 3 cups white flour
Directions
  1. In a large bowl, dissolve the yeast and sugar. Proof for about 5 minutes.
  2. Add cottage cheese and egg to the yeast mix.
  3. In a large bowl, mix flour, salt and baking soda.
  4. Add flour to wet mix and mix/knead until you get a slightly sticky, but elastic dough (I did this in my Kitchenaid and it took about 4-5 minutes to get the right consistency. By hand it would likely take 10 or more minutes)
  5. Put dough in a greased bowl, cover, and let it rise to double in size (about an hour)
  6. Punch down dough and place in a greased loaf pan. Cover and allow to rise to double size again (about another hour)
  7. With a super sharp knife, run a slit down the center of the loaf.
  8. Place in a preheated oven at 375F (190C, Gasmark 5) for 40 minutes.
  9. Cool on a wire rack
Good times!

Sunday, March 22, 2020

Homebound Day #6: I Get Productive

Days are already starting to blend together, so I have to make sure I have some time markers. One of my standard time markers was Sunday. Normally, it would be marked by weeping that I had to go to work the next day, but that doesn't look to be a real concern for some time. So I have to remember, Sundays Are For Baking. I figure I'll just keep up with my habit of baking something every Sunday.

The baking took the form of two loaves of sour cream bread. They hold well and are great for sandwiches. Plus, it's a very simple bread to make.
And if you let your daughter help, you get to add 25 drops of blue food coloring.
While the bread was rising, we through a couple of things in the slow cooker. We used the last of our smoked chicken for a Faux Pho

This was unbelievably good.
We also threw a pork loin, onion, and some cucumber-honeydew preserves in another cooker. No pictures, as there's not much to look at. It will likely become carnitas, or possibly a stir fry or soup. This is our multi-use food for the week.
 
Finally, The Wife reminded me that we had a single pie crust in the fridge, as well as a couple of containers of  strawberries that were not long for this world. 
So naturally we made a strawberry pie.
Not much to look at, but tasty.
And that's where we are right now. Food supplies are still good. We still have a couple of gallons of milk and plenty of toilet paper and napkins. Fairly likely we will make the two week mark without needing to go our for anything. Past that, we will run out of milk and possibly one or two other minor things. If I keep baking, flour may be a concern. 
Stay Safe!

Almost forgot, I made coffee smoothies for breakfast:


Friday, March 20, 2020

Homebound Day #4: Shelter In Place

So as we enter into day 4 of homebound, we get the notice. The Governor will be ordering to "shelter in place" until further notice. Pretty much you can leave for food, medicine, or doctor visits. Other than that, don't go anywhere if you don't have to. We actually did have to go out, as our dog has Addison's and needs regular injections of a steroid or his kidneys eventually fail and he dies. Other than that, he's the picture of health. He's had Addison's for about 10 years
Look at that face. He's worth it.
We went into town, took care of it, then headed back home. Many places were empty, but the Sam's Club was absolutely jam-packed.

Breakfast was once again a simple affair of toast with butter and Vegemite and a fried egg. The Spud had a toaster strudel. We skipped lunch as we were getting ready to head out for the dog appointment. The daughter had another tray of lunchmeat, fruit and yogurt with a cookie. The Wife had to make a trip to her school for some supplies. While I waited, I got peckish and had a snack:

Sardines in mustard sauce and Ritz crackers. Don't judge me.
The Wife returned home and we had a pretty nice dinner. Corn on the cob, dill bread, pickled dilly beans, and a smoked chicken that one of my student's parents gave me as a gift for rehabilitating his son. This dad does BBQ competitions, so this chicken was crazy good. For dessert, we polished off the rest of the pineapple cake.
Who said teaching is without reward?
There was plenty of chicken left, so I stripped the carcass and stored the meat, and then did what any survivalist would do during the apocalypse: I boiled the carcass to make stock, which I will freeze for later use. 
Celery seed, onion salt, pepper were added.
Bear Grylls can bite me.
So now we head into the weekend and a serious lockdown. I'm looking to download Tabletop Simulator and finding some people willing to do the same, so I can play games with people. I'm also looking at setting up an RPG group to play online.
Stay safe!


Tuesday, September 5, 2017

Slow Cooker Honey Wheat Bread

     I do love my slow cookers. I use them for so many different things. However, there was one thing I never thought to try: bread. It seemed to me that there would be no possible way to bake bread in a slow cooker without it ending up super damp and mushy. Not surprisingly, I was totally wrong. I've managed to find a couple recipes that turn out some surprisingly good bread. I love it because it means I can bake on a hot day without having to turn on the oven! This particular bread has a touch of sweetness and is a great breakfast bread. It actually manages to have a good crust and a super nice crumb. Best of all, I was able to make it without using their method of putting a second container into the cooker! Fair warning, I needed considerably more flour than the recipe called for. As always, notes and changes are in blue. 

Slow-Cooker Honey Wheat Bread
(via Slow Cooker Magic in Minutes)
Ingredients

  • 3 cups whole-wheat flour (I needed considerably more than this)
  • 2 cups warm milk
  • 3/4-1 cup all-purpose flour (I needed considerably more than this)
  • 1/4 cup honey
  • 2 tablespoons canola oil
  • 1 envelope active dry yeast
  • 3/4 teaspoon salt
Directions
  1. Spray a 1-quart casserole, or other high sided baking pan with nonstick cooking spray (totally didn't to that. I just lined a 1.5 quart slow-cooker with parchment paper and sprayed it with non-stick spray)
  2. Combine 1-1/2 cups whole-wheat flour, milk, 1/2 cup all-purpose flour, honey, oil, yeast, and salt in a large bowl. Beat at low speed of electric mixer 2 minutes. 
  3. Add remaining flour. If mixer has difficulty mixing dough, mix in remaining flour. (Holy crap did I have difficulty. The amount of flour called for in the recipe will deliver a sticky mess. I needed close to another cup and a half of flour. I just did a 50/50 mix of flours to make up this difference. Just don't freak out when the original recipe doesn't yield a nice, smooth dough.)
    Mix until dough is smooth and elastic (using my KitchenAid and dough hook, this took about 6-7 minutes in total)
  4. Transfer to prepared dish. Place dish in slow-cooker. (As I mentioned in step 1, I was not going to do that. I just shaped the dough into a ball and put it into the parchment lined slow-cooker). Cover and cook on HIGH 3 hours or until edges are browned.
    (If you are doing it my way, here are a few tips. After 3 hours, take out the loaf, flip it over, lay a paper towel over it, put the cover back on and let it go another 45 minutes to hour. This will get rid of any moisture on the top and give the top a bit of a crust without having to throw it under the broiler at the end.
  5. Turn out on a wire rack to cool. 
Good times!


Sunday, August 14, 2016

Applesauce Cheddar Quick Bread

     We eat an alarming amount of bread in this house. The Wife loves her bread. The Spud really, really likes her bread. I certainly enjoy bread. We embrace gluten lovingly and with all our beings. We love it enough that we eventually started using the hashtag #sundaysareforbaking. That makes it serious. I think. Maybe not. This particular bread is from an ancient canning book that still gets a lot of mileage in our house. It's a great quick bread. If you make your own applesauce, which we do, it's even better. The timing on the bread is a little iffy. It took us way longer to bake than the book called for. This is a fantastic breakfast bread, spread with a little sweet butter or marmalade. Perhaps top it with my Mulberry Jam? I imagine it would make a dynamite peanut butter and jelly sandwich, too. As always, notes and changes are in blue.

Applesauce Cheddar Quick Bread
via BH&G Home Canning Cook Book
Ingredients

  • 1/2 cup butter
  • 2/3 cups sugar
  • 2 eggs
  • 2 cups all-purpose flour
  • 1 teaspoon baking soda
  • 1/2 teaspoon salt
  • 1 cup applesauce (why not try my Peach Bourbon Applesauce!)
  • 3/4 cup shredded Cheddar cheese
  • 1/2 cup chopped walnuts (omitted. The Wife is not a huge fan of nuts in her bread.)
Directions
  1. Cream butter and sugar until light and fluffy (maybe I'm not doing this for long enough, because I have never been able to achieve light and fluffy consistency. I always end up with something on par with cake frosting)
  2. Add eggs, beat well.
  3. In a separate bowl, stir together flour, soda and salt. Add to the creamed butter mix. Stir in the applesauce, cheese and nuts (if using)
  4. Turn into a greased loaf pan (what am I, a wizard? I never got a Hogwarts letter so I'm not really up on my Transfiguration and Polymorph spells. How about I just dump the mixture into a loaf pan?)
  5. Bake at 350F (180C, Gasmark 4) for 50-55 minutes (fair warning, this may take way longer than the stated time. It took me closer to 75-90 minutes. Just run it for the 55, then check it with a knife. If it comes out clean, you're fine. If it comes out wet, you're not done. If it comes out covered in blood and ichor, your oven is possessed.) Cool 10 minutes in the pan. Remove to finish cooling on a wire rack.
Add caption

Tuesday, April 5, 2016

Cheddar Apple Bread

     Every now and then I come across a recipe that doesn't seem right. I mean, it looks good in theory, but something is off about it. This bread recipe was a perfect example. It looked great on paper. I followed most of the instructions. Then I was staring at a mixing bowl full of what amounted to dust. There was no liquid to turn it into dough. I figured maybe because I used dried apples instead of fresh. Then I realized grated apples still wouldn't produce enough liquid to make a dough. I called over The Wife for a consult. She agreed the recipe was wonky. We made an executive decision, and based on other recipes, added some yogurt and milk. The end result was fantastic. A bread that's good and crusty on the outside, but soft on the inside. Toast up a big slab of this and slather it with butter and you've got yourself a winner. I suggest making it using my suggestions, but feel free to try the original recipe. Let me know if you have any success. As always, notes and changes are in blue.

Cheddar Apple Bread
originally Old English Cheese & Apple Loaf
via The Art of Bread
Ingredients
  • 1 teaspoon oil, to grease pan (we just used nonstick cooking spray)
  • 3-1/2 cups unbleached flour (regular white flour, right?)
  • 1 tablespoon baking powder
  • 1/2 teaspoon salt
  • 4 tablespoons unsalted butter
  • 4 apples, peeled, cored and grated (we used about 2 cups dried apples, chopped)
  • 4 ounces cheddar cheese, grated
  • 2 eggs, beaten
  • 1 cup plain yogurt
  • 1/2 cup milk
  • rolled oats, to sprinkle (totally forgot about this)
Directions
  1. Preheat oven to 350F (180C, Gasmark), grease a 9x5x3" baking pan.
  2. Sift flour, baking powder and salt together in a large bowl. Rub butter into the flour mixture quickly with your fingertips until the mixture resembles the texture of coarse breadcrumbs (using your fingertips? How about one of those dough cutters? Why make things harder and messier than it needs to be?)
  3. Stir in the apples and cheese into the flour mixture. Add the beaten eggs until evenly blended (ok, if you have skipped my optional steps, you may find yourself staring at a bowl of clumpy and mostly dry flour. This was my WTF moment. Something very important seemed to be missing from the recipe. Like something to make it into a dough. The fact that the next step refers to "spooning the batter" indicates something the consistency of dried Play-Doh was not what I was looking for. Just go ahead and mix in that milk and yogurt now.) Mix until evenly blended.
  4. Spoon the batter into the pan (see? I told you. "Spoon." You'd be better off with a broom and dustpan if you don't add some liquid) Sprinkle with oats (I was so pissed about this recipe seemingly missing ingredients that I totally forgot about the oats.)
  5. Bake for 1-1/2 to 2 hours (we went for about 1-3/4 hours) until golden brown and well-risen. Turn out on a wire rack to cool.
Good Times!

Friday, March 18, 2016

Ham and Cheese Bread

     You probably know by now that I don't always have top of the line ingredients on hand. That's not really my thing. It's nice to have fancy meats and cheeses and stuff like that, but it's also nice to be able to pay the mortgage and utilities. I often find recipes that I end up avoiding because I never have the ingredients on hand, or more likely, I can't seem to justify the cost of the ingredients. That's probably why you don't see more recipes with Gruyere on my pages. Anyways, I found a bread recipe and wanted to make it for some time, but never had the key ingredients. Finally, I just cracked and used super-cheap alternatives. I couldn't have been happier with the results. I ended up with a nice, crusty bread perfect for sandwiches! As always, notes and changes are in blue.


Ham and Cheese Bread
adapted from Torta Di Testo Di Prosciutti E Formaggio
via The Art of Bread
Ingredients
  • 2 teaspoon (1 envelope) active dry yeast
  • 1/3 cup plus 2 tbsp water (I ended up using 4 tbsp water for whatever reason. Maybe I used too much flour.)
  • 3-1/2 cups unbleached flour (I just used plain old white flour from ALDI. I didn't have time to take the Rolls Royce out for "special" flour)
  • 1-1/2 teaspoon salt
  • 1/4 teaspoon ground black pepper
  • pinch of freshly grated nutmeg (even this amount was noticeable. If you're not a fan of nutmeg, just omit this)
  • 1/2 cup unsalted butter, softened (a stick of generic margarine microwaved for 20 seconds, you say? Done!)
  • 4 eggs, beaten
  • 5 ounces ounces sliced prosciutto, chopped (lah-de-dah! Prosciutto! Let me break out the good china! I'm going to be honest. I used a pack of Buddig honey ham)
  • 5 ounces Emmental, diced (seeing as all my liquid assets are tied up in long term investments in yacht and gold futures, I used an equal amount of shredded pepperjack cheese)
Directions
  1. Sprinkle yeast into water in a bowl. Leave for five minutes (they should really be more specific. I left the kitchen and got as far as the driveway before I realized I couldn't finish the recipe from out there. Even though the recipe didn't say to return, I did); stir to dissolve.
  2. Mix flour, salt, pepper and nutmeg in a large bowl (I used my KitchenAid, so that was my large bowl). Make a well in the center and add the dissolved yeast and everything else. 
  3. Mix until you've formed a soft, sticky dough (as mentioned, this took a little extra water to achieve). Turn out onto a lightly floured surface. Knead until silky and elastic, about 10 minutes (I just slapped the dough hook on the mixer and let it take care of things while I had a drink or six.)
  4. Put the dough in a clean bowl and cover with a dish towel. Let rise until doubled in size, about 2 hours. Punch down, then let rest for 10 minutes. 
  5. Shape the dough into a round loaf. Place on a lightly oiled baking sheet (I used a pizza stone and a thin spray of cooking oil) and cover with a dish towel (they had to specify dish towel? Was there a chance I'd chuck a beach towel over it? Maybe a washcloth?). Proof until doubled in size, about 1 hour.
  6. Bake in an oven preheated to 350F (180C, Gasmark 4) for 1-1/2 hours, until golden brown (yeah, I know this seems like a long time, but it's right. You'll need every minute of it), cool on a wire rack.
Good Times!

Wednesday, December 30, 2015

Kale, Chorizo and Potato Soup

This has been one of the goofiest winters on record. We've had a week of near sixty degree temperatures, then it rained hard for two days straight and everything flooded. This morning it snowed. This sort of weather makes it hard for me to plan meals. There are certain things I can make only if the weather permits. Soups, for instance. I generally won't make soup during the summer. Come winter, it's game on. Now that we have a snap of cold weather, I figured it was time to throw down some soup. I found this recipe lurking in one of my cookbooks. I tweaked it just a bit and was greatly satisfied with the results. It's a simple, hearty soup that's great with crusty bread. As always, notes and changes are in blue.

Kale, Chorizo and Potato Soup
via Best-Ever Soups

Ingredients
  • 8 ounces kale, stems removed
  • 8 ounce chorizo sausage (Italian or Spanish, not Mexican. You want the salami type chorizo)
  • 1 medium onion, cut in half and thinly sliced
  • 1-1/2 pounds red potatoes, skinned
  • 7-1/2 cups vegetable stock (we used chicken stock)
  • 1 teaspoon ground black pepper
  • 1/2 teaspoon cayenne pepper
  • Crusty bread
Directions
  1. Place the kale in a food processor and process for a few seconds to chop it finely (or just take out a goddamned knife and chop it yourself. I know I'm lazy, but even I have my limits)
  2. Prick the sausage *snicker* and place in a pan with enough water to cover (if you're using the onion option, add them here). Simmer for 10 minutes. Drain and cut sausage into thin slices.
  3. Cook the potatoes in lightly salted boiling water for about 15 minutes or until tender. Drain and place in a bowl. Mash, adding about a cup of the cooking liquid to make a thick paste.
  4. Bring the stock to a boil and add the kale, chorizo (and possibly onion) and lower heat. Simmer for 5 minutes. Add the potato paste, stir to incorporate and simmer another 20 minutes. 
  5. Season with black and cayenne pepper.
  6. To serve: Place a slice of bread in the bottom of each bowl, then pour over soup.
Good times!

Monday, July 13, 2015

Whole Wheat Bread

     I do believe we've found our favorite wheat bread recipe so far. Most of the wheat bread recipes we've found have resulted in breads that, while tasty, were dense enough to hammer nails. This particular recipe, with a couple changes (firstly we omitted the nuts. The Wife is not a fan of nuts in her bread), resulted in a beautiful loaf of soft, delicious bread with just a hint of sweetness. I used this for a salami and provolone sandwich with some red onion and spicy brown mustard and it was amazing. Truly this bread is fantastic and could easily supplant Shaker or Sally Lunn for our weekly loaf. The first loaf we made didn't even survive two days in our house! You need this bread. Even if you're gluten intolerant, it's worth the pain. As always, notes and changes are in blue.

Whole Wheat Bread
(via Taste of Home Everyday Light Meals)
Ingredients

  • 2-1/4 cups all-purpose flour
  • 1-1/4 cups whole wheat flour
  • 3/4 cup finely chopped walnuts (omitted)
  • 2 tablespoons brown sugar
  • 1 package (1/4 ounce) quick-rise yeast
  • 1 teaspoon salt
  • 1 cup water
  • 1/3 cup reduced-fat plain yogurt (no yogurt on hand, we used sour cream)
  • 2 tablespoons butter
Directions
  1. In a mixing bowl, combine 1 cup all-purpose flour and the rest of the dry ingredients (I used the bowl from my KitchenAid, since that's where I'd be doing the mixing/kneading).
  2. In a saucepan, heat water, yogurt (sour cream) and butter to about 120-130F (I just heated until the butter melted in. Either way, let it cool to 110F or below before you move to the next step)
  3. Pour liquid ingredients into dry ingredients. Beat until smooth. Add enough remaining all-purpose flour to form a soft dough (we always wind up using all the flour). Turn out onto a floured surface; knead until smooth and elastic, about 4 minutes (On the KitchenAid, I used the dough hook the entire time. I turned it on low, added the liquid, then slowly added the remaining flour and let it knead for about 2-3 minutes)
  4. Shape dough into a ball and place on a baking sheet coated with nonstick cooking spray (we used a lightly greased pizza stone). Cover and let rest in a warm place for 20 minutes. (I highly suggest lightly scoring an "X" into the top of the ball with a knife to prevent a mushroom shaped bread. Unless you're into that sort of thing, then do what feels natural)
  5. Bake at 400F (200C, Gasmark 6) for 25-30 minutes, (we generally go about 27 minutes) or until golden brown. Turn out on a wire rack to cool.
Good times!

Friday, March 27, 2015

Swedish Rye Bread

     There seems to be a sharp division on rye bread. It's like pumpernickel. People either love it or hate it. There is no middle ground. Those people who don't like it are totally entitled to their opinions. They are however, totally wrong. Rye bread is great. Especially this rye bread. Granted, this bread will qualify as a PITA due to the 2+ hours of rising time. It's worth the wait. The recipe makes 3 loaves and the loaves freeze really well. Just wrap each loaf in plastic shrink and then in a layer of heavy aluminum foil. When you're ready, just take it out and let it get back to room temperature on it's own. This is a good, hearty bread with just a touch of sweetness. You'll love it. Or you're wrong. As always, notes and changes are in blue.

Swedish Rye Loaves
via Taste of Home Everyday Light Meals
Ingredients

  • 1/4 cup old-fashioned oats
  • 1/3 cup packed brown sugar
  • 1/4 cup molasses
  • 5 tablespoons butter, divided (we omitted the 1 divided tablespoon of butter for reasons that will become apparent)
  • 2 teaspoons salt
  • 2 cups boiling water
  • 3 cups bread flour (theoretically, if you use any flour for bread, doesn't it count as "bread" flour? I hope they meant white flour, because that's what I used)
  • 2 packages (.25 ounce each) of active dry yeast
  • 3 cups rye flour
  • 1 teaspoon caraway seeds (omitted. The Wife is not a fan of bread with seeds)
Directions
  1. In a bowl, combine the oats, brown sugar, molasses, 4 tablespoons butter and salt; stir in boiling water. Let stand until mixture cools to 120-130F, stirring occasionally.
  2. In a large mixing bowl, combine 2 cups of bread flour and yeast. Add the molasses mixture. Stir in rye flour and enough of the remaining flour to form a medium stiff dough (we used all the flour called for in the recipe and a tiny bit more). Turn out onto a floured surface; knead until smooth and elastic, about 6-8 minutes (we did this entire step in our KitchenAid with the dough hook. I plan on using that thing until it explodes)
  3. Place in bowl covered with non-stick cooking spray, turning once to coat the top. Cover and let rise in a warm place until doubled, about 1 hour.
  4. Punch down dough, cover and let rise in again until doubled, about 30 minutes. 
  5. Punch down dough, Turn out onto floured surface and divide into three portions. Shape into loaves (I went with round loaves because it's the easiest and very rustic looking. Everybody loves that rustic looking stuff). Place on baking sheets covered with nonstick cooking spray (I used a pizza stone and everything came out wonderfully). Cover and let rise until doubled, about 30 minutes (I know! The rising times qualify this as a PITA. This is the last rise. I promise. This will be totally worth it. Unless you don't like rye bread, in which case you just wasted a bunch of time and ingredients).
  6. Cut a shallow cross across the top of each loaf to prevent uneven expansion during baking, Bake at 375F (190C, Gasmark5) for 25-30 minutes, or until golden brown (our oven consistently takes 35 minutes to cook these loaves)
  7. Cool on wire racks
  8. Melt remaining butter; brush over loaves and sprinkle with caraway seeds. Cool. (Omitted)
Good times!

Monday, February 16, 2015

Spiced Gatehouse Tea Bread

If you've never read any of the Redwall books by Brian Jacques, you're really missing out. I even devoted a whole blog post to his dedication to describing food. Go read his books; you won't regret it. Lately, we've been dabbling with a few of the recipes from an actual cookbook that he released some time ago. I mention it in the post linked earlier. Check that out, too. The first one we tried was a tea bread. This is a fantastic breakfast bread. Toasted and slathered in butter and/or honey, you've got a real treat. It also is a very good looking bread, just loaded with fruit. Make it and sit around pretending you're a mouse and it's like you're living the book! As always, notes and changes are in blue.


Spiced Gatehouse Tea Bread
via Brian Jacques The Redwall Cookbook
Ingredients

  • 3 cups mixed dried fruit, preferably 1 cup each raisins, currants and golden raisins (no currants on hand so we went with dried cranberries instead)
  • 1-1/2 cup hot brewed tea (we used pomegranate tea)
  • 4 packed teaspoons brown sugar
  • 1-1/2 cups whole wheat flour
  • 1-1/4 cups all-purpose flour
  • 2 tablespoons pumpkin pie spice or 2 teaspoons each cinnamon, ginger and nutmeg 
  • 2 teaspoons baking powder
  • 1 teaspoon salt
  • 1 egg, beaten
  • butter, for greasing pan
Directions
  1. Preheat oven to 375F (190C, Gasmark 5). Butter an 8-cup, preferably nonstick loaf pan (I suspect the book may have a typo. I've never seen an 8 cup loaf pan. That's huge. I am thinking they meant 8 inch loaf pan, because that's what I used and it was the perfect size. Go me.)
  2. Place the dried fruit in a large bowl, Pour the hot tea over the fruit, stir in the brown sugar, and let the mixture cool for 5 minutes.
  3. In another bowl, whisk together the flours, spices, baking powder and salt. Stir the dry ingredients into the fruit mixture, then stir in the egg until well combined (I did the final mixing in the KitchenAid because I 'm lazy and didn't want to do it by hand)
  4. Scrape the batter into the pan, level the surface and place it in the top third of the oven. Bake for about an hour, or until a toothpick inserted into the center comes out clean. 
  5. Let the loaf cool in the pan for about 10 minutes, then turn out onto a wire rack.
Good times!

Tuesday, November 11, 2014

Focaccia

     I don't think I'd be able to live with a gluten intolerance. I like bread way too much. I don't have the willpower to resist it. I'd eat a loaf of garlic bread and then sit in the bathroom for an hour screaming and cursing my existence. Then I'd go eat a stack of waffles. Circle of life and all that. Anyway, I've been meaning to try my hand at focaccia for some time and finally found a nice recipe hiding in one of my Frugal Gourmet cookbooks. This particular recipe takes about three hours from start to finish, so make sure you've set aside enough time for this. It's not particularly labor intensive, it just has a lot of rising time. It's totally worth it, as it makes a bread with a lightly crisp crust and a soft middle. It's very flavorful and seems like you could do all sorts of wonderful things with toppings. I'm calling it a winner. As always, notes and changes are in blue.

Focaccia
via The Frugal Gourmet Cooks Three Ancient Cuisines
Ingredients
Dough

  • 2 packets quick-rising dry yeast
  • 2 cups tepid water
  • 1 tablespoon sugar
  • 4 tablespoons olive oil (use as many virgins as you like)
  • 1/2 cup vegetable or salad oil (salad oil? Is that what you get when you wring out lettuce?)
  • 1 teaspoon salt
  • 5-1/2 cups unbleached white flour (I don't believe I've ever had that in the house. I went with regular old bleached white flour)
Topping
  • 3 cloves garlic, peeled and crushed (I used 4 cloves, and grated them. Take that, Frugal Gourmet!)
  • 1/4 cup olive oil
  • 1 teaspoon dried rosemary, whole
  • 1 tablespoon kosher salt (I used a Tuscany salt and pepper mixture in a grinder. Very tasty stuff)
  • Sun-dried tomatoes. The recipe didn't call for them, but The Wife suggested them. They look great, but don't stay on the dough for shit. You pick up the bread and the tomatoes unceremoniously fall off. Not sure what to do to hold them in place. Maybe toothpicks or rubber cement. 
Directions
  1. Dissolve the yeast in tepid water. Add the sugar, olive oil, vegetable oil, and salt. Mix in 3 cups of the flour and whip until the dough begins to leave the sides of the mixing bowl, about 10 minutes (Whip? Whipping dough? Is that a thing? I don't have a whipping attachment for the KitchenAid, so I used the dough hook for the entire procedure)
  2. Mix in remaining flour by hand or with a dough hook and knead the dough until it is smooth. Allow the dough to rise twice, in the bowl, and punch down after each rising (I went with about an hour for each rise. The dough will at least double in size)
  3. Oil 2 baking sheets, each 18x13"(totally didn't bother measuring. I only own two baking sheets so measuring is kind of moot). Using your fingers, press the dough out to the edges of the pan. Allow to rise for about 30 minutes.
  4. Preheat oven to 375F (190C, Gasmark 5)
  5. Brush with the garlic mixed with the oil for topping. Sprinkle with rosemary and kosher salt on top (or whatever else you decided to chuck on there). Bake for about 20 minutes (We did 20 minutes exactly and the bread came out golden with a nice bottom crust. Kind of like a diaper)
Good Times!

Monday, June 23, 2014

Shaker Bread

     I hope I never develop a gluten intolerance, because I love bread dearly. I love baking bread. I imagine The Wife, in large part, stays with me because I regularly bake bread. We could easily just sit and stuff our faces with hot buttered bread. This particular bread, a "Shaker Daily Loaf," comes out of one of my old Frugal Gourmet cookbooks. It's a simple, yeasty bread that toasts well and has a great crust. This would be a rock solid PB&J bread. As always, notes or changes are in blue.


Shaker Bread
via The Frugal Gourmet Cooks American
Ingredients

  • 2 packages fast-acting dry yeast
  • 1/4 cup warm water
  • 1-3/4 cup milk
  • 3 tablespoons butter
  • 2 tablespoons sugar
  • 2 teaspoons salt
  • 5 cups all-purpose flour
  • Soft butter for greasing the bowl and top of dough, about 2 tablespoons (or if you're like me and counting calories, just use non-stick cooking spray instead)
Directions
  1. Dissolve the yeast in warm water in a large mixing bowl. Warm the milk and melt the 3 tablespoons of butter in it. Stir in the sugar and salt and allow to cool to lukewarm. Add this to the yeast bowl along with 3 cups of the flour. Beat until smooth (I used the KitchenAid since I am too lazy to do the beating/mixing by hand)
  2. Add the remaining flour and knead on a floured surface until smooth and elastic, about 10 minutes (3-4 minutes on the KitchenAid if you're using the dough hook)
  3. Place the dough on a plastic counter and butter the top of the dough with half of the remaining butter. Cover the dough with a very large stainless steel bowl and allow to rise until double in bulk (let it rise for about an hour. That should double it. As for the plastic counter nonsense, I just took the dough out of the mixing bowl, sprayed the bowl with nonstick cooking spray and rolled the dough in it and then left it in the bowl with a towel over the top.)
  4. After the dough has risen, punch down and shape into two loaves for loaf pans (spray the pans with nonstick cooking spray). Again brush the top of the dough and allow to rise until doubled in bulk (this will be about 30 minutes. I skipped the butter brush and just put a little cooking spray on the tops of the loaves)
  5. Bake at 400F (200C, Gasmark 6) for 30 minutes (this took exactly 30 minutes for us. Cooking times may vary)
Good Times!

Saturday, June 21, 2014

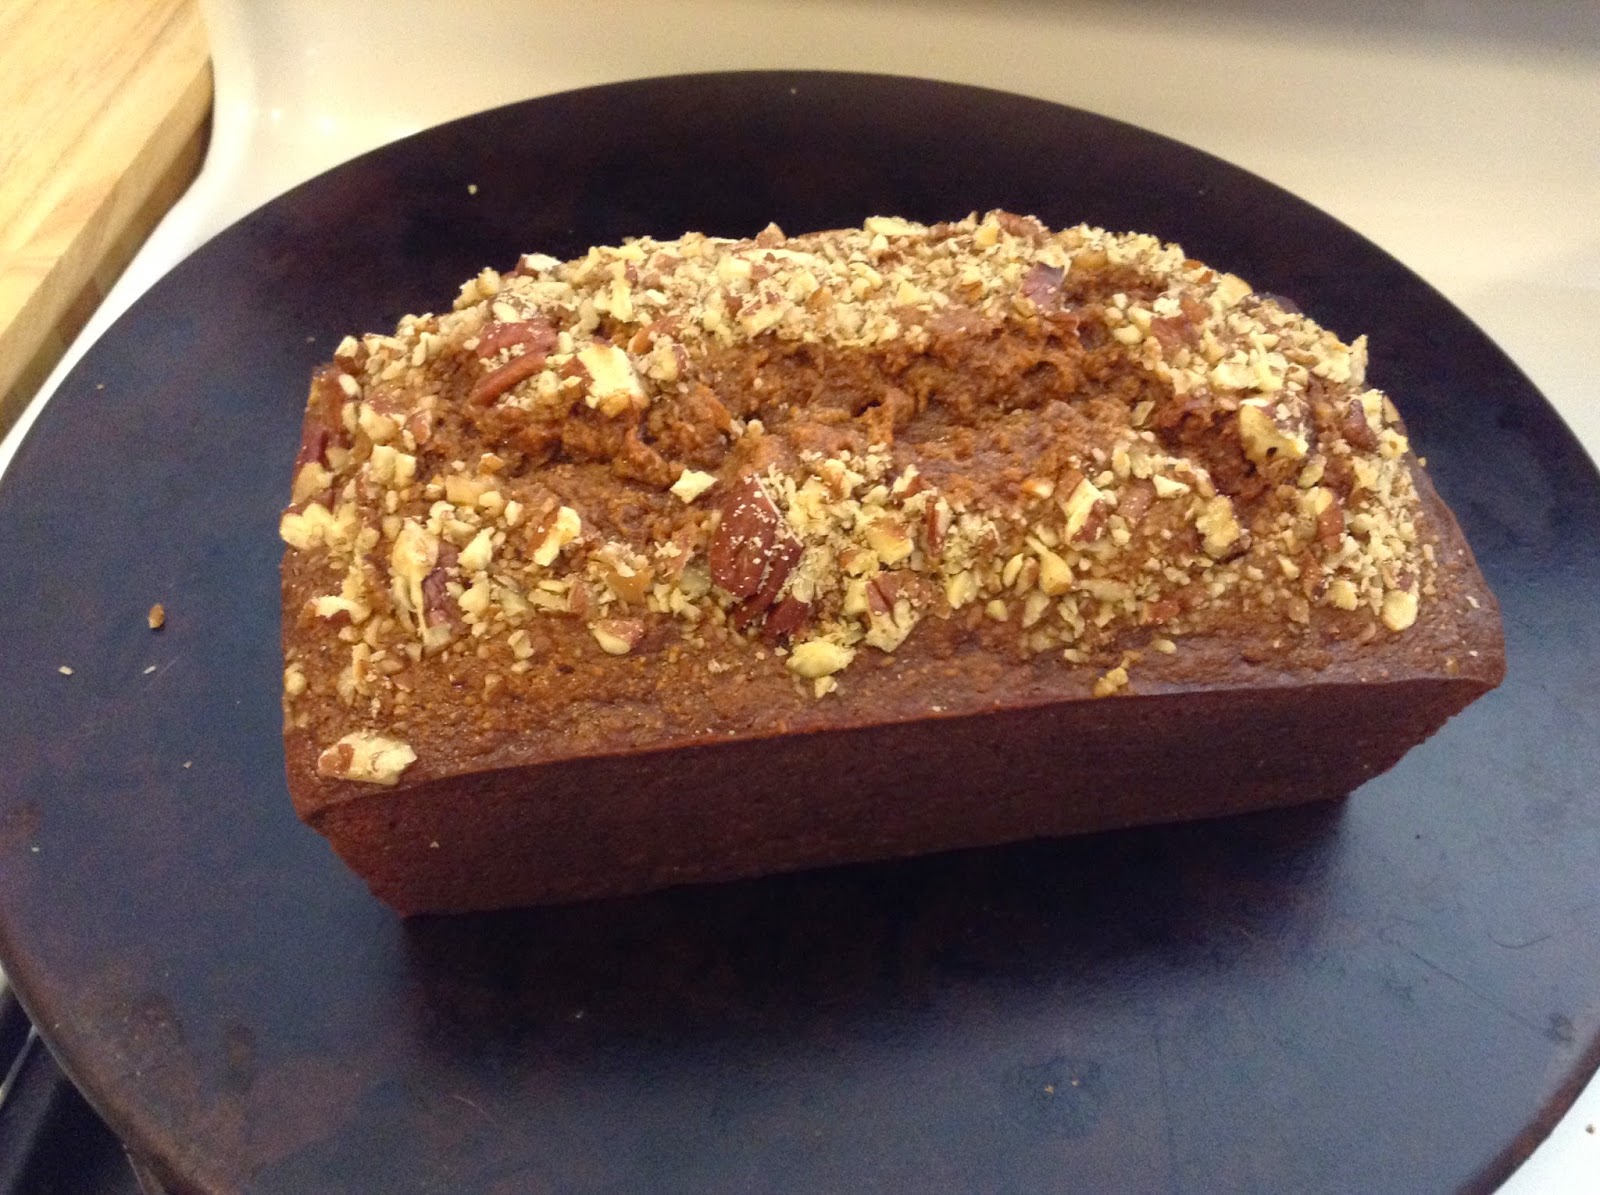
Banana Nut Bread

     There's nothing like remembering you had a bag of bananas sitting on the counter for a week. You go to pick them up and they just sort of snap off their little connectors, exposing the mushy banana. You're screwed. You can't just throw them out; you spent good money on them. The only logical course of action is to make banana bread. You can never go wrong having a loaf or six of banana bread in the house. You may have seen The Wife's Banana Bread Recipe. This is not the same thing at all. Using whole wheat flour seems to really change things up. Both are really good and I'd welcome either on my plate. Make them both and let me know which you like more. As always, notes and changes are in blue.

Banana Nut Bread
via Taste of Home Everyday Light Meals
Ingredients

  • 2 tablespoons butter, softened 
  • 3/4 cup sugar
  • 1 egg
  • 1 egg white (what the hell am I going to do with ONE egg yolk? I just went ahead and used the whole egg)
  • 2 cups (about 4 medium) mashed ripe bananas
  • 1/4 cup unsweetened applesauce (we used our own apple butter)
  • 1/4 cup honey
  • 1 tablespoon vanilla or rum extract (we used vanilla extract and I drank some rum for good measure)
  • 1-1/3 cup all-purpose flour
  • 2/3 cup whole wheat flour
  • 1 teaspoon baking soda
  • 1/2 teaspoon salt
  • 1/4 cup chopped pecans
Directions
  1. In a mixing bowl, beat butter and sugar for 2 minutes or until crumbly. Add egg, then egg white (or just 2 eggs if you're a lazy bastard like me), beating well. Beat on high speed until light and fluffy (It's too bad the recipe totally neglects to mention you're using a mixer. Granted, you might be a robot with speed settings. I just used the Kitchenaid on speed 4. Anything higher than that and it sounds like somebody is trying to land a Harrier in the kitchen and I'll be cleaning batter off the ceiling)
  2. Stir in the bananas, apple sauce, honey and extract. Combine the flours, baking soda and salt; stir into banana mixture until just moistened. 
  3. Pour into 9x5x3 inch loaf pan coated with nonstick cooking spray. Sprinkle with nuts. 
  4. Bake at 325F (170C, Gasmark 3) for 60-65 minutes (this took almost 90 minutes in our oven. Cooking times will vary) or until a toothpick inserted near the center comes out clean.
  5. Cool for 10 minutes before removing to a wire rack.
Good times!

Sunday, March 2, 2014

Banana Bread

     You just can't beat a well made banana bread. What a noble bread. Selflessly using bananas that would otherwise be thrown away, banana bread is perfect any time of day. This particular recipe comes by way of The Wife. She says she got the recipe from one of those "1,000,000 Recipes of Which Maybe 12 Are Any Good" CD-Roms. This is, indeed, a good recipe. The bread is moist and delicious. You could probably get away with adding some nuts to this recipe, but we're not much for nutty breads. Do what you want; we're not here to judge. As always, any notes are in blue.

Banana Bread

Ingredients

  • 1/2 cup butter, softened
  • 1/2 cup white sugar
  • 1/4 cup brown sugar
  • 1 egg
  • 2 cups flour
  • 1/2 teaspoon baking soda
  • 2 teaspoons baking powder
  • 1/4 teaspoon salt
  • 1 teaspoon cinnamon
  • 1 cup (2 medium over-ripe) mashed bananas
  • 1 tablespoon milk
  • For topping: 1/2 teaspoon cinnamon, 2 teaspoons white sugar
Directions
  1. Preheat oven to 350F (180C, Gasmark 4). Spray a 9x5" loaf pan with non-stick cooking spray.
  2. Beat butter with sugars until light and fluffy (if you don't have a Kitchenaid or electric mixer, this will be a PITA). Add egg and beat well. 
  3. In a large bowl, mix flour with baking soda, baking powder, salt, and cinnamon. In another bowl, mix banana with milk.
  4. Add half the banana mixture to the butter mixture, mixing until smooth; add half the flour mixture and mix until smooth. Repeat process with second half of the banana and flour mixtures. 
  5. Pour batter into loaf pan. In a small bowl (just use the bowl you used for the flour. No sense in dirtying a third bowl), mix the 1/2 teaspoon cinnamon with 2 teaspoons white sugar; sprinkle over top of batter. 
  6. Bake at 350F (180C, Gasmark 4) for 60 minutes, or until a toothpick inserted near the center comes out clean (cooking times will vary). Remove immediately to a wire rack to cool. 
Good times!

Monday, February 24, 2014

Whole Wheat Bread

     Shockingly, I once again turn to my well-worn copy of Taste of Home Everyday Light Meals for a bread recipe. This time it's a simple whole wheat bread. The original recipe called for walnuts, but as you may know, The Wife isn't a big fan of nuts in her bread. I tend to agree with her. I think this bread is fine without the added texture. This makes for a rustic, crusty loaf that's great with soups, or toasted and covered in butter at breakfast. One warning, if the bread doesn't cook evenly, it will rise funny in the oven and end up looking like a mushroom cloud. It still will taste fine, it will just look goofy. A friend has told me that scoring an "X" about 1/2" deep in the top of the dough before baking will prevent that from happening. As always, any notes or changes are in blue.


Whole Wheat Bread
via Taste of Home Everyday Light Meals
Ingredients

  • 2-1/4 cup all-purpose flour
  • 1-1/4 cup whole wheat flour
  • 3/4 cup finely chopped walnuts (omitted)
  • 2 tablespoons brown sugar
  • 1 package (1/4 ounce) quick-rise yeast
  • 1 teaspoon salt
  • 1 cup water
  • 1/3 cup reduced-fat plain yogurt
  • 2 tablespoons butter
Directions
  1. In a mixing bowl, combine 1 cup all-purpose flour, whole wheat flour, nuts (if using), brown sugar, yeast and salt.
  2. In a saucepan, heat the water, yogurt and butter to 120-130F. Add to dry ingredient; beat until smooth.
  3. Stir in enough remaining all-purpose flour to form a soft dough (we wound up using the full amount of flour listed in the ingredients). Turn out onto a floured surface; knead until smooth and elastic, about 4 minutes (I just ran it in the Kitchenaid with the dough hook), Do not let rise.
  4. Shape dough into a ball; place on baking sheet coated with nonstick cooking spray. Cover and let rest in a warm place for 20 minutes (I know for sure that if I cover this dough and put it in a warm place, it's going to rise. They just told me not to let it rise. Is this some sort of test? What do I do if it starts to rise? Talk it down?) 
  5. Bake at 400F (200C, Gasmark 6) for 25-30 minutes or until golden brown (we went close to 40 minutes. Baking times may vary). Remove from pan to cool on wire rack. 
Don't forget to cut an "X" about 1/2" deep in the top before baking
to prevent the loaf from looking like a nuclear bomb test.
Good times!

Sunday, January 19, 2014

Braided Butternut Squash Bread

     It's a good thing The Wife is really good at braiding bread. Her challah is supreme. This time we used her preternatural braiding abilities to make a braided butternut squash bread. I found the original recipe at Allrecipes. We wound up making this bread because we've had a surplus of frozen butternut squash and have been on a crusade to find fun ways to use it. This is certainly a great way to use butternut squash. After the bread came out of the oven, we just stood there like morons, vacantly shoving hot bread in our mouths until we were through half a loaf. As always, any notes or changes are in blue.
Braided Butternut Squash Bread
via Allrecipes.com
Ingredients
  • 1 butternut squash, peeled, seeded and cubed (I always wonder why we have to be told to peel a butternut squash. Do you think there's anybody out there who just can't get enough butternut squash peel?)
  • 1 (0.25 ounce) package active dry yeast
  • 2 tablespoons warm (110F) water
  • 1/3 cup warm (110F) milk
  • 1/4 cup butter, softened
  • 2 eggs
  • 3 tablespoons brown sugar (we used 4 tablespoons. You could probably do 5 or 6 if you wanted a really sweet bread)
  • 1/4 teaspoon salt (we followed a suggestion to go with 3/4 teaspoon salt to bring out the butternut squash flavor)
  • 3 cups all-purpose flour (the dough is totally unworkable with this much flour. It's almost still liquid. We wound up using 4-1/2 cups flour)
  • 1 tablespoon water
Directions
  1. In a large saucepan, cover cubed squash with water. Bring water to a boil and cook until tender, about 15-20 minutes. Let cool and mash. Reserve 1 cup for use and freeze the remainder for later use (or just tell me I only needed 1 cup of boiled, mashed squash so I didn't have to cook all of it! What if I didn't want all that extra mashed squash? Why doesn't anybody consider my feelings? THIS IS WHY I DRINK)
  2. In a small bowl, dissolve yeast in warm water (2 tablespoons of water). Let stand until creamy, about 10 minutes (this is the first time I've ever seen yeast described as "creamy." I'm not sure I'm comfortable with it)
  3. In a large bowl (I used the Kitchenaid for this, so I just used the mixing bowl) combine the yeast mixture with milk, butter, 1 cup mashed squash, 1 egg, brown sugar, salt and 2 cups of the flour; stir well to combine. Stir in remaining flour, 1/2 cup at a time (I used 1/4 cup at a time just to be spiteful), beating well after each addition. When the dough has pulled together, turn it out onto a lightly floured surface and knead until smooth and elastic, about 8 minutes (I just used the dough hook on the mixer for this. I don't have time for needless manual labor)
  4. Lightly oil a large bowl; place dough in bowl and turn to coat with oil. Cover with a damp cloth and let rise in a warm place until doubled in volume, about 1 hour. 
  5. Deflate the dough ("Deflate?" It makes it sound like you're working with an air mattress. When I work with dough, I "punch it down." It's what Chuck Norris would do)
    Told you so.
  6. This section describes how to cut the dough and get it braided. I consider it a Pain In The Ass (PITA) and will not waste the time or space typing it. Instead, I'm going to just link you the YouTube video the wife used to learn. It obviously works. You're going to want to split the dough in half first. You're looking to make 2 loaves here. Once you figure out the braiding, cover the loaves and let rise for another 30 minutes on a greased baking sheet.
  7. In a small bowl, beat together remaining egg and 1 tablespoon water. Brush loaves with egg wash. Bake for 20-25 minutes at 350F (we went with 25 minutes and the bread came out great)
Good times!

Wednesday, December 4, 2013

Lentil Bread

     It's been a while since I've tried a new bread recipe. I've been leaning pretty heavily on that Sally Lunn recipe. I've been wanting to try this recipe, but I never had lentils on hand. This is a great sandwich bread. It has a nice, sturdy crust and a soft inside. You can just get a hint of the lentil taste in the bread. I don't think you'll want to make French Toast with this bread; this is more of a straight up sandwich bread. Give it a try and see what you think. As always, notes and changes are in blue.

Lentil Bread
via Taste of Home Everyday Light Meals
Ingredients
  • 3/4 cup lentils, rinsed
  • 1-1/2 cups water
  • 4-1/2 teaspoons finely chopped onion (you're going to be running this through a food processor, you don't need to chop finely. Work smarter, not harder)
  • 1 garlic clove, minced (again, food processor. I just threw the damned thing in whole)
  • 2 packages (.25 ounce each) active dry yeast
  • 1 cup warm water (110-115F)
  • 1/4 cup olive oil
  • 1/4 cup sugar
  • 1 tablespoon grated Parmesan cheese
  • 1 tablespoon salt
  • 1 cup whole wheat flour
  • 6 to 7 cups bread flour (I hope that's the same thing as all-purpose flour, because that's what I used)
Directions
  1. In a saucepan, combine lentils, water, onion and garlic; bring to a boil. Reduce heat; cover and simmer for about 30 minutes or until lentils are tender. Cool slightly. Transfer mixture to a blender or a food processor. Cover and process until smooth. Cool to 110-115F.
  2. In a mixing bowl dissolve yeast in warm water. Add the milk, lentil mixture, oil, sugar, Parmesan cheese, salt, whole wheat flour and 3 cups bread flour. Beat until smooth. Stir in enough remaining flour to form a soft dough (I wound up using about 6-1/2 cups)
  3. Turn onto a floured surface (do it. The dough will be a bit sticky). Knead until smooth and elastic, about 6-8 minutes (as always, I let the Kitchenaid do the hard work. Feel free to do it by hand if you're the industrious type)
  4. Place in a bowl coated with nonstick cooking spray, turning once to coat top. Cover and let rise in a warm place until doubled, about 1 hour.
  5. Punch dough down. Turn onto a lightly floured surface. Divide into thirds; shape into loaves. Place in three greased 9"x5"x3" loaf pans. Cover and let rise until doubled, about 30-40 minutes. 
  6. Bake at 375F for 35-45 minutes or until golden brown (mine took about an hour!). Remove from pans to wire racks to cool. 
Good times!

Sunday, August 11, 2013

Sally Lunn Bread

     Ladies and gentlemen, I think I have found my go-to bread recipe. This could very well mean my never buying a loaf of white bread again. I decided to poke around in my Frugal Gourmet cookbooks for a Sunday baking recipe when I found this little gem in The Frugal Gourmet Cooks American. Sally Lunn bread. Who is Sally Lunn? Instead of just copying and pasting the answer, simply follow this Wiki link to Sally Lunn! The bread is soft and springy with just the right amount of crust. The recipe says you can even do these up in a cast iron muffin pan and make rolls! As always, any notes or changes will be in blue.
Sally Lunn Bread
via The Frugal Gourmet Cooks American
Ingredients
  • 2 cups milk
  • 2 tablespoons butter
  • 2 tablespoons sugar
  • 2 teaspoons salt
  • 1 package dry quick-rising yeast
  • 3 eggs
  • 4 cups flour
Directions
  1. Scald the milk, or bring it almost to a simmer, and add the butter, sugar and salt. Let cool until tepid or just warm (95F)(If you don't own a digital thermometer for the kitchen, you really need one. Baking and grilling is so much easier when you know stuff isn't raw and poisonous. Unless that's what you were going for and carry on)
  2. Dissolve the yeast in 1/4 cup of tepid water
  3. Using an electric mixer, if you have one, beat the eggs and then add the milk mixture, the yeast water, and finally the flour. Beat until smooth, about 5 minutes (I used the Kitchenaid here, but any electric mixer will do. This batter will be pretty thin so it won't strain most mixers. You could do it by hand but it will be a bit of work.)
  4. Leave the dough in the mixing bowl and allow it to rise for one half hour. Beat it down with the mixer for just a moment and then allow it to rise again (when they say "just a moment," this is not an exaggeration. I only let the mixer go for a second or two and it knocked the batter down at least 50%. Don't panic, this is normal). Do this a total of 3 times and then put the dough in 2 large greased bread pans (I used nonstick cooking spray with no issues). Allow to rise to double the bulk (I just let it go for about an hour)
  5. Bake in a preheated 375F oven for 45 minutes to 1 hour (this came out in 45 minutes on the button for us. For once something cooked on the short end of time. Cooking times vary. You can always jab a toothpick in there to see if it comes out clean). The bread should be light and have a nice crust.
Good times!