Showing posts with label youtube. Show all posts

Wednesday, March 18, 2020

Not Exactly Shakshuka

So here we sit, stuck at home for at least another 14 days due to global pandemic. What better time than to go through my notes and put up all the recipes I never got around to posting! This here is a spin on the classic shakshuka. However, I've left out the eggs, added chicken, spinach, paneer, and a bunch of Indian spices. So it's Not Exactly Shakshuka any more. However, it is warm and filling and pretty easy to make. It's also versatile. It is easily modified for vegetarian or vegan diets. As always, notes are in blue. There is a link to the YouTube video of this recipe at the bottom.

Shakshuka with Chicken and Paneer
Ingredients

  • 3 tablespoon olive oil
  • 1 teaspoon brown mustard seed
  • 1 teaspoon grated ginger
  • 4 cloves garlic, finely chopped
  • 1 medium onion, chopped
  • 2 quarts canned tomatoes (with liquid)
  • 2 tablespoons chili powder
  • 2 teaspoon ground cumin
  • 2 dried cayenne peppers
  • 1/4 - 1/2 teaspoon ground cayenne
  • 1 teaspoon garam masala
  • 1 tablespoon dried cilantro
  • 10 ounces frozen spinach (no need to unthaw)
  • 1 pound boneless, skinless chicken (we used breast tenders, thighs would work well. Or leave it out if you want to go vegetarian)
  • 1 pound paneer cheese (or other firm, white, cheese if you can't find paneer. Or leave out the cheese and chicken and now this is vegan!)
Directions
  1. Heat oil in a large pot over medium high heat (we used our trusty 6 quart dutch oven)
  2. Add mustard seed, heat until seeds begin to pop
  3. Add ginger, garlic, and onion. Reduce heat to medium and sautee for 5-7 minutes or until onions start to brown.
  4. Add tomatoes with liquid, chili powder, cumin, cayenne, garam masala, and cilantro. Stir a simmer for a couple minutes.
  5. Add the spinach. (if you threw it in frozen, give it a few minutes to unfreeze and everything to come back up to a simmer. If the spinach is already thawed, go on to the next step.)
  6. Add chicken. Simmer for about 15-20 minutes.
  7. Add cheese. Simmer another 5-7 minutes. 

Good times!

Tuesday, March 17, 2020

First full day of staying home

As most of you are acutely aware, the Coronavirus has drastically changed how many of us have to live. My wife and I are both teachers, and both our schools are closed until March 30th. The prevailing notion is the closings will last far longer. It is possible that the schools could remain closed for the remainder of the year and students will work online from home.

That being said, we are stuck home for at least 15 days. We will do everything in our power to not go out, though this means being trapped at home with a feisty four year old. What I've got going for me is that I was raised in a house where you always bought way more than you'd need "just in case."  The Wife continually questioned why I insisted on keeping six jars of peanut butter and jellies, bags and bags of frozen potatoes and vegetables, cases of ramen noodles, matzoh, and assorted pastas. Why did I buy 48 packs of toilet paper every week or so?

Well, "just in case" has arrived. We have plenty of food in the fridge, freezer, and pantry. We have a rack full of food we've canned in the last couple of years. We have toilet paper and paper towels. We get our prescriptions in 90 day supplies, so we're good there. There is no fear of running out of booze.

What this means is that we don't have to run out and grab stuff from the store; stuff that somebody might need more than we do. Our goal is to live on what we've got in the house for 15 days. At worst, we will have to go out for milk. That's it. I'll try to give regular updates of what we're eating and how it's going. I'll post videos when I can (there's one at the bottom!)

Today's Meals:
Breakfast: Egg and cheese on English muffins for me and The Wife. Fruit Loops for the Spud
whoops, we have already run out of English muffins!


Dinner: Shepherd's Pie (using up the leftover mashed potatoes from the weekend)

-Stay Safe!


Sunday, November 13, 2016

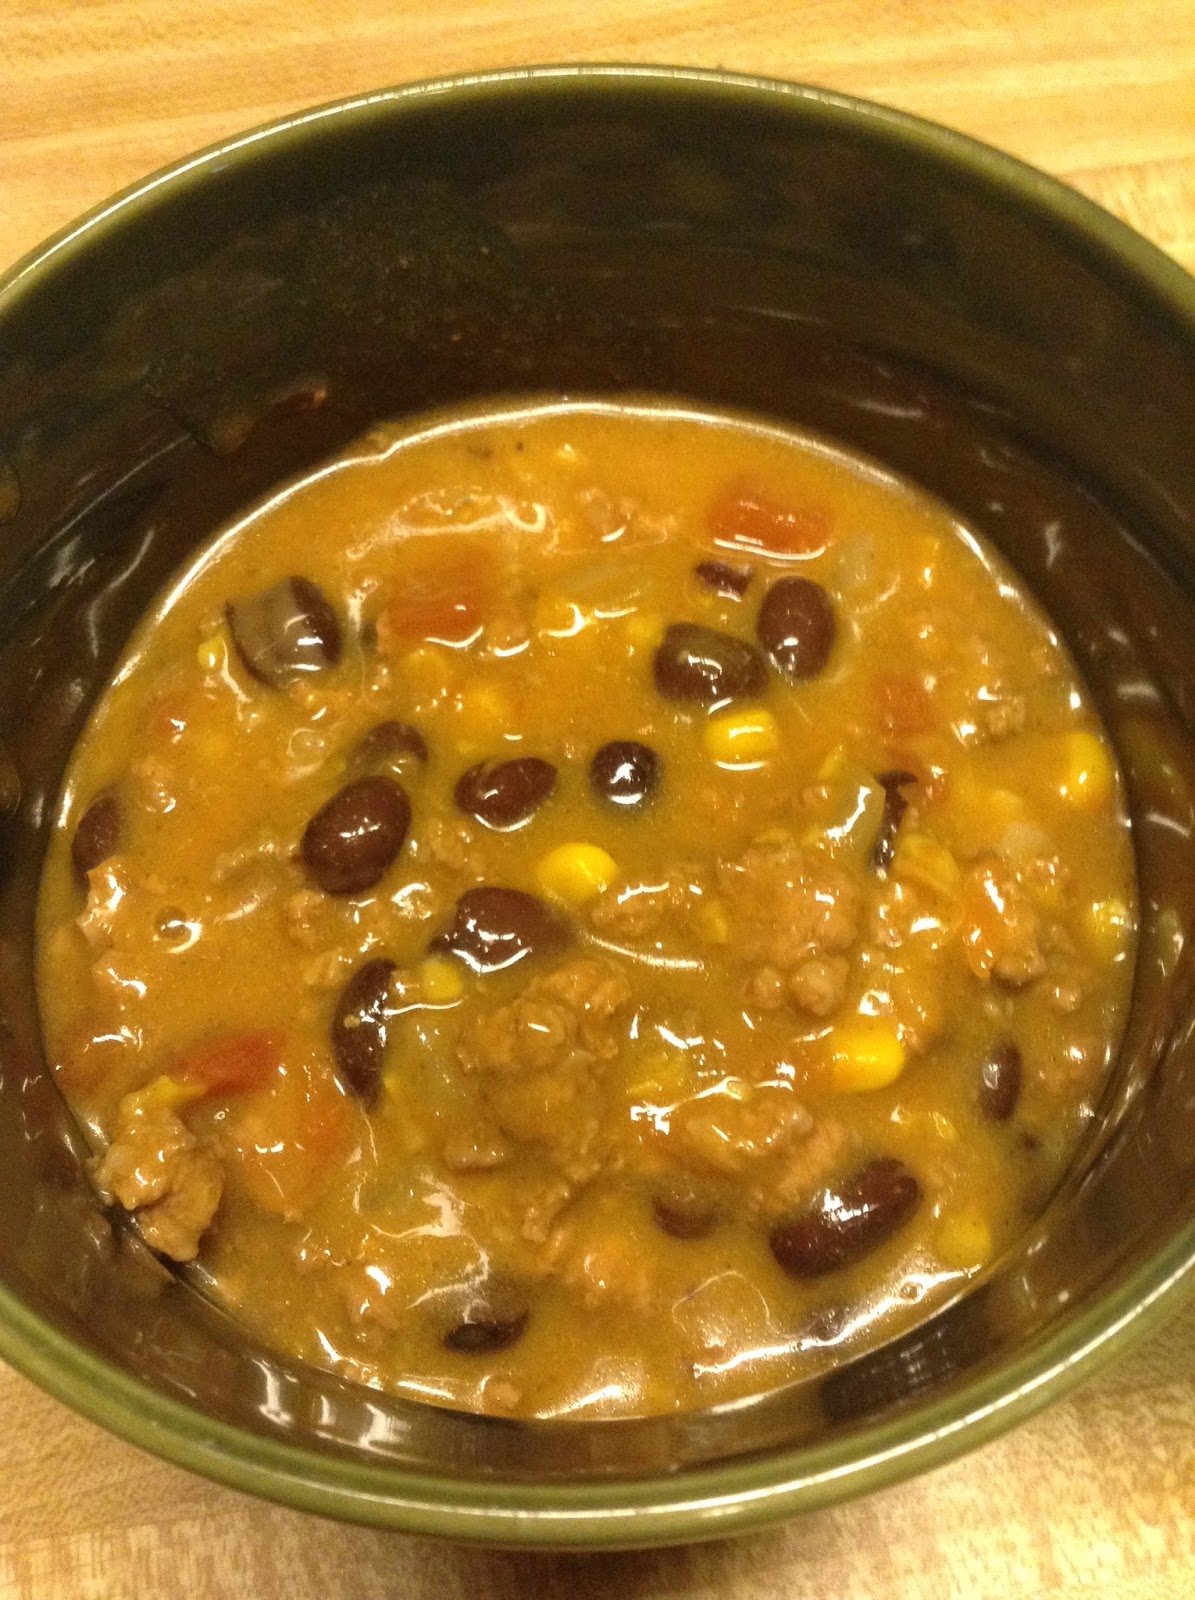
Slow Cooker Mexican Style Beer and Cheese Soup

Holy cow does having a child eat into your time. Nobody warned me about that. Okay, everybody warned me about that. It's a good thing she's beautiful and hilarious, so I don't mind. One of the big things I've learned in the last year or so is to find meals that can be prepared in a hurry or require very little maintenance. During the winter months, that means I'm leaning heavily on the slow cooker. The Wife was recently after me to make some beer and cheese soup. I have a recipe and it's pretty good, but wanted something that would work well with the absolutely vile pumpkin beer I had in the fridge. I found it! The beer flavor really works quite well and the soup has a nice bite to it from the peppers. This is a great cold-weather soup. We are definitely making it again. As a bonus, at the bottom of this post, you'll find the link to the YouTube video of the recipe. As always, notes are in blue.


Slow Cooker Mexican Style
Beer and Cheese Soup
(that absolutely does not photograph well)
Ingredients

  • 1-1/4 lb. ground beef
  • 1/2 onion, chopped
  • 1 can (10.75 oz) cheddar cheese soup (if you can find nacho cheese soup, that would probably be even better)
  • 1 can (10 oz) diced tomato and peppers
  • 1 can (15.5 oz) black beans, rinsed and drained
  • 1 can (14.75 oz) creamed corn
  • 1 can (12 oz) Harvest Patch Shandy (Leinenkugel) beer. (if you can't find it, any pumpkin beer will do. If you can't find pumpkin beer, or despise all things pumpkin, use any pilsner style beer (Old Style, etc). If you can't/won't use booze, just use an equal amount of water or beef stock)
  • 1 envelope taco seasoning (about 1 oz)
Directions
  1. In a pan, brown ground beef along with the chopped onions. Drain off excess grease and then stir in taco seasoning (into the meat and onion mix, not the drained grease because that would be dumb)
  2. Combine all ingredients in a slow cooker. (we used a 3 quart and it was close. I suggest at least a 4 quart cooker). Cook on HIGH about 4 hours.
BONUS VIDEO


Good Times!

Thursday, April 17, 2014

Slow Cooker Apple Butter BBQ Ribs

     Cooking bone-in meat in a slow cooker is always an exciting prospect. The end result more often than not looks terrifying, with meat and gristle and bone all in a heap in the bottom of the cooker. I'm also leery about using really nice spareribs for a slow cooker recipe. However, this recipe gave me the opportunity to use up some surplus apple butter and bbq sauce I canned last season. I bit the bullet and gave it a try. Despite the fact that I entirely missed a step, the ribs were quite tasty. The Wife really liked them because she didn't have to fight to get the meat off the bone. She would never be able to survive in the wild. I don't know that I'd make this a lot, but it was certainly good and I would consider making it again if the grill and smoker were not available outside. As always, any notes and changes are in blue.


Slow Cooker Apple Butter BBQ Ribs
via Super-Fast Slow Cooking
Ingredients
Directions
  1. Sprinkle ribs with salt and pepper (as mentioned, we used the Uncle Joe's)
  2. Place ribs on rimmed baking sheets. Bake at 350 (180F, Gasmark 4) for 30 minutes; drain. Slice the ribs into serving size pieces and place in the slow cooker. (holy shit. I didn't even see this step when I made these. I just chucked the frozen rib sections into the slow-cooker. I'm not even joking. If you don't believe me, watch the video below.)
  3. Add remaining ingredients. Cover and cook on low for 8 hours.

Bonus Video! 
Good times!

Friday, February 28, 2014

Slow Cooker Margarita Chicken and Black Beans

     I'm pretty sure there's about 150,000 different slow-cooker Mexican style chicken recipes floating around the interwebz, so I figured why not add another? This particular recipe assembles quickly and makes for a fairly versatile meal. We served it over rice, in tortillas and as a nacho topping. Just make sure to drain off any excess liquid if you're using it in tortillas, tacos or nachos, otherwise everything will get soggy. This is very mild. I wound up adding habanero hot sauce to mine, but I really like the heat. As always, any notes are in blue.


Slow Cooker Margarita Chicken
and Black Beans
Ingredients
  • 1 pound boneless, skinless chicken
  • 1 can (15 ounces) black beans, rinsed and drained
  • 1 can stewed tomatoes, with liquid
  • 1/2 onion, chopped
  • 1/2 bell pepper, chopped (any color is fine; we used red)
  • 1 tablespoon pepper in adobo sauce (you can find these canned in the ethnic section of most grocery stores)
  • 2 ounces tequila (optional if booze isn't your thing)
  • 1 tablespoon lime juice (I used the stuff from the little plastic lime. I love that sort of thing)
  • 1 teaspoon Pilsen Latino Seasoning (from The Spice House)
  • for those who don't have access to the above seasoning, it includes: coarse Kosher flake salt, garlic & onion powders, Mexican oregano, Tellicherry black pepper, hot red pepper flakes.
Directions
  1. Place chicken in bottom of slow cooker.
  2. Unceremoniously dump all other ingredients on top of chicken.
  3. Give a quick stir. Cook on LOW 6-8 hours.
  4. Remove chicken from cooker, shred and return to cooker. 

UPDATE: Now there's a YouTube video for this recipe!

Sunday, February 23, 2014

Traditional Middle Class Breakfast Casserole

     When I moved to central Illinois, I was greeted with an entirely new menu of middle class food. One of the more ubiquitous dishes was the Breakfast Casserole. You'd find these gastric bludgeons lurking at most potluck breakfasts or brunches. Boasting anywhere from twelve to six hundred eggs and upwards of fifteen hundred pounds of sausage and cheese, a single slice could meet your caloric needs for the next two days. However, they are crazy good. There's a bunch of different ways to make these. You can use potatoes instead of bread, change up the sausage with ham or bacon, use different cheeses or veggies. I have yet to have a bad one. This particular version is pretty basic and is intended to give you a starting point for your own personal breakfast powerhouse. As always, notes are in blue.

Traditional Middle Class
Breakfast Casserole

Ingredients
  • 1 pound pork sausage
  • 1 onion, chopped
  • 1 yellow bell pepper, chopped
  • 1/2 loaf Herbed Swirl Bread, cut into 1" cubes (in the event you don't feel like making bread especially for this, you can sub in 1/2 loaf of any hearty bread)
  • 12 eggs
  • 1 cup milk
  • 2 teaspoons Frank's Hot Sauce
  • 8 slices American cheese
Directions
  1. Preheat oven to 375F (190C, Gasmark 5)
  2. In a pan, cook onion, peppers and sausage until sausage is browned. Drain excess grease and set pan aside.
  3. Spray a 13"x9" baking dish with nonstick cooking spray. Put down a layer of bread cubes in the dish.
  4. Spread the sausage and veggie mixture in an even layer over the bread.
  5. In a large bowl, lightly beat 12 eggs (make sure you take them out of the shells first. That's critical), with the milk and hot sauce. Pour over everything in the baking dish, ensuring that you have an even layer of egg covering everything.
  6. Lay the slices of cheese over the top (next time I think I may put the cheese in between the bread and sausage layer and then sprinkle some cheddar over the top. Live and learn).
  7. Bake for 40 minutes or until egg is completely set.
BONUS VIDEO:


A generation of chickens headed to the casserole
Good times!

Wednesday, February 19, 2014

Slow-Cooker Cream Cheese Chicken with Broccoli

     I'm glad The Wife is working more in the kitchen. Don't freak out; I'm not making any gender specific claims here. The Wife doesn't work much in the kitchen because that's my job. It's also because she didn't have a tremendous amount of confidence in her cooking. Lately she's been poking through recipes and messing around with the ingredients. Nothing ground-breaking, but she consistently achieves success. Her latest success was a slow cooker recipe she found in one of our many slow cooker recipe books. I was extremely pleased with how this turned out. It had great flavor and was great over pasta, rice or bread. My only complaint was that it was pretty salty, but that was down to the Italian salad dressing mix. She even used almost half of what the recipe called for. She also used half of the requested chicken. Next time I'd say go the full four pounds of chicken, or quarter the seasoning. Either way, I hope she makes this one again! As always, any notes or changes are in blue.

Slow-Cooker Cream Cheese Chicken with Broccoli
via Crock Pot Potluck For All Occasions
Igredients
  • 4 pounds boneless, skinless chicken breasts, cut into 1/2-inch pieces (as we are not made of money, she used 2 pounds of chicken)
  • 1 tablespoon olive oil
  • 1 package (1-ounce) Italian salad dressing mix (her package was .6 ounces and we felt that was PLENTY)
  • Nonstick cooking spray
  • 2 cups (8 ounces) sliced mushrooms (she used one 4-ounce can of mushrooms, drained)
  • 1 cup chopped onion (she went with 1/2 cup)
  • 1 can (10.75 ounces) condensed cream of chicken soup, undiluted
  • 1 bag (10 ounces) frozen broccoli florets, thawed 
  • 1 package (8 ounces) cream cheese, cubed (she used 4 ounces, and as always, Neufchatel was used in place of cream cheese)
  • 1/4 cup dry sherry (she used 1/8 cup dry Vermouth)
  • Hot cooked pasta (We did serve it over pasta, but I also served it over herbed swirl bread for lunches a couple times)
Directions
  1. Toss chicken with oil in a large bowl. Sprinkle with salad dressing mix. Transfer to a slow-cooker. Cover; cook on LOW for 3 hours
  2. Coat large skillet with cooking spray; heat over medium heat. Add mushrooms and onion; cook 5 minutes or until onion is tender, stirring occasionally (since The Wife used canned mushrooms, she didn't add them until the next step.)
  3. Add soup, broccoli, cream cheese and sherry (neufchatel and vermouth in our case), to the pan (hopefully you didn't just throw that stuff into the slow cooker, because if you did, you just screwed up,) cook and stir until heated through. Transfer to the slow-cooker. Cover and cook on LOW for 1 hour. Serve over pasta (or bread, or rice, or whatever you want. Don't give in to recipe bullying)
Good Times!
UPDATE: Now there is a video for this recipe:

)

Sunday, January 19, 2014

Braided Butternut Squash Bread

     It's a good thing The Wife is really good at braiding bread. Her challah is supreme. This time we used her preternatural braiding abilities to make a braided butternut squash bread. I found the original recipe at Allrecipes. We wound up making this bread because we've had a surplus of frozen butternut squash and have been on a crusade to find fun ways to use it. This is certainly a great way to use butternut squash. After the bread came out of the oven, we just stood there like morons, vacantly shoving hot bread in our mouths until we were through half a loaf. As always, any notes or changes are in blue.
Braided Butternut Squash Bread
via Allrecipes.com
Ingredients
  • 1 butternut squash, peeled, seeded and cubed (I always wonder why we have to be told to peel a butternut squash. Do you think there's anybody out there who just can't get enough butternut squash peel?)
  • 1 (0.25 ounce) package active dry yeast
  • 2 tablespoons warm (110F) water
  • 1/3 cup warm (110F) milk
  • 1/4 cup butter, softened
  • 2 eggs
  • 3 tablespoons brown sugar (we used 4 tablespoons. You could probably do 5 or 6 if you wanted a really sweet bread)
  • 1/4 teaspoon salt (we followed a suggestion to go with 3/4 teaspoon salt to bring out the butternut squash flavor)
  • 3 cups all-purpose flour (the dough is totally unworkable with this much flour. It's almost still liquid. We wound up using 4-1/2 cups flour)
  • 1 tablespoon water
Directions
  1. In a large saucepan, cover cubed squash with water. Bring water to a boil and cook until tender, about 15-20 minutes. Let cool and mash. Reserve 1 cup for use and freeze the remainder for later use (or just tell me I only needed 1 cup of boiled, mashed squash so I didn't have to cook all of it! What if I didn't want all that extra mashed squash? Why doesn't anybody consider my feelings? THIS IS WHY I DRINK)
  2. In a small bowl, dissolve yeast in warm water (2 tablespoons of water). Let stand until creamy, about 10 minutes (this is the first time I've ever seen yeast described as "creamy." I'm not sure I'm comfortable with it)
  3. In a large bowl (I used the Kitchenaid for this, so I just used the mixing bowl) combine the yeast mixture with milk, butter, 1 cup mashed squash, 1 egg, brown sugar, salt and 2 cups of the flour; stir well to combine. Stir in remaining flour, 1/2 cup at a time (I used 1/4 cup at a time just to be spiteful), beating well after each addition. When the dough has pulled together, turn it out onto a lightly floured surface and knead until smooth and elastic, about 8 minutes (I just used the dough hook on the mixer for this. I don't have time for needless manual labor)
  4. Lightly oil a large bowl; place dough in bowl and turn to coat with oil. Cover with a damp cloth and let rise in a warm place until doubled in volume, about 1 hour. 
  5. Deflate the dough ("Deflate?" It makes it sound like you're working with an air mattress. When I work with dough, I "punch it down." It's what Chuck Norris would do)
    Told you so.
  6. This section describes how to cut the dough and get it braided. I consider it a Pain In The Ass (PITA) and will not waste the time or space typing it. Instead, I'm going to just link you the YouTube video the wife used to learn. It obviously works. You're going to want to split the dough in half first. You're looking to make 2 loaves here. Once you figure out the braiding, cover the loaves and let rise for another 30 minutes on a greased baking sheet.
  7. In a small bowl, beat together remaining egg and 1 tablespoon water. Brush loaves with egg wash. Bake for 20-25 minutes at 350F (we went with 25 minutes and the bread came out great)
Good times!

Sunday, December 15, 2013

Too Damned Easy Baked Brie and Chutney

     I subscribe to several cooking magazines. Occasionally I will find recipes and make them exactly as described. More often than not, I will modify the recipe to fit what I have in the house and what I am willing to spend money on. Naturally, certain recipes never make it into the rotation because of these restrictions. One recipe in particular involved brie, fruit preserves and puff pastry. I generally don't stock these items. However, as luck would have it, I found very reasonably priced (nine bucks for almost two pounds!) brie at the Sam's Club in town. I didn't feel like looking for the actual recipe, so I decided to wing it with what I had. I grabbed some of my chutney and a tube of ALDI biscuit dough and went to work. The end result was much greater than the sum of its parts. This looked super fancy and tasted amazing. The melted brie mixed with the chutney for a sweet and mild taste. The biscuit dough held it all together perfectly. I hope you enjoy this as much as we did! As always, notes are in blue.


Too Damned Easy
Baked Brie and Chutney
Ingredients
  • 6-8 ounce piece of brie, rind removed
  • 2 tablespoons roasted pepper and tomato chutney (feel free to use some other chutney or preserve. You're not going to hurt my feelings)
  • 1 7.5 ounce tube of buttermilk biscuits
Directions
  1. Preheat oven to 400F. Lightly grease a baking sheet.
  2. Take half the biscuit dough, wad it up and roll it out big enough that you can lay the brie on and have enough dough to fold up the sides of the brie. 
  3. Put the brie on the dough (duh). 
  4. Spread the chutney over the top of the brie.
  5. Wad up the other half of the dough and roll it out to the same size as the first piece. Lay it over the top. Tuck the bottom dough under the top. Use a sharp knife to make three slashes on the top of the dough (this will vent any steam and makes this look way fancier than it actually is.)
  6. Cook for 20-25 minutes or until golden brown. (If you're feeling ultra-fancy, give the dough an egg wash before putting it in the oven)
BONUS: Watch in horror as we make this recipe on YouTube!
Good times!

Sunday, August 25, 2013

Slow Cooker Pork Loin and Hominy

     The school year is in full swing, which means the slow-cooker has been brought out for heavy use. Generally we throw together a few things in our cookers on Sunday and eat on them for lunches and dinners during the work week. I started this week with an idea that had been knocking around in my head for a couple of days. Pork and hominy seemed like a good mix, so I decided to use those as key ingredients and give it a generally Southwest feel. I used my own home-canned chili tomatoes. Any canned chili tomato will do. The recipe below is written assuming you're using plain old canned tomatoes. If you find pre-seasoned chili tomatoes, omit the chili powder, cumin and paprika. If you drain the liquid, this makes a decent taco filling. It's also good over rice. It doesn't have a ton of heat, so you can fine tune it as you need.
Slow Cooker Pork Loin with Hominy
Ingredients

  • Pork loin, about 3 pounds
  • 1 can white or yellow hominy, drained
  • 1 can black eye peas or bean of your choice
  • 1 quart canned tomatoes, undrained.
  • 1 tablespoon chili powder
  • 1 teaspoon cumin
  • 1/4 teaspoon smoked paprika
  • 3 cayenne peppers
  • 2 chipotle peppers in adobo sauce
  • 1 medium onion, roughly chopped
  • 1 can cream of celery soup
Directions
  1. Heat some oil in a large pan. Cook loin about 3 minutes on each side, until just starting to brown.
  2. Pour tomatoes and spices into slow cooker. Lay the loin, fat side up, on top of the tomatoes. 
  3. Spread remaining ingredients over top of loin.
  4. Cook 4-5 hours on HIGH or until meat breaks apart easily with a fork.
UPDATE: I have added a YouTube video of the actual cooking process! How exciting! Or not. Depends on how low you set the bar.

Good times!

Sunday, July 21, 2013

Skillet Apple Brownie via All Recipes

     I have mixed emotions about All Recipes. It's kind of like the YouTube of recipe sites. People put their best efforts into creating something, then the people in the comments ruthlessly dismantle the person who posted. Some of the comments are just downright mean. However, there are some fairly good recipes lurking about. I actually subscribed to the All Recipes magazine to allow the recipes to be pre-screened for me. That's how I found this recipe. This was a very dense and rich dessert and would benefit greatly from a nice vanilla ice cream melting across the top. As always, any notes and changes are in blue.

Skillet Apple Brownie
via All Recipes
Ingredients
  • 1 cup all-purpose flour
  • 1/2 cup white sugar
  • 1/2 cup brown sugar
  • 1/4 teaspoon salt
  • 2 teaspoons ground cinnamon
  • 1 teaspoon ground nutmeg (I used 1/2 teaspoon)
  • 1/2 teaspoon ground cloves (omitted)
  • 2 eggs, lightly beaten
  • 1 teaspoon vanilla extract (I substituted a tablespoon of French Vanilla syrup from Java & Co.)
  • 1/2 cup plus 1 tablespoon melted butter
  • 2 cups apples, peeled, cored and chopped (I used a pint of my home canned apples in bourbon and clove)
  • 1/2 cup chopped pecans (No pecans in the house. I substituted chopped walnuts)
Directions
  1. Preheat oven to 350F. Place an 8-9" cast iron skillet in oven to preheat.
  2. Whisk together flour, white sugar, brown sugar, salt, cinnamon, nutmeg and cloves (if used) in a bowl; set aside.
  3. Beat together eggs, vanilla extract (or syrup), 1/2 cup of melted butter in a mixing bowl. (I used the Kitchenaid. Eventually Kitchenaid has to give me a sponsorship)
  4. Toss apples and nuts in flour mixture, then stir into egg mixture until combined (again, the Kitchenaid was used to combine the dry and wet ingredients. ARE YOU LISTENING, KITCHENAID?)
  5. Add remaining 1 tablespoon butter to hot skillet, coating pan evenly. Pour batter into pan and place in oven. Bake until sides are dry and a toothpick inserted in the center comes out clean, about 40 minutes (as always mine took a bit longer, closer to 50 minutes. Cooking times may vary)
  6. Cool in skillet 20 minutes before removing to slice (as you can see from the picture, I left it in the pan to slice. Rebel to the end, that's me)
Good times!