Sunday, November 13, 2016

Slow Cooker Mexican Style Beer and Cheese Soup

Holy cow does having a child eat into your time. Nobody warned me about that. Okay, everybody warned me about that. It's a good thing she's beautiful and hilarious, so I don't mind. One of the big things I've learned in the last year or so is to find meals that can be prepared in a hurry or require very little maintenance. During the winter months, that means I'm leaning heavily on the slow cooker. The Wife was recently after me to make some beer and cheese soup. I have a recipe and it's pretty good, but wanted something that would work well with the absolutely vile pumpkin beer I had in the fridge. I found it! The beer flavor really works quite well and the soup has a nice bite to it from the peppers. This is a great cold-weather soup. We are definitely making it again. As a bonus, at the bottom of this post, you'll find the link to the YouTube video of the recipe. As always, notes are in blue.


Slow Cooker Mexican Style
Beer and Cheese Soup
(that absolutely does not photograph well)
Ingredients

  • 1-1/4 lb. ground beef
  • 1/2 onion, chopped
  • 1 can (10.75 oz) cheddar cheese soup (if you can find nacho cheese soup, that would probably be even better)
  • 1 can (10 oz) diced tomato and peppers
  • 1 can (15.5 oz) black beans, rinsed and drained
  • 1 can (14.75 oz) creamed corn
  • 1 can (12 oz) Harvest Patch Shandy (Leinenkugel) beer. (if you can't find it, any pumpkin beer will do. If you can't find pumpkin beer, or despise all things pumpkin, use any pilsner style beer (Old Style, etc). If you can't/won't use booze, just use an equal amount of water or beef stock)
  • 1 envelope taco seasoning (about 1 oz)
Directions
  1. In a pan, brown ground beef along with the chopped onions. Drain off excess grease and then stir in taco seasoning (into the meat and onion mix, not the drained grease because that would be dumb)
  2. Combine all ingredients in a slow cooker. (we used a 3 quart and it was close. I suggest at least a 4 quart cooker). Cook on HIGH about 4 hours.
BONUS VIDEO


Good Times!

Tuesday, September 13, 2016

T-Bird Hot Sauce

     Every year I plant way too many hot peppers and every year I find myself desperate to find ways to use them up. I have bags and bags of peppers that I've dried, but those really start to take up space. I am always looking for new and exciting ways to use up lots of peppers in one go. This particular sauce certainly fits the bill, using five dozen peppers. It also uses up some tamarind concentrate that I mistakenly bought when I was shopping for tahini. For whatever reason, I'm always mixing tahini and tamarind up, which generally doesn't end well in a recipe. Though very spicy, this sauce has a wonderful deep and mellow flavor underneath from the tamarind and guajilo. This is a go-to sauce for chicken or pork dishes. It's thick enough to hold up on the barbecue or hot wings. As for the name? I used Thai peppers in the recipe. I know "bird" specifically refers to the dried pepper, but the name was too good to pass up. "T" for Thai or Tamarind and "Bird" for the alternate pepper name. I am so damned clever it hurts. As always, notes are in blue.

T-Bird Hot Sauce
Ingredients

  • 1 tablespoon tomato paste
  • 2 tablespoons red wine vinegar
  • 1 Tablespoon tamarind concentrate
  • 1 cup cider vinegar
  • 1/3 cup water
  • 60 Thai bird chili peppers, stemmed (cayenne or serrano can be substituted, but you may need to use less, as those peppers are generally larger)
  • 1 dried Ancho chili
  • 2 dried Guajillo chilis
  • 4 tomatoes, chopped
  • 1 onion, chopped
  • 1 carrot, chopped
  • 1 rib celery, chopped
Directions
  1. Add all ingredients to a food processor (make sure it is a large capacity processor, at least 7 cups. 10 would be better, unless you're a fan of leaking and caustic messes. Caustic Mess would be an outstanding punk band name). Process until smooth.
  2. Transfer mixture to a nonreactive pot and bring to a boil. Reduce to a simmer and let simmer for about 10 minutes. (If you're not planning on canning this sauce for storage, you're done. If you want to store this sauce long term, go on to the next steps)
  3. Prepare a boiling water canner and submerge 4 half pint jars (or two full pint jars) to sterilize in the boiling water. (You can be doing this while the sauce is simmering)
  4. Remove the jars and fill with the warm sauce. Leave 1/4" headspace in each jar.
  5. Seal the jars with a 2 piece lid and process in the boiling water bath for 12 minutes (If you're doing full pints, go for about 16 minutes).
  6. After 12 minutes, remove from the bath and set on a wire rack to cool. Eventually, you'll hear the satisfying "pop" that tells you the jar has sealed. If after a few hours, a jar hasn't sealed, put on a new lid and try reboiling for another 12 minutes. If it doesn't seal after that, just give up and use the sauce. It will hold for a long time in the fridge. Properly processed and sealed, the sauce is good for at least a year. As always, double check everything with the National Center for Home Food Preservation to ensure you don't poison anybody.

Good Times!


Sunday, August 14, 2016

Applesauce Cheddar Quick Bread

     We eat an alarming amount of bread in this house. The Wife loves her bread. The Spud really, really likes her bread. I certainly enjoy bread. We embrace gluten lovingly and with all our beings. We love it enough that we eventually started using the hashtag #sundaysareforbaking. That makes it serious. I think. Maybe not. This particular bread is from an ancient canning book that still gets a lot of mileage in our house. It's a great quick bread. If you make your own applesauce, which we do, it's even better. The timing on the bread is a little iffy. It took us way longer to bake than the book called for. This is a fantastic breakfast bread, spread with a little sweet butter or marmalade. Perhaps top it with my Mulberry Jam? I imagine it would make a dynamite peanut butter and jelly sandwich, too. As always, notes and changes are in blue.

Applesauce Cheddar Quick Bread
via BH&G Home Canning Cook Book
Ingredients

  • 1/2 cup butter
  • 2/3 cups sugar
  • 2 eggs
  • 2 cups all-purpose flour
  • 1 teaspoon baking soda
  • 1/2 teaspoon salt
  • 1 cup applesauce (why not try my Peach Bourbon Applesauce!)
  • 3/4 cup shredded Cheddar cheese
  • 1/2 cup chopped walnuts (omitted. The Wife is not a huge fan of nuts in her bread.)
Directions
  1. Cream butter and sugar until light and fluffy (maybe I'm not doing this for long enough, because I have never been able to achieve light and fluffy consistency. I always end up with something on par with cake frosting)
  2. Add eggs, beat well.
  3. In a separate bowl, stir together flour, soda and salt. Add to the creamed butter mix. Stir in the applesauce, cheese and nuts (if using)
  4. Turn into a greased loaf pan (what am I, a wizard? I never got a Hogwarts letter so I'm not really up on my Transfiguration and Polymorph spells. How about I just dump the mixture into a loaf pan?)
  5. Bake at 350F (180C, Gasmark 4) for 50-55 minutes (fair warning, this may take way longer than the stated time. It took me closer to 75-90 minutes. Just run it for the 55, then check it with a knife. If it comes out clean, you're fine. If it comes out wet, you're not done. If it comes out covered in blood and ichor, your oven is possessed.) Cool 10 minutes in the pan. Remove to finish cooling on a wire rack.
Add caption

Friday, August 5, 2016

Mulberry Jam

     There is great debate around here as to the standing of the mulberry tree. Many see it as a weed. And you know what?  They're totally right. Left unchecked, you can watch mulberries inexorably take over your yard. We have the damned things poking out from about every bush in our yard. They even grow out of rocks. Not even joking. They're next to impossible to kill once they get established. Then, there's the fruiting mulberries. These aren't so bad. I mean, ok, they're bad. They're just as invasive and if the birds get to the berries before you do, everything in the area is covered in purple shit. So I think what we can take away from this discussion is that mulberries are the worst thing ever. That's why I collect like ten pounds of berries each season. As awful as the trees may be, the 
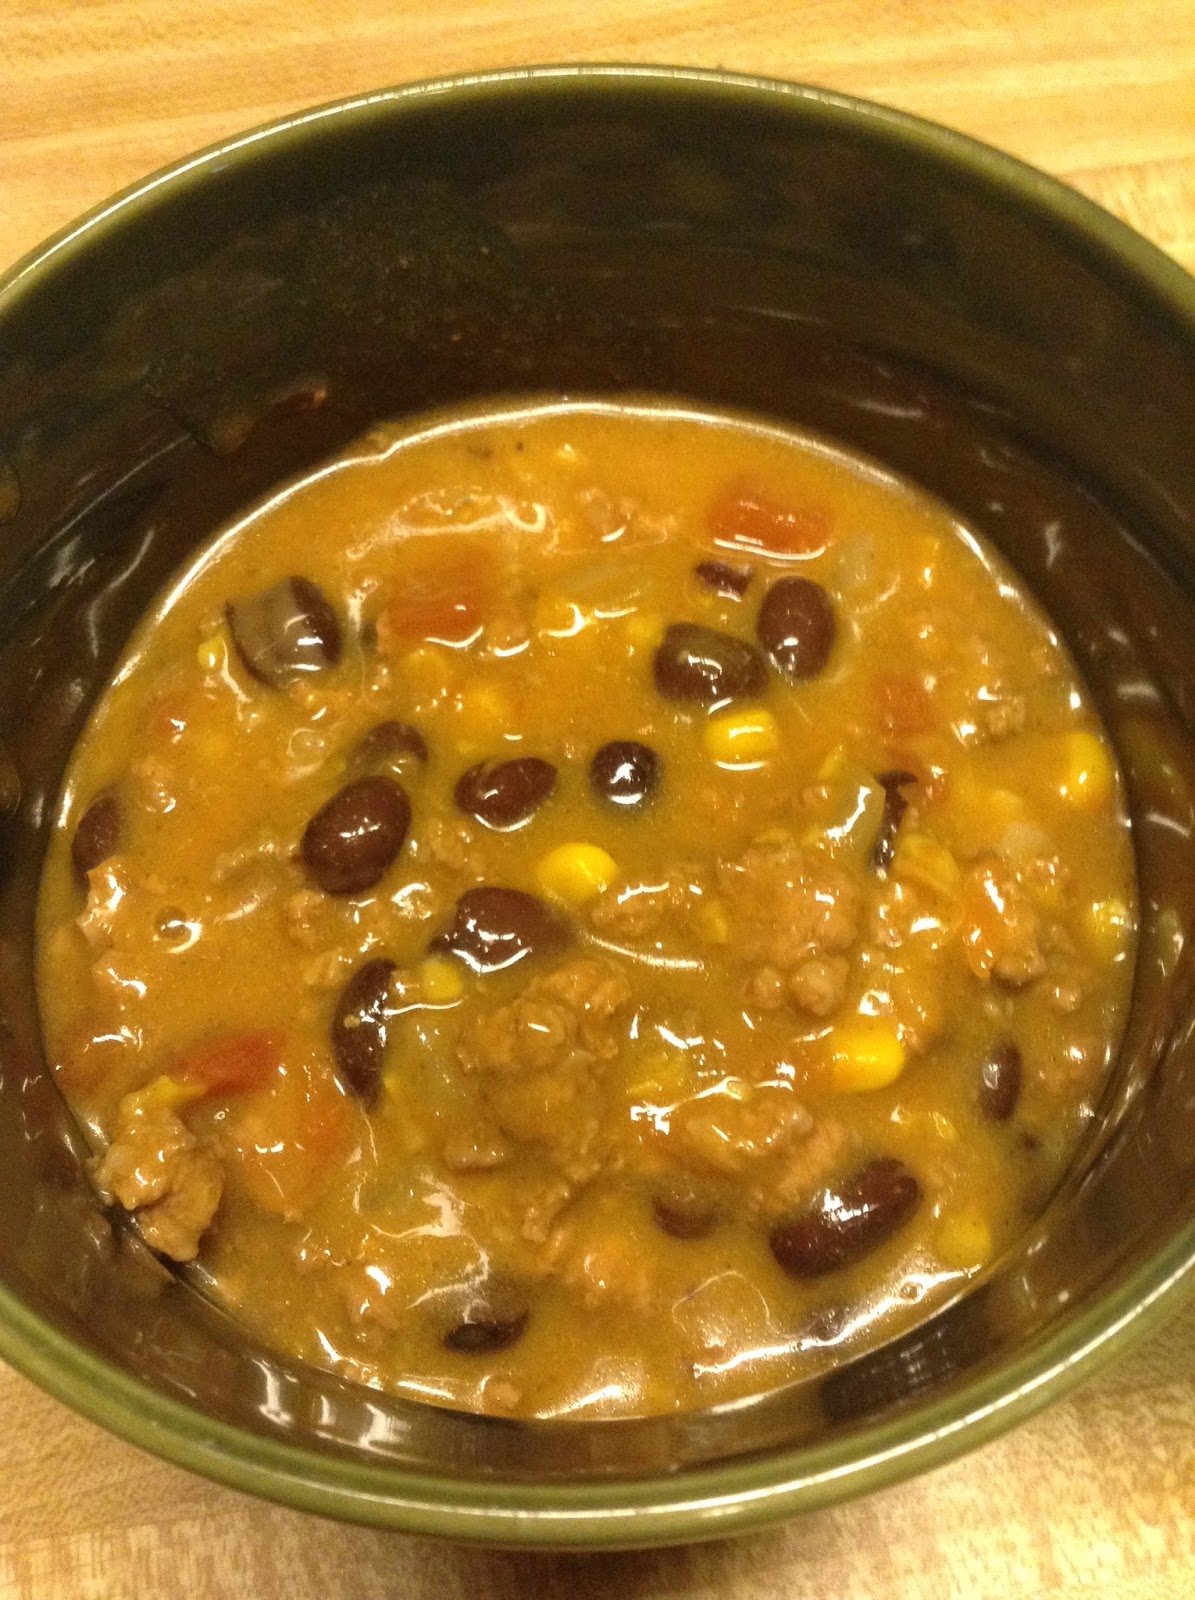
berries are actually pretty good. They have a nice color and a mild sweetness. I decided to make them into jam this year. I'm going to come out and admit I think I did something wrong. I'm thinking I used either too much sugar, too much pectin, or possibly both. This stuff is thick.
Also useful for caulking doors and windows,
if you don't mind the ants.

As far as jam (jelly? conserve? I can't tell that shit apart) goes, it's quite tasty, but a little tough to work with. It helps to warm it up a bit before you use it. It's great on a bagel with a schmear of cream cheese, or even over some vanilla ice cream. Give it a try and mess around with the pectin and sugar and let me know what you come up with. As always, notes are in blue.

Mulberry Jam
(yields: 7 half pint jars)
Ingredients

  • 4 cups mulberries
  • 7 cups sugar
  • 1 box (1.75 ounce) powdered pectin

Directions
  1. Run fruit through a food mill. 
  2. Take the milled fruit and resulting juice into a stainless steel pot
  3. Add pectin, stir and bring to a rolling boil on high heat
  4. Add the sugar. Bring back to a rolling boil and boil EXACTLY one minute (this is straight off the Sure-Jel instructions and they are not kidding. I've screwed this up and ended with quarts of cinnamon-apple syrup. Not with this recipe, mind you. We're using mulberries here. If we started with mulberries and ended with cinnamon-apple, we'd be dealing with some sort of alchemy.) 
    Wrong alchemy
  5. Watch in horror as the entire mixture foams up over the top of the pot and makes a huge fucking mess of the stove top (alternatively, stir constantly and be ready to adjust the heat to prevent foaming)
  6. Get the pot off the heat and start getting it into half pint jars. This stuff will start setting fairly quick. 
  7. Seal the lids and process in a boiling water bath for five minutes (as always, check with the National Center for Home Food Preparation to ensure you're not accidentally poisoning anyone)
  8. After five minutes, remove jars to a wire rack and wait for the satisfying "thunk" that means they're sealed. Store in a cool dark place for up to a year or until you're too afraid to open it.
  9. Reflect on how "Mulberry Jam" would be an awesome name for a funk band.
Good Times


Thursday, July 21, 2016

Black Bean Mango Lime Slaw

     It's always fun to order cole slaw at restaurants. There is no middle ground in the quality. It either tastes great, or it tastes like an old dishrag. It's either drowning in vinegar and oil, or it's buried in mayo. Only the truly adventurous pick cole slaw as a side when they eat out. Nobody ever says, "Hey, let's go to this restaurant, they have really fucking great cole slaw." I'm not even sure what convinced me to make this. We were considering fish tacos for dinner and it struck me that they would benefit from some slaw. Not just any slaw, mind you. This would be a slaw for the ages. An UberSlaw. I have to tell you, this was some damned good slaw. Thank me later. As always, notes are in blue.

Black Bean Mango Lime Slaw
Ingredients

  • 1 bag (about 1 pound) cole slaw mix (feel free to shred cabbage, red cabbage and carrot if you want to make your own mix. I was feeling fairly lazy. Just make sure it's around a pound.)
  • 1/2 red onion, chopped
  • 1 mango, chopped
  • 1 can (14.5 ounce) black beans, rinsed and drained
  • 1/4 cup lime juice
  • 1 tablespoon balsamic vinaigrette
  •  1/2 teaspoon Ukrainian Village seasoning from Spice House (follow the link for a list of what's in it if you don't want to order it)
  • optional: (this is not actually optional unless you're a big baby) 1 jalapeno, seeded and finely chopped
Directions
  1. In a large bowl, mix the first four ingredients (and the jalapeno if you're a sexual tyrannosaurus, just like me).
  2. In a smaller bowl, mix the last three ingredients.
  3. Pour the contents of the smaller bowl into the larger bowl.
  4. Toss to incorporate ingredients. Refrigerate for a couple of hours.
  5. HOW EASY WAS THAT?
Good Times!

Monday, July 11, 2016

Another Sausage, Sauerkraut and Potato Recipe, but with Apples!

     Bratwurst, sauerkraut and potato dishes are as ubiquitous as man-buns on hipsters. Why does the world need another one? No clue. Good thing this one isn't mine. I pinched it from a recipe book and then made a bunch of changes. As far as I'm concerned, these dishes generally taste about the same. This one had enough changes that it was actually fairly tasty. I'm still not a big fan, but The Wife enjoyed it, so it will stay in the rotation. Mostly I avoid dishes like this because they are absolute sodium bombs. I can gain 3-4 pounds of water overnight after eating something like this. Not even joking. Just serve it with copious amounts of beer to keep the system flushed. As always, notes and changes are in blue.
Another Sausage, Sauerkraut
and Potato Recipe
but with Apples!
(via Fix-It and Forget-It Recipes for Entertaining)

Ingredients
  • 5-6 bratwurst links, cut into 1" pieces (I'm always leery of bratwurst; my father referred to it as "gray meat." We went with a package of Johnsonville "Irish O'Garlic" sausages.)
  • 5 medium sized potatoes, peeled and cubed (we just scrubbed them and cubed them. I generally refuse to peel a potato)
  • 27 ounce can sauerkraut, rinsed and drained (we used a 24 ounce jar, just to be difficult)
  • 1 medium tart apple, chopped
  • 1 small onion, chopped
  • 1/4 cup packed brown sugar
  • 1/2 teaspoon salt (HAHAHAHAHAHA, no. You've already got kraut and a pack of sausages in there. If there's one thing this recipe does NOT need, it's more salt. 
  • 1 teaspoon Old World Central Street Seasoning from Spice House (yeah yeah, it's got salt, but a ton of other good things in there!)
Directions
  1. Brown bratwurst/sausages on all sides in skillet (did they mean all sides of the sausage, or brown the sausage on all sides of the skillet? I tried browning the sausages on the outside of the skillet and it made a hell of a mess)
  2. Combine remaining ingredients in slow cooker. Stir in bratwurst/sausage and pan drippings (Pan drippings? Seriously. They mean grease. You cook half a dozen processed meat tubes in a pan and you get grease. Pan drippings sounds like a Satyr with venereal disease)
  3. Cover. Cook on high 4-6 hours, or until potatoes and apples are tender. (It took us about 5 hours)
BONUS! Click HERE to see the video replay of the live stream we did of cooking this recipe!
Good Times!

Thursday, July 7, 2016

Too Damned Easy Spicy Orange Chicken and Broccoli

     If I ever made a list of all-time favorite fast-food/carry-out dishes, Panda Express's Orange Chicken would have to be on it. It is so wrong, but so damned right. This recipe is nothing like it, apart from being called "orange chicken." Sorry. The only reason I even made this was because we couldn't figure out what to make for dinner. The Wife wanted pasta, and I just wasn't feeling pasta. Then I remembered a jar of orange marmalade lurking on the top shelf of a cabinet. I had long threatened to use it on something other than toast. Thus, this recipe was born. Possibly the goofiest thing I used in this recipe was Sunny Delight for the sauce. However, it gives you an orange citrus flavor punch that can't be denied. Feel free to use orange juice instead. You could probably even omit the sauce entirely and it would still be fine. I tried it with and without the sauce and enjoyed it both ways. Flavor-wise, I was very pleased with the result. Sweet orange flavor with a nice bit of heat. As always, notes are in blue.

Too Damned Easy
Spicy Orange Chicken
and Broccoli
Ingredients

  • 1-1/2 pounds breaded chicken tenders (our local market sells bulk bags of breaded chicken tenders like you get in the cups at Wal-Mart or Casey's gas stations. Sort of like popcorn chicken style.  For a buck or so a pound, they're great. If you can't find them, find something similar. Hell, even Tyson nuggets would work.
  • 3/4 cup orange marmalade
  • 1 tablespoon Sriracha hot sauce
  • 1 pound frozen broccoli
for sauce:
  • 1/2 cup Sunny Delight (give or take, depending on how thick you'll want the sauce. Also, feel free to use orange juice if you don't like Sunny D. I thought it added a nice flavor)
  • 2 tablespoons corn starch
  • 1 teaspoon garlic powder
  • 1/4 teaspoon black pepper
  • 2 teaspoons Sriracha hot sauce
  • 1/2 teaspoon crushed red pepper flakes
Directions
  1. Cook chicken according to directions
  2. Cook broccoli however you prefer (steaming, microwave, whatever. We just boiled ours for a few minutes)
  3. While steps 1 and 2 are going, in a small saucepan, combine all the ingredients for the sauce (if you want it thinner, add a little more liquid.) Cook over medium heat, whisking constantly, until the sauce is your desired consistency (I went for that slightly thick and sticky sauce like you get at Panda Express).
  4. Toss hot chicken and broccoli in a large bowl with the marmalade and Sriracha.
  5. Add the sauce to the chicken mix and toss again.
  6. Serve over white rice.
Good Times!

Monday, July 4, 2016

Feta and Spinach Stuffed Chicken Breasts

     Can you really go wrong with the combination of feta and spinach? No, you can't. Don't even try to argue with me because I won't listen. It's a great combo and if you don't like it you are obviously defective. Basically, what I've done is make my version of a fairly ubiquitous recipe. I'm sure there are hundreds of similar recipes floating around the internet. Do you know what separates mine from theirs? Theirs suck. Theirs are not made with love. It is entirely possible that theirs were made by Baby-Eating Fascists. Use my recipe and strike a blow for global peace and understanding. If you're not part of the solution, you're obviously part of the problem. I'll stop now. The recipe is simple and delicious and I promise you'll love it. Unless you don't. And then it's your own fault for listening to me. As always, notes are in blue.

Feta and Spinach
Stuffed Chicken Breasts
Ingredients

  • 4 boneless, skinless chicken breasts
  • 3 ounces crumbled feta cheese
  • 4 ounces room temperature cream cheese (we use Neufchatel)
  • 10 ounces frozen spinach, defrosted and all water squeezed out
  • 1 cup bread crumbs
  • 1-1/2 teaspoons Spice House Greek Town seasoning, divided (if you can't get this spice, a mix of salt, pepper, onion powder, oregano and lemon peel. I have no idea what ratios you'd use, so good luck. Or just order the seasoning)
  • 1/2 cup flour
  • 1 egg, beaten
Directions
  1. Preheat oven to 375F (190C, Gasmark 5).
  2. Split the chicken breasts down the length, being careful to not cut completely into two pieces. You're looking to sort of butterfly the chicken.
  3. Mix 1 teaspoon of the spice mix in with the flour. 
  4. Dredge the chicken in first in the flour mix, then the egg, then finally the bread crumbs.Set on a baking sheet. 
  5. In a small bowl, combine cream cheese, spinach, feta and remaining spice mix. Mix well until all ingredients are incorporated. 
    You could just take what you have here,
    add some jarred artichokes and you have a hell of an appetizer dip!
  6. Fill each piece of chicken with 1/3 cup of the filling.
  7. Bake for 35 minutes or until chicken juices run clear.
    See? Clear. We're all making it out of this meal alive.
    Good Times!

Thursday, June 30, 2016

Spicy Black Bean Gazpacho

     I'm not sure how I feel about gazpacho.
Wrong Gazpacho.
The idea of cold soup has never really appealed to me. Granted, there are exceptions. There's an Indian cold yogurt cucumber soup I'm a fan of, but the idea of a bowl of raw veggies in tomato juice doesn't really call out to me. I wound up making this soup because we had a bunch of veggies on hand and The Wife suggested it. On a hot summer day, I suppose it made sense. I gave in and whipped it up. I used my Bloody Mary mix since it had all the seasonings already in it and I wasn't about to run out and buy V8. I have to admit this was pretty good. It had a nice spicy kick and I particularly like the way the beans offset the crunchiness of the other veggies. If you're looking for an easy, healthy summer soup, I'd have to say this is a big winner. As always, notes and changes are in blue.

Spicy Black Bean Gazpacho
via Everyday Light Meals
Ingredients

  • 3 cans (5-1/2 ounces each) spicy hot V8 juice. (Nope. We don't have V8 in the house since the gold-plated hovercraft was in the shop. We opted for 18 ounces of The Wife's Choice Bloody Mary Mix. It's worth the extra trouble to make this, especially if you like a good Blood Mary.)
  • 1 can (15 ounces) black beans, rinsed and drained (has anybody ever seen a recipe that said not to rinse and drain black beans? I feel like maybe I have. You know, "reserve mucousy water for proper texture.")
  • 1 medium onion, chopped (I used yellow, though I feel a sweet onion would have been good here)
  • 2 large tomatoes, seeded and chopped (seeded? I don't have time for that sort of nonsense)
  • 2 medium zucchini, chopped
  • 2 tablespoons olive oil
  • 2 tablespoons white wine vinegar
  • 1 garlic clove, minced
  • 1/4 teaspoon salt
  • 1/4 teaspoon black pepper (omitted since it's already in my Bloody Mary Mix)
  • 1/4 teaspoon cayenne pepper (omitted since it's already in my Bloody Mary Mix)
Directions
  1. In a large bowl, combine all ingredients. Cover and refrigerate at least 8 hours. (Feel free to serve with a sprinkle of Parmesan cheese. We did, and we should be the benchmark for all your decision making.)
Good Times!

Monday, June 6, 2016

Three Mustard and Bacon Potato Salad

     Who doesn't like potato salad? COMMUNISTS AND BABY EATING FASCISTS, THAT'S WHO. Seriously? There's so many potato salad variants. I can see not liking one or two, but to turn up your nose at all of them would be an unforgivable crime. Especially if you turned your nose up at mine. We all know I produce nothing but pure gold here and if you didn't like something I made, you either screwed it up or are uncultured swine. All kidding aside (I wasn't kidding), this potato salad is dynamite. At least, that's The Wife's verdict. I will admit it is a tasty salad. You can't go wrong with a pound of bacon! The only thing you may find problematic is that it calls for another one of my recipes to make this. You need to have a batch of my Three Mustard Pepper Relish on hand. If you don't have it, or can't make it, I'm not sure what you can do. I imagine a mix of a sweet and spicy mustard and a spicy relish should be a fair (albeit weak) approximation. If you come up with a replacement for my relish, let me know. As always, notes are in blue.

Three Mustard and Bacon Potato Salad
Ingredients

  • 4 pounds potatoes, cut into 1" cubes (pick any potato you want. We used russet. Red would be good. I wouldn't recommend sweet)
  • 1 pound pepper bacon
  • 3 stalks celery, chopped
  • 1/2 large red onion, chopped
  • 1/3 cup sour cream
  • 2/3 cup Three Mustard Pepper Relish
Directions
  1. Throw the potatoes into boiling water. Boil 7-10 minutes or until they are just starting to get soft (don't over cook them or they will disintegrate when you go to toss them later). Set aside to cool. 
  2. In a pan, cook the bacon until crisp. Drain and crumble the bacon. (don't you dare throw away the grease. Drain it into a clean jar and you can pop it in the fridge for later use. DON'T put the hot jar right into the fridge unless you're a huge fan of cleaning broken glass.)
  3. In a small bowl, mix the sour cream and mustard. 
  4. Put potatoes in a large bowl. Add bacon and onion. Pour in the sour cream and mustard mix. Toss until all ingredients are incorporated (this gives a nice, thin coat over everything. If you like more dressing in your salad, feel free to add more. Just remember 2 parts mustard relish per 1 part sour cream)
  5. Refrigerate at least an hour before serving
Good Times!

Thursday, June 2, 2016

Stir-Fried Beef With Green Onion and Broccoli

     Stir-fry has to be one of my favorite methods of cooking. It's generally fast and easy. You really have to totally walk away from the pan for an extended period of time to mess it up. This particular recipe came about as many of my recipes do: a way to use up produce before it goes off. We had a few gigantic scallions the Mother-In-Law gave us and some broccoli not long for this world. Fortunately, I've taken to keeping at least a pound of stew beef in the freezer, so it worked out great. The flavor was mellow and satisfying. You may notice I let "fast and easy" and "mellow and satisfying" without making any sort of obvious snide "like I like my women" comment. That's because I like my women like I like my coffee. Bitter. And with a cheese Danish. As always, notes are in blue.

Stir-Fried Beef with
Scallions and Broccoli
Ingredients

  • 1 pound beef stew meat
  • 4 scallions, cut into 1/4" pieces (you can use some of the green part if you like. We do.)
  • 2 cups fresh broccoli, cut into smallish pieces (frozen will work in a pinch. Just defrost it first)
  • 1 clove garlic, minced
  • 2 tablespoons soy sauce (we use low sodium)
  • 2 tablespoons red wine vinegar
  • 2 tablespoons vegetable oil
  • 2 teaspoons Sriracha (optional. I mean, if you hate flavor and happiness, you can certainly leave it out. To each their own.)
  • sesame oil
Directions
  1. Cut each piece of stew meat into one or two smaller pieces. 
  2. In a bowl, add meat, scallions, broccoli, soy sauce and vinegar. Toss to coat. Let marinate for about 30 minutes. Toss occasionally to make sure everything is coated.
  3. Heat oil in a large pan (a wok would be perfect here if you have one. If you don't, maybe you could run out and buy one! Be adventurous! Take a wok on the wild side! Sorry.) Add garlic and cook for less than a minute. Add beef and veggies and stir-fry 7-10 minutes or until the meat is done and the veggies still have a little bit of snap. Add a few drops of sesame oil toward the end of the cooking.
  4. Serve over white rice or noodles.
Good Times!

Sunday, May 29, 2016

Sweet and Tangy Crabuluxe Pasta Salad

     I do so enjoy a good pasta salad. I also enjoy Crabuluxe, so obviously my tastes can't be a reliable source of information. For those of you who have yet to hear me speak of Crabuluxe, it is the faux-product name I tag on any form of imitation crab meat. It runs about $2.50 per pound and is useful in all sorts of recipes (such as Zesty Crabuluxe Cold Pasta Salad; Crab and Spinach Enchiladas, or Stir-Fried Broccoli with Crabuluxe). I suppose if you're made of money and regularly wipe your ass with $100 bills you could go ahead and use real crab meat. Anyways, we whipped this little number up using a mango-chipotle vinaigrette we picked up at ALDI. We had it warm the day we made it, then ate it cold the next day. We felt cold was the better way to serve it. Do what you want as far as serving temperature. Nobody listens to me anyways. As always, notes are in blue.

Sweet and Tangy Crabuluxe Pasta Salad
Ingredients
  • 1 pound medium shells pasta
  • 1 pound Crabuluxe, cut into bite sized pieces
  • 1 medium sweet onion, chopped
  • 3 medium tomatoes, chopped
  • 8 ounces mozzarella cheese, cut into 1/4" cubes
  • 1-1/4 cup mango chipotle vinaigrette (ALDI carries it. If you don't have access to ALDI, I imagine most larger grocery stores carry something similar)
  • 1 teaspoon garlic powder
  • 1 teaspoon ponzu sauce (it's a citrus based sauce. If you don't have it in your kitchen, stop reading this and go get a bottle. You can thank me later)
  • 2 teaspoons Sriracha (optional for babies and the chronically lame)
Directions
  1. Cook pasta until al dente (nice guy, Al. I wonder what he's up to these days?) Drain put in a large bowl. 
  2. In a smaller bowl, mix the vinaigrette, garlic powder, ponzu and Sriracha. 
  3. Put all the remaining ingredients in the large bowl with the pasta. Pour in the contents of the smaller bowl. Toss to incorporate ingredients. 
  4. Refrigerate at least one hour before serving. (as mentioned, we loved this as a cold pasta salad. There's really nothing stopping you from serving it immediately if you prefer a warm pasta salad. It's not like I have your house under surveillance...Or do I?)
Good Times!


Tuesday, April 26, 2016

Quick Tortellini and Kielbasa via The Wife

Special guest post from The Wife:
   
   My mom and I have an arrangement on Tuesday nights. The Husband stays late at school to run game club, so my mom brings the Spud home at 4, and then one of us prepares dinner while the other one watches the Spud. We alternate dinner responsibilities from week to week. This past Tuesday, it was my mom’s turn to make dinner. Around 1:45, I received an email from her saying she wasn’t feeling well and needed to bow out of dinner. This left me with a dilemma. Sure, we could have leftovers, but that didn’t sound appealing to me, and I was certain the Husband wouldn’t be too excited about it either. As I sat at my desk, waiting for my students to locate their homework, I remembered a package of kielbasa I had seen hiding in the back of the freezer. I typed “quick kielbasa recipe” into Google, and the first hit was Quick Tortellini and Kielbasa. With just five ingredients (all of which we had in some form or another), I decided to give it a try.
Mercifully, the Spud decided to take a nap on the way home from Grandma’s, so I was able to throw dinner together before she woke up. She even got to taste-test it before her dad got home. Her red face and watery eyes attested to the fact that it was a bit spicier than I had intended…but she continued to shovel it in. I figured that was a good sign.   

Quick Tortellini and Kielbasa
From Pillsbury

Ingredients:
  • 1 (9 oz.) package refrigerated cheese-filled tortellini (I’m sure they meant 1 16 oz. package of frozen tortellini.)
  • 1 ½ cups frozen bell pepper and onion stir-fry (Didn’t have this exact item. Instead, I went with ½ cup thinly sliced red pepper, ½ cup thinly sliced yellow onion, and ½ cup fresh broccoli.)
  • ½ lb. cooked kielbasa or Polish sausage, cut into ¼ inch slices (14 oz. is kinda like ½ pound, right? No, but if I’m going to open a package, I’m using all of it.)
  • 1 (26 oz.) can chunky-style tomato pasta sauce (I didn’t have a 26 oz. can of pasta sauce, but that wasn’t a big deal. Kielbasa and pasta sauce sounded gross. Instead, I went with 1 14.5 oz. can of low sodium petite diced tomatoes and 1 10 oz. can of diced tomatoes with green chiles. I know, I know… 14.5 + 10 is 24.5, not 26. Look, I’m an English teacher, okay?)
  • 1 oz. (1/4 cup) shredded Parmesan cheese (omitted since I didn’t use pasta sauce)

Directions:
  1.  Cook tortellini as directed on package. Drain and set aside.
  2.  Meanwhile, spray large nonstick skillet with nonstick cooking spray (clearly, we don’t want this to stick). Add bell pepper and onion (and broccoli); cook over medium-high heat for 3 to 5 minutes or until tender, stirring occasionally. Add kielbasa; cook and stir 2 minutes. (I let it cook a little longer – nothing worse than underdone kielbasa).
  3. Add pasta sauce (don’t be gross – used the diced tomato combo); mix well. Reduce heat to medium; simmer 4 to 5 minutes or until thoroughly heated, stirring occasionally.
  4. Add cooked tortellini; stir gently to mix. Cook until thoroughly heated, stirring occasionally. Sprinkle with cheese (or don’t).
Good Times!


Monday, April 11, 2016

Slow Cooker Southwest Style Cheese Soup

     "Southwest Style." what a vague description. It would seem as long as you have meat and chile peppers, you can call something Southwest. That's good, because that is exactly what I did. This really came together as a desperate attempt to come up with meals for the week. I didn't expect much from this recipe, but was happily surprised at how it turned out. It had a nice bite and a plenty of flavor. It was even better the next day! Give it a try and see what you think! If you like it, let me know! If not, tell someone else, because I don't have time for your criticism.

Slow Cooker
Southwest Style Cheese Soup
Ingredients

  • 1 can (15.5 ounce) black beans, drained and rinsed
  • 1 can (14.5 ounce) fire roasted salsa style tomatoes, undrained (our ALDI had these. If you can't find them, just substitute a can of Rotel tomatoes with green chiles.)
  • 1/2 cup corn (frozen or canned)
  • 1 pound ground beef (80/20 is great, but 73/27 is fine, too. 11/89 is right out)
  • 1/2 medium yellow onion, diced
  • 4 cups water
  • 1/2 cup sour cream
  • 1 cup pepper jack cheese (this is not a paid endorsement, but I wholeheartedly recommend Kraft Habanero Heat shredded Monterey Jack)
Directions
  1. Brown and drain the ground beef. Throw it in a slow cooker.
  2. Throw in everything else except the sour cream and cheese.
  3. Cook on LOW for 4 hours
  4. Add the sour cream and cheese. Stir to incorporate and cook on LOW another 30 minutes.
Good Times!

Thursday, April 7, 2016

Orange Whip Pie

     I think everybody has a few boxes of Jell-O that have been sitting in their cabinet for untold years. In my case, it was orange flavored. I don't even like orange Jell-O. I don't know how it got there. Fortunately, I found a recipe that used it! This recipe is phenomenally easy and quite tasty. I've made a few modifications, the most notable is the use of a pie crust in the pie mix. This is because I'm cack-handed and managed to bust the first crust while loading it with filling. I just dumped everything back in the bowl and crushed up the crust in it. I feel it added a nice bit of texture to the filling! I also give the option of adding some booze to make it more true to the beverage for which it's named. If you're interested here's a bonus recipe:

Orange Whip
- 4 ounces orange juice
- 1 ounce rum
- 1 ounce vodka
- 2 ounces cream
Blend with immersion blender until thick and frothy. Serve over ice in a Collins glass

     This recipe is also flexible if you don't like orange. You could easily leave out all the orange stuff and swap in cherry Jell-O and maybe use a bit of vanilla extract. Anyways, I served it and it was a hit with all three people (The Wife, The Mother-in-Law and The Spud) who tried it. As always, notes and changes are in blue.

Orange Whip Pie
adapted from Velvety Orange Gelatin Pie (which is a terrible name)
via Taste of Home Everyday Light Meals
Ingredients
  • 1 package (.3 ounce orange gelatin)
  • 1/2 cup boiling water
  • 1 can (14 ounces) sweetened condensed milk
  • 1 cup lo-fat sour cream
  • 3 tablespoons fresh grated orange peel (too lazy to grate oranges. I used 2 teaspoons dried orange peel)
  • 1 8-ounce carton whipped topping (you know, Cool-Whip)
  • 1/4 teaspoon orange extract
  • 1 nine inch graham cracker pie crust (just go and buy one. They're like a dollar)
  • another 9" pie crust, or 6-8 decent sized graham crackers, crushed. 
  • If you're feeling adventurous and want the true Orange Whip experience:
    1 ounce vodka
    1 ounce rum
    If you use booze, use a little less water
Directions
  1. In a large bowl, dissolve gelatin in boiling water. 
  2. Stir in milk, sour cream, orange peel (and the booze if you're using it)
  3. Fold in whipped topping (and the crushed graham cracker if you're doing it my way. The Right way)
  4. Spoon into crust. Cover and refrigerate for at least 4 hours.
Good Times!

Tuesday, April 5, 2016

Cheddar Apple Bread

     Every now and then I come across a recipe that doesn't seem right. I mean, it looks good in theory, but something is off about it. This bread recipe was a perfect example. It looked great on paper. I followed most of the instructions. Then I was staring at a mixing bowl full of what amounted to dust. There was no liquid to turn it into dough. I figured maybe because I used dried apples instead of fresh. Then I realized grated apples still wouldn't produce enough liquid to make a dough. I called over The Wife for a consult. She agreed the recipe was wonky. We made an executive decision, and based on other recipes, added some yogurt and milk. The end result was fantastic. A bread that's good and crusty on the outside, but soft on the inside. Toast up a big slab of this and slather it with butter and you've got yourself a winner. I suggest making it using my suggestions, but feel free to try the original recipe. Let me know if you have any success. As always, notes and changes are in blue.

Cheddar Apple Bread
originally Old English Cheese & Apple Loaf
via The Art of Bread
Ingredients
  • 1 teaspoon oil, to grease pan (we just used nonstick cooking spray)
  • 3-1/2 cups unbleached flour (regular white flour, right?)
  • 1 tablespoon baking powder
  • 1/2 teaspoon salt
  • 4 tablespoons unsalted butter
  • 4 apples, peeled, cored and grated (we used about 2 cups dried apples, chopped)
  • 4 ounces cheddar cheese, grated
  • 2 eggs, beaten
  • 1 cup plain yogurt
  • 1/2 cup milk
  • rolled oats, to sprinkle (totally forgot about this)
Directions
  1. Preheat oven to 350F (180C, Gasmark), grease a 9x5x3" baking pan.
  2. Sift flour, baking powder and salt together in a large bowl. Rub butter into the flour mixture quickly with your fingertips until the mixture resembles the texture of coarse breadcrumbs (using your fingertips? How about one of those dough cutters? Why make things harder and messier than it needs to be?)
  3. Stir in the apples and cheese into the flour mixture. Add the beaten eggs until evenly blended (ok, if you have skipped my optional steps, you may find yourself staring at a bowl of clumpy and mostly dry flour. This was my WTF moment. Something very important seemed to be missing from the recipe. Like something to make it into a dough. The fact that the next step refers to "spooning the batter" indicates something the consistency of dried Play-Doh was not what I was looking for. Just go ahead and mix in that milk and yogurt now.) Mix until evenly blended.
  4. Spoon the batter into the pan (see? I told you. "Spoon." You'd be better off with a broom and dustpan if you don't add some liquid) Sprinkle with oats (I was so pissed about this recipe seemingly missing ingredients that I totally forgot about the oats.)
  5. Bake for 1-1/2 to 2 hours (we went for about 1-3/4 hours) until golden brown and well-risen. Turn out on a wire rack to cool.
Good Times!

Monday, March 21, 2016

The Most Middle Class Midwest Central Illinois Sandwich Ever

     There are just certain things typical to geographic areas. You go to Texas and you're going to get Tex-Mex. You go to Louisiana and you're going to get Cajun. You go to Maine and you're getting seafood. You know what you get when you head into the Midwest? Central Illinois specifically? You're going to get something with Ranch and bacon on it. The fascination with Ranch out here borders on repulsive. The kids put it on everything. Pizza. Burgers. Nuggets. Fries. If they can dip it in a bowl of Ranch, they're going to. I weep for our species. If somebody could invent deep fried Ranch, they could probably make a fortune selling it at the state fair.
     I figured I should just give in to local custom and make something involving a bunch of Ranch. The result is the following sandwich. I'll tell you this: it was super, hella-good. Crazy good. Like hide the leftovers before we eat them good. I felt guilty for throwing together such an uninspired sandwich, but there was no denying its awesomeness. So, if you're interested in a fair representation of typical Central Illinois food, this is a slightly upgraded form of it. Someday I'll tell you about Horseshoes and how every restaurant here serves them!

The Most Middle Class, Midwest,
Central Illinois Sandwich
Ever
Ingredients

  • 2 chicken breasts, butterflied and then split into two pieces each (yielding 4 pieces of chicken)
  • Old Taylor Street Cheese Sprinkle from the Spice House (if you don't have access to this mix, it's a mix of Romano cheese powder, salt, garlic powder, scallions, powdered green peppercorns, Italian parsley, basil. Good luck figuring out the exact amounts. Maybe just order it or use your favorite spice blend)
  • 4 ounces Swiss cheese, thinly sliced
  • 1/2 pound thick cut bacon
  • 8 slices thick cut bread (we used the ham and cheese bread we made earlier)
  • pack of ranch dressing mix
  • 16 ounce container of sour cream (yeah, you'll have leftover. Quit whining and use it the rest for vegetable dip)
  • red onion, sliced thin
  • iceberg lettuce (feel free to throw some tomato on if you'd like)
Directions
  1. Mix ranch dressing packet with sour cream. Put it aside for right now.
  2. Sprinkle the chicken breast pieces with the spice mix. 
  3. Heat a skillet to medium high. Add the bacon and cook until just beginning to crisp. Set aside the bacon and drain all but the a tablespoon or so of the bacon grease.
  4. Put the chicken breasts in the pan and cook 5-7 minutes. Turn the chicken and cook another 5-7 minutes. 
  5. During the last minute or so of cooking, lay the cheese on the chicken and put a cover on the pan.
  6. While the cheese is melting, spread a thick layer of the ranch sour cream mix on each slice of bread. Pile on the lettuce, onion.
  7. Add the chicken and bacon. 
  8. Eat the hell out of that sandwich.
Someday I'll learn to slice bread evenly.
Good Times!

Friday, March 18, 2016

Ham and Cheese Bread

     You probably know by now that I don't always have top of the line ingredients on hand. That's not really my thing. It's nice to have fancy meats and cheeses and stuff like that, but it's also nice to be able to pay the mortgage and utilities. I often find recipes that I end up avoiding because I never have the ingredients on hand, or more likely, I can't seem to justify the cost of the ingredients. That's probably why you don't see more recipes with Gruyere on my pages. Anyways, I found a bread recipe and wanted to make it for some time, but never had the key ingredients. Finally, I just cracked and used super-cheap alternatives. I couldn't have been happier with the results. I ended up with a nice, crusty bread perfect for sandwiches! As always, notes and changes are in blue.


Ham and Cheese Bread
adapted from Torta Di Testo Di Prosciutti E Formaggio
via The Art of Bread
Ingredients
  • 2 teaspoon (1 envelope) active dry yeast
  • 1/3 cup plus 2 tbsp water (I ended up using 4 tbsp water for whatever reason. Maybe I used too much flour.)
  • 3-1/2 cups unbleached flour (I just used plain old white flour from ALDI. I didn't have time to take the Rolls Royce out for "special" flour)
  • 1-1/2 teaspoon salt
  • 1/4 teaspoon ground black pepper
  • pinch of freshly grated nutmeg (even this amount was noticeable. If you're not a fan of nutmeg, just omit this)
  • 1/2 cup unsalted butter, softened (a stick of generic margarine microwaved for 20 seconds, you say? Done!)
  • 4 eggs, beaten
  • 5 ounces ounces sliced prosciutto, chopped (lah-de-dah! Prosciutto! Let me break out the good china! I'm going to be honest. I used a pack of Buddig honey ham)
  • 5 Emmental, dicedounces sliced prosciutto, chopped (seeing as all my liquid assets are tied up in long term investments in yacht and gold futures, I used an equal amount of shredded pepperjack cheese)
Directions
  1. Sprinkle yeast into water in a bowl. Leave for five minutes (they should really be more specific. I left the kitchen and got as far as the driveway before I realized I couldn't finish the recipe from out there. Even though the recipe didn't say to return, I did); stir to dissolve.
  2. Mix flour, salt, pepper and nutmeg in a large bowl (I used my KitchenAid, so that was my large bowl). Make a well in the center and add the dissolved yeast and everything else. 
  3. Mix until you've formed a soft, sticky dough (as mentioned, this took a little extra water to achieve). Turn out onto a lightly floured surface. Knead until silky and elastic, about 10 minutes (I just slapped the dough hook on the mixer and let it take care of things while I had a drink or six.)
  4. Put the dough in a clean bowl and cover with a dish towel. Let rise until doubled in size, about 2 hours. Punch down, then let rest for 10 minutes. 
  5. Shape the dough into a round loaf. Place on a lightly oiled baking sheet (I used a pizza stone and a thin spray of cooking oil) and cover with a dish towel (they had to specify dish towel? Was there a chance I'd chuck a beach towel over it? Maybe a washcloth?). Proof until doubled in size, about 1 hour.
  6. Bake in an oven preheated to 350F (180C, Gasmark 4) for 1-1/2 hours, until golden brown (yeah, I know this seems like a long time, but it's right. You'll need every minute of it), cool on a wire rack.
Good Times!

Tuesday, March 15, 2016

My Father's Lasagna

     My Dad was always fun to watch in the kitchen. He never used a printed recipe. He just sort of played it loose and fast and hoped for the best. One of his classics was lasagna. For whatever reason, he never used crumbled Italian sausage. Ever. It was always the links. In lasagna, he'd just slice it up and layer it in there. It was so good. He never actually taught me the recipe. I learned it by watching him, then tinkering with things until it was just right. It's not a terribly labor intensive recipe, but you need to be careful to not overcook the pasta before layering it. If you do, it's going to be a real bitch to work with. Try it and tell me it's not a great lasagna. Seriously, don't do that. I don't want your criticism.

My Father's Lasagna

Ingredients
  • 1 box lasagna noodles
  • 1 pound Italian sausage links(sweet or hot, doesn't matter)
  • sliced pepperoni
  • 1 lb ricotta cheese
  • 8 ounces shredded mozzarella cheese
  • pasta sauce of your choosing (we used home made from our Meatballs and Red Sauce recipe)
Directions
  1. Brown the sausage and slice into 1/2" rounds. Set aside.
  2. Cook the pasta a couple minutes less than the directions on the package.
  3. Take a 9x13 Pyrex baking dish and spray it with nonstick cooking spray. Lay three noodles down the length of the pan, slightly overlapping.
  4. Drop twelve tablespoons of ricotta at equal intervals (4 dollops on each noodle)
  5.  Lay a slice of sausage on each dollop of ricotta. Cover with a thin layer of the shredded mozzarella. Spoon a thin layer of sauce over the entire layer.
  6. Lay down another layer of pasta and another 12 dollops of ricotta. Instead of sausage, this time put down pepperoni. Put down another thin layer of mozzarella and a layer of sauce.
  7. Repeat step 5.
  8. Lay down a final layer of pasta. Over this, thinly spread a layer of ricotta. Lay alternating sausage and pepperoni over the top. Add a final layer of sauce. Finish with a healthy layer of mozzarella. 
  9. Bake at 375F (190C, Gasmark 5) for 40-45 minutes or until the top is golden brown and bubble. Remove from oven and let sit for 10 minutes or so to let everything set up.
UPDATE: Here's the video for the recipe!

Good Times!