Showing posts with label oregano. Show all posts

Thursday, September 10, 2015

Slow Cooker Greek Style Chicken

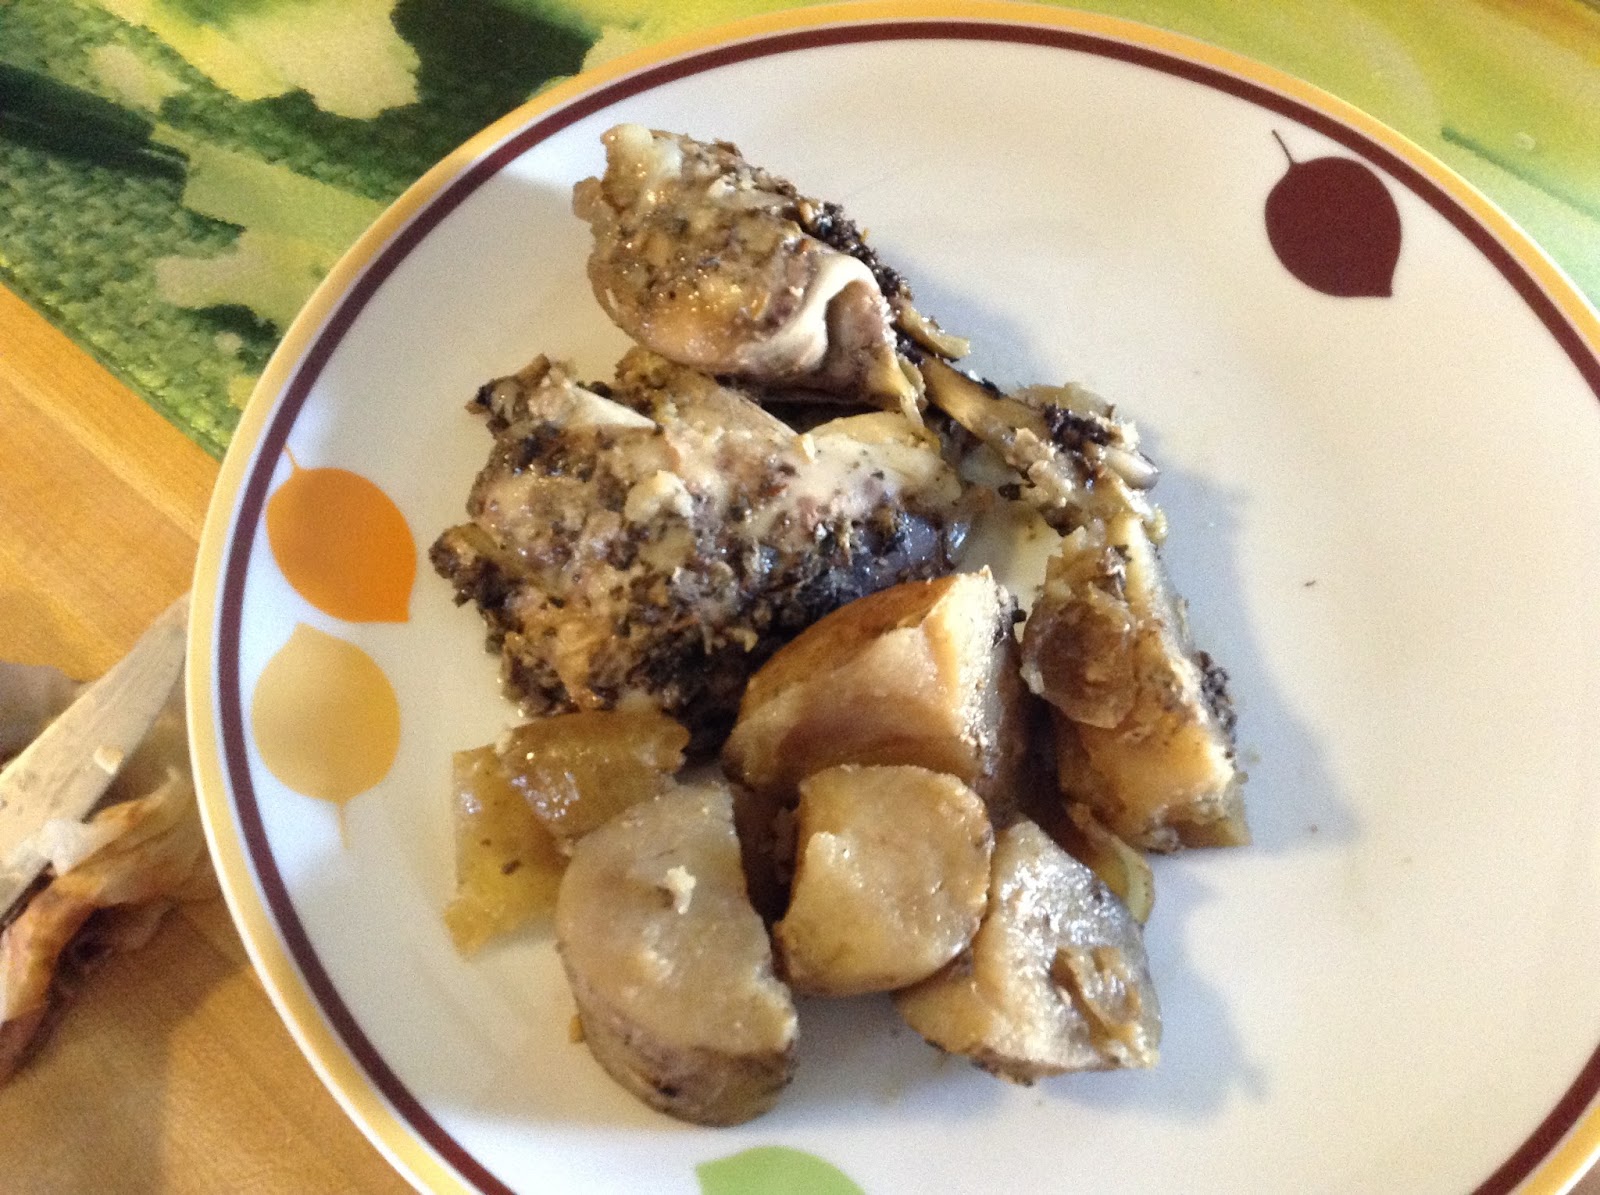
     I'm going to tell you right now: this is not a pretty looking recipe. Reviewing the photograph, it's actually pretty fucking horrifying. Fortunately, if you can get past the visual, it's really quite a tasty meal. Is it truly authentic Greek? Hell no. It has oregano. I think the whole "Greek" theme falls apart after that. Look, it's tasty and super easy to make. Just look at a picture of something nice while you eat it. As always, notes and changes are in blue.

Slow Cooker Greek Style Chicken
via Fix It and Forget It Lightly
Directions

  • 6 medium sized potatoes, quartered
  • 3 lbs chicken pieces, skin removed
  • 2 large onions, quartered (this is a shit-ton of onions. We went with a single onion, cut into sixths)
  • 1 whole bulb garlic, minced
  • 1/2 cup water
  • 3 teaspoons dried oregano
  • 1 tsp salt (omitted, we used 1 teaspoon Spice House Pilsen Seasoning)
  • 1 teaspoon black pepper
  • 1 tablespoon olive oil
Directions
  1. Load potatoes in bottom of slow cooker. Add chicken, onions and garlic.
  2. In a small bowl, mix water with oregano and spices.
  3. Pour over chicken and drizzle oil over the top.
  4. Cook on HIGH for 5-6 hours
Good times!

Tuesday, March 31, 2015

Slow Cooker Chicken Parmesan Soup

     While Yahoo is one of the most worthless sources of reliable news reporting, they do have a fairly robust food section that I refer to on a regular basis. The Wife happened across this slow-cooker recipe in her search for quick and easy meals for the week. In addition to being quick and easy, this was also right tasty, which is something I don't often say about slow cooker fare. Throw down some good crusty bread with this and you're good to go. I do suggest you take the suggestion for the pasta you'll see later in the recipe; you'll thank us for it. Or not, if you're totally ungrateful. We give and give and give and all you do is take and take and take. As always, notes and changes are in blue.

Slow Cooker Chicken Parmesan Soup
via Yahoo Food
Ingredients
  • 3 garlic cloves, minced (we got lazy and used 3 teaspoons minced garlic from a jar)
  • 1 green bell pepper, chopped (The Wife doesn't like green peppers, so we went with red)
  • 14 1/2 ounces crushed tomatoes (we used a can of undrained diced tomatoes)
  • 1/2 pound raw boneless, skinless chicken breasts 
  • 3 cups chicken broth 
  • 1/2 cup chopped white onion
  • 1/3 cup shredded Parmesan cheese, plus extra for garnish
  • 1 tablespoon chopped fresh basil (none on hand, we used 1 teaspoon dried)
  • 2 teaspoons chopped fresh oregano (none on hand either, 1.5 teaspoons dried)
  • 1/8 teaspoon red pepper flakes 
  • 4 ounces uncooked dry gemelli or penne pasta
  • Chopped fresh basil or parsley, for garnish (no fresh on hand, omitted)
Directions
  1. In the slow cooker, stir together the garlic, bell pepper, crushed tomatoes, chicken, broth, onion, the cheese, basil, oregano, and red pepper flakes. Cook on high for 3 1/2 hours, or on low for 7 hours.
  2. Transfer chicken breasts to a cutting board and coarsely shred them; return them to the slow cooker; stir in the pasta. Cook on high for 30 minutes longer or until pasta is cooked al dente (adding the pasta at this step is a Bad Idea unless you plan on eating everything in one sitting. That pasta will turn to mush overnight if you put any aside for later. We suggest cooking the pasta separately and adding it as needed when you serve the soup. Unless you like mushy pasta. We won't judge. Yes we will. Don't do it.)
  3. Serve garnished with more Parmesan cheese and chopped basil or parsley.
Good times!

Saturday, December 28, 2013

Shells with Bell Peppers and Feta

     If I ever lose my copy of Taste of Home Everyday Light Meals, I'm hosed. I am constantly digging through this recipe book for recipes and ideas. We really liked this recipe. It's super easy to put together and leaves plenty of room for personal interpretation. It's also fairly healthy. This is one of those meals that is perfect for the middle of a busy week. As a bonus, it's good cold, too! As always, any notes or changes are in blue.
Shells with Bell Peppers and Feta
via Taste of Home Everyday Light Meals
Ingredients
  • 2-1/4 cups uncooked penne (we used 5 cups of medium shells)
  • 3/4 cup chopped onion 
  • 1 tablespoon olive oil
  • 3 cloves garlic, minced
  • 1 cup chopped sweet red pepper
  • 1 cup chopped green pepper
  • 1/4 cup sliced ripe black olives (you bet. Ripe from the can.)
  • 1 teaspoon dried oregano
  • 1/4 teaspoon salt
  • 1/8 teaspoon cayenne pepper (I never understand measurements like this. 1/8 teaspoon? Really? Why not hold the jar of cayenne next to the bowl and call it a day? I used a full teaspoon)
  • 1/4 cup water
  • 1/2 cup crumbled feta cheese
Directions
  1. Cook and drain pasta according to package directions (It's important to use the right package for directions. You don't want to accidentally cook your pasta according to the directions on a package of suppositories). 
  2. In a nonstick skillet, sautee onion in oil for 1-1/2 minutes. Add garlic; cook 30 seconds longer.
  3. Add the peppers; cook and stir for 2-3 minutes or until vegetables are tender.
  4. Stir in olives, oregano, salt, and cayenne. Add water; cook and stir until mixture comes to a boil. Stir pasta into skillet. Remove from heat. Stir in cheese. 

Friday, November 29, 2013

Bacon and Lemon Herbed Turkey

     Nothing says Thanksgiving like a well-made turkey perfectly carved and served up on a fancy platter. One out of three isn't bad. I can give you well-made. The rest is up to you. I know many people love that crispy golden skin on a turkey. I don't really care about that. For me, the skin is there to help store all sorts of good things to flavor the meat. I've messed around with a couple versions of this type of turkey, but I feel this is the final iteration. I am very pleased. The meat is suspiciously tender and is infused with hints of lemon, bacon and herbs. This, my dear friends, is a winner. As always, any notes are in blue.
Bacon and Lemon Herbed Turkey
Ingredients

  • 1 turkey (we used a 13 pound bird for this recipe)
  • 1 pound thick cut bacon (use whatever kind you want. Applewood smoked, hickory, whatever)
  • 1 lemon, thinly sliced
  • 2 sticks butter, separated
  • 1 tablespoon dried Italian herbs (basil, oregano, thyme, marjoram, rosemary and sage)
  • 1 large onion, quartered
  • Uncle Joe's Rub Down
Directions
  1. Make sure the bird is defrosted and all the fun stuff is removed from inside. (I'll normally throw those spare parts in the roaster with the bird and serve them to the dogs later. I'll save the neck to throw at the unruly neighborhood children)
  2. Take your hand and slide it between the skin and the meat of the bird. Gently work your hand around to separate the skin from the meat the best you can without tearing the skin. (This whole process feels genuinely wrong. I always apologize to the bird when I do this)
    I know we've only just met...
  3. Mix one of the sticks of butter with the herbs until the herbs are evenly distributed through the butter. Start grabbing handfuls and get your hand back in under the skin. Spread the butter around under the skin the best you can. 
  4. Gently lift the skin and lay the lemon slices between the meat and skin. Do the same with a quarter pound of the bacon (It's going to get crowded under the skin. Don't worry too much about having it be neat and tidy under there. The important part is to get it evenly distributed without tearing the skin)
  5. Take the other stick of butter and the onion and put it in the cavity of the bird.
  6. Shake a coat of Uncle Joe's Rub Down over the skin of the bird (feel free to use any rub or seasoning mix you like. I'm just partial to this stuff)
  7. Take the remaining bacon and use it to cover the bird (I absolutely can't be bothered to make a bacon weave)
    See? No weave and it looks fine. I can't be bothered with frippery.
  8. Load the bird into a roaster and cover it with a tinfoil tent (if you have time, feel free to make yourself a hat to block government mind-control rays. It never hurts to be careful)
  9. Load the bird into an oven preheated to 325F. Cook until a meat thermometer reads an internal temperature of 165F (This took about 4 hours for our bird. It may take more or less time depending on your stove, size of the bird, altitude, relative humidity, astrological sign, etc. You could always use the old trick of seeing if the leg just pulls off. That usually means the turkey is done. Or has leprosy. It's not an exact science)
  10. Once the bird has reached the required temperature, take it out and let it rest for 15 minutes or so (You've already violated it quite a bit. Give it a moment or two before you attack it with the knife. This is a good time to make sure everything else for your meal is done, or to have a cocktail or six)
  11. Take the bacon off the top of the bird and set it aside for later snacking. Pull the skin off the bird and clear off the remaining bacon and lemon from under the skin. (Do not be alarmed when you see that you do not have a golden, crisp skin. It's going to be pretty squishy. Just pull it off. You want to get at the now tender and delicious meat).
  12. Inexpertly maul the turkey and throw the meat on a platter. Eat until sleepy.
Good times!

Saturday, November 2, 2013

Salata Horiatiki (Country Greek Salad)

     If there is any one salad I love above all others, it is the Greek salad. The combination of flavors is wonderful. There are a ton of variations on this salad, but this one from The Best Traditional Recipes of Greek Cooking is one of my favorites because it is Too Damned Easy.  It comes together in minutes and is a visually impressive dish. I, personally, would add anchovies to this, but the Wife isn't a huge fan of the little fishies, so I generally leave them off. Other than that, there isn't much I would change here. This is a winner as-is. As always, notes are in blue.

Salata Horaitiki (Country Greek Salad)
via The Best Traditional Recipes of Greek Cookingby Maria Mavromataki
Ingredients
  • 3-4 tomatoes
  • 2 medium cucumbers, sliced
  • 1 onion, sliced
  • 5 ounces black olives
  • 2 medium green bell peppers, seeded and cut into big pieces
  • 2-3 tablespoons red wine vinegar
  • 3-4 tablespoons olive oil
  • Salt, oregano
  • 7 ounces feta cheese, cut into chunks (our ALDI only sells crumbled feta, so that's what we used)
Directions
  1. Wash and slice the tomatoes in quarters and place them in a bowl. Add cucumber, onion, olives and peppers
  2. Dress the salad with the vinegar, olive oil, salt and oregano
  3. Add feta, toss and serve
Good times!

Monday, July 29, 2013

BBQ Jalapeno Peppers and Onions

     Every year, the garden produces jalapeno and banana peppers faster than I can use them. Desperate times called for desperate measures. I turned to Allrecipes.  After digging around, I found one of my favorite recipes for working through surplus peppers. I've tweaked the recipe to add in more of my produce. This recipe makes a LOT of extra sauce, so don't be shy about loading in extra peppers and onions. Even if you do have extra sauce, it's vinegar based, so it will can well.
     I'm not joking when I tell you that this sauce is the bomb-diggety. True story, I gave a pint to a co-worker because he liked it so much. Somehow, it fell out of his mailbox in the workroom and shattered. He came to me literally on the verge of tears. I brought him a quart the next day. He cradled it in his arms and smiled tenderly at it. I'm fairly sure he showed more affection for that quart of sauce than his own kids. Either way, this sauce is beyond good and will bring any meat to another level entirely. As always, notes and changes are in blue.

BBQ Peppers and Onions
via Allrecipes
Ingredients
  • 2 cups corn oil 
  • 2 cups cider vinegar 
  • 2 cups white sugar 
  • 4 cups ketchup 
  • 1 pound fresh jalapeno peppers, sliced into rings 
  • 1 pinch dried oregano (in this case, a pinch is a teaspoon)
  • 1 clove garlic, minced 
  • 1 pound fresh Banana Peppers, sliced into rings
  • At least 1 large Yellow Onion, sliced
Directions
  1. In a large pot, stir together the corn oil, cider vinegar, sugar, and ketchup until sugar has dissolved completely. 
  2. Bring to a boil, then add the jalapeno peppers (any other peppers and onion go in at this step, too). Reduce heat to low, and simmer for 10 minutes. Season with oregano and garlic. 
  3. Ladle into sterile pint jars, leaving 1/4 inch of space at the top. Wipe rims with a clean dry towel. Seal with lids and rings. Process in a hot water bath for 10 minutes to seal (I can't say I agree with the time of the water bath here, especially not for a full pint. As a rule of thumb, I do 12 minutes for a half pint, 15 for a full pint. I've done it my way for three years and haven't killed anybody yet)
  4. Refrigerate any unsealed jars.
Good times!

Wednesday, June 26, 2013

Couscous and Vegetable Salad via 400 Calorie Fix

     If this week's weather is any indication, the summer is going to be horrifyingly hot and humid. If you're like me, on days like this you want to run the stove as little as possible. When the weather gets like this I also don't want super heavy meals. Like I said last week, salads are a great alternative. This week's recipe comes from the book 400 Calorie Fix. This particular recipe is about as healthy as you can hope for. A 1-1/2 cup serving is only 260 calories. If you wanted to bulk it up, you could add some tuna or chicken.

Couscous and Vegetable Salad
via 400 Calorie Fix

Ingredients

  • 1-1/2 cups water
  • 1/4 teaspoon salt
  • 1 teaspoon + 1 tablespoon olive oil
  • 1 cup whole wheat couscous
  • 1 can (15 ounces) chickpeas, rinsed and drained, 3 tablespoons of liquid reserved
  • 1/2 cup frozen peas, thawed
  • 1 medium carrot, coarsely shredded
  • 1 small tomato, chopped
  • 1 small red or yellow pepper, chopped (we went with red. The wife's not a huge fan of green peppers)
  • 2-1/2 tablespoons currants (we didn't have any. We also weren't sold on currants being a good idea in here)
  • 2-1/2 tablespoons finely chopped fresh chives
  • 1-1/2 tablespoons pistachios or pine nuts (we used pistachios. Any time we have a choice between pistachios and pine nuts, I'm using pistachios)
  • 1-1/2 tablespoons lemon juice (spring for a fresh lemon here. The bottled stuff doesn't have the fresh taste you want in this dish)
  • 1/4 teaspoon dried thyme
  • 1/4 teaspoon dried oregano
  • Angostura Bitters (optional)
Directions
  1. Bring water, salt and 1 teaspoon of the oil to a boil in a medium saucepan over high heat. Stir in the couscous. Remove from heat and cover. Let stand for 5 minutes or until liquid is absorbed. Fluff with fork.
  2. Transfer the couscous to a large bowl. Add the chickpeas (setting aside the liquid), peas, carrot, tomato, pepper, currants (not for me), chives and nuts. Toss gently until mixed.
  3. Whisk together lemon juice, thyme oregano, bitters, reserved chickpea liquid and remaining tablespoon of oil in a small bowl (why do recipes always make restrictions on bowl size? What if I wanted to use a big bowl for this? Who's going to stop me. I'll tell you straight up, I used a medium sized bowl. I have no regrets). Mix and pour over the salad. Toss to mix well. 
  4. Cover and refrigerate for 30 minutes to blend the flavors.
Good times!

Friday, May 17, 2013

Giant Garlic Bread Stick

     Today I'm posting the last recipe for last Sunday's Italian feast. It all started with what I thought was going to be a loaf of bread. I quickly changed my mind when I realized I was fundamentally making a pizza dough. I wound up messing around and making a honking big bread stick instead. It turned out really well and was wonderful for slopping up the red sauce from the ravioli and meatballs. So with no further delay, here it is.
Giant Garlic Breadstick
Ingredients
  • 3 cups flour, plus more for dusting
  • 1-1/2 teaspoon salt
  • 2 packets active dry yeast
  • 1/2 cup lukewarm water, plus more as needed (I'll explain later)
  • 3 tablespoons olive oil, plus more as needed (I'll explain later)
  • 1 tablespoon each, dried oregano, basil, parsley
  • 1/2 cup grated Parmesan cheese
  • Minced garlic, 3-6 cloves or 2 tablespoons jarred
  • 3 tablespoons butter, melted
Directions
  1. Put first seven items into a mixing bowl. Mix ingredients (If you have a Kitchenaid, you're golden. Chuck the first seven ingredients into the bowl, put on the dough hook, set to power level 2 and go. If not, you're going to be working the dough by hand.)
  2. This is basically an extension of the first step. Regardless of how you're working the dough, my method is woefully inexact. The dough will be very dry and crumbly to start. During the mixing, you're going to need to add in a little more oil and water. What we're looking for is a nice, elastic dough. It should pull everything off the sides and bottom of the bowl and work into a ball. Start by adding a teaspoon of oil. Then a scant 1/4 cup of water. Go back and forth between the oil and water until the dough hits that consistency we're looking for. If the dough gets sticky, sprinkle a little extra flour in there. The dough should NOT be sticky. You're going to work it for about 5 minutes.
    This is exactly what we're looking for here. Nothing stuck to the sides or bottom.
  3. Once the dough is the desired consistency take it out of the bowl and work it for a couple of more minutes. If it was in the mixer, take it out and work it by hand for a couple of more minutes. Put it back into the bowl and cover it with greased plastic wrap. Put the bowl in a warm place and let it rise for about an hour. If all goes well, the dough should double in size.
  4. Take out the dough and knock it down. Knead it for a couple more minutes. Then cut the dough into two equal pieces. Roll each piece out to about 12-15 inches. Lay them next to each other on a greased baking sheet. Try to twist them around each other into a quasi-braid sort of thing. (I'm completely cack-handed with this sort of thing and mine looked fairly horrifying at this stage. This is why the wife does the complicated braiding stuff when we bake).
    Like I said, not pretty.
  5. Take the minced garlic and throw it in the melted butter. Grab a brush and paint the top of the bread with a liberal dose of the garlic-butter mixture. Don't be shy. Hold a little of the mix back for later. Or go crazy and use it all right now. You can always make more later. Don't live in fear. 
  6. Throw the tray in a preheated oven at 375-400F. Give it 15-20 minutes. Keep an eye on it. Ovens vary and I am not a reliable source of information. Cooking times may vary. When it looks like it's about done (the outside should be getting golden and developing a nice crust), take it out and hit it with another round of garlic-butter mix. Go nuts. Put the bread back in the oven for another 3-5 minutes. Give it the old "tap on it and if it sounds hollow, it's done trick."
  7. Take it out and let it rest for a few minutes. Mostly to see if you can do it. We couldn't wait and wound up burning the crap out of the inside of our mouths. 
Good times!

Saturday, May 4, 2013

Herbed Swirl Bread via Everyday Light Meals

     Who doesn't love bread! Obviously people with gluten intolerance, but you know what I mean. Every time I post a picture of bread on Facebook, people go nuts. Even just a picture of a ball of dough. People can't help but like it.
Oh boy! Bread!
     This was the case with the bread I baked today. Everybody responded in a very positive manner. This is a good thing since I don't think I could handle it if I got a tidal wave of comments about how awful that looked and how much it probably sucks. Anyways, I got the recipe out of the Taste of Home Everyday Light Meals cookbook, so if it's bad, blame them! As always, any changes or notes are made in blue.  With no further delay, I proudly present:
Herbed Swirl Bread
via Everyday Light Meals

Ingredients

  • 3 packages (1/4 ounce each) active dry yeast
  • 2-1/2 cups warm water, divided
  • 1 teaspoon sugar
  • 3-1/4 cups whole wheat flour
  • 1 tablespoon salt
  • 2-3/4 to 3-1/2 cups white flour
  • 6 green onions, finely chopped
  • 1 garlic clove, minced
  • 1 cup minced fresh parsley
  • 2 tablespoons minced fresh rosemary
  • 1 tablespoon minced fresh basil
  • 1 tablespoon minced fresh oregano
  • 1 teaspoon minced fresh thyme
  • 1/4 teaspoon pepper
  • 2 tablespoons butter
  • 1 egg, beaten

Directions
  1. In large mixing bowl, dissolve yeast in 3/4 cup warm water. Add sugar, let stand for five minutes. Add whole wheat flour, salt, and remaining water. Beat until smooth. Stir in enough bread flour to form a soft, sticky dough. (I ended up using the minimum amount of white flour called for in the recipe, 2-3/4 cup)
  2. Turn out onto floured surface; knead until smooth and elastic, about 6-8 minutes (I just chucked it all in the Kitchenaid and let the dough hook take care of it. My work ethic extends only so far.) Place in a bowl coated in non-stick spray, make sure to coat top (Of the bread, not YOUR top. Unless you're in to that sort of thing. I'm not here to judge.) Cover and let rise in a warm place for about an hour.
  3. In a nonstick skillet, saute onions, garlic, herbs and pepper in butter until tender. Set aside. (I only had fresh green onions. I substituted dried for everything else and doubled the amount of butter. Remember to use smaller amounts if you're switching to dry. You can find equivalents online. I also completely forgot to put in the pepper.)
  4. Punch dough down onto floured surface. Cut into two pieces. Roll each piece out to about 14"x9". Brush with some egg, put the rest of the egg in the fridge for now. (Make sure the egg bowl is CLEAN before you put it in the fridge. I just tossed mine in there and apparently there was some drippage. The wife let me know about said dripping in a very loud and annoyed voice.) Spread herb mixture over dough to within 1/2" of the edges. Roll up jelly-roll style, starting on the short side. Pinch seams to seal and tuck ends under. Place seam-side down in two greased loaf pans. Cover and let rise until doubled, about 45 minutes.
  5. Brush with reserved egg. Bake at 375F for 40-50 minutes or until bread sounds hollow when tapped. (Mine took 46 minutes.) Remove from pans to wire racks. 
At 12 slices a loaf, you're looking at about 135 calories a slice.

Good times!

Saturday, April 13, 2013

Italian Pinwheel Rolls (via Everyday Light Meals)

     It seems that every time my wife leaves me unattended in the house I end up baking. I'm not sure why that is, but she hasn't complained yet. Today she went out for a couple of hours and I immediately started looking for something to bake. I busted open a well worn cookbook (Taste of Home Everyday Light Meals) and started searching for a recipe that I could make with what I had in the house. I ended up with these rolls. I threw in some dried tomatoes we had left over from last season and they added a nice sweet note to the rolls. The wife was suitably pleased with the results and wound up eating three or four.

Italian Pinwheel Rolls 
(via Taste of Home Everyday Light Meals)
Ingredients
  • 1 package (.25 oz) active dry yeast
  • 1 cup warm water (100-115F)
  • 1.5 teaspoon sugar
  • 1.5 teaspoon butter, softened
  • 1 teaspoon salt
  • 2.25-2.5 cups flour
Filling
  • 2 tablespoons butter, melted
  • .25 cup grated Parmesan Cheese
  • 2 tablespoons fresh parsley (omitted)
  • 6 garlic cloves, minced
  • 1 teaspoon dried oregano
  • 2 tablespoons chopped sun-dried tomatoes
Directions
  1. In a large bowl, dissolve yeast in warm water. Add sugar, butter, salt and 1 cup flour. Beat until smooth. Stir in enough remaining flour to form a soft dough (I wound up using just shy of 2.5 cups of flour)
  2. Turn out onto floured surface. Knead until smooth and elastic, about 6-8 minutes (I just chucked it all in the Kitchenaid with the dough hook and let it do the work). Place in bowl coated in non-stick cooking spray, turning once to coat top. Cover and let rise in warm place until doubled, about an hour.
  3. Punch dough down. Turn out onto lightly floured surface and roll into 12x10" rectangle. Brush with melted butter. Sprinkle Parmesan, parsley, garlic, oregano and desired fillings to within 1/2 inch of edge. Roll up jelly-roll style, starting on long side. Pinch seam to seal. Cut into 12 rolls.
  4. Place rolls cut side up in a baking pan covered in non-stick spray. Cover and let rise until doubled, about 30 minutes.
  5. Bake at 350F for 25-30 minutes or until golden brown (mine took 25 minutes). Remove from pan to wire rack to cool.
About 110 calories per roll.

Good times!