Showing posts with label basil. Show all posts

Thursday, October 15, 2015

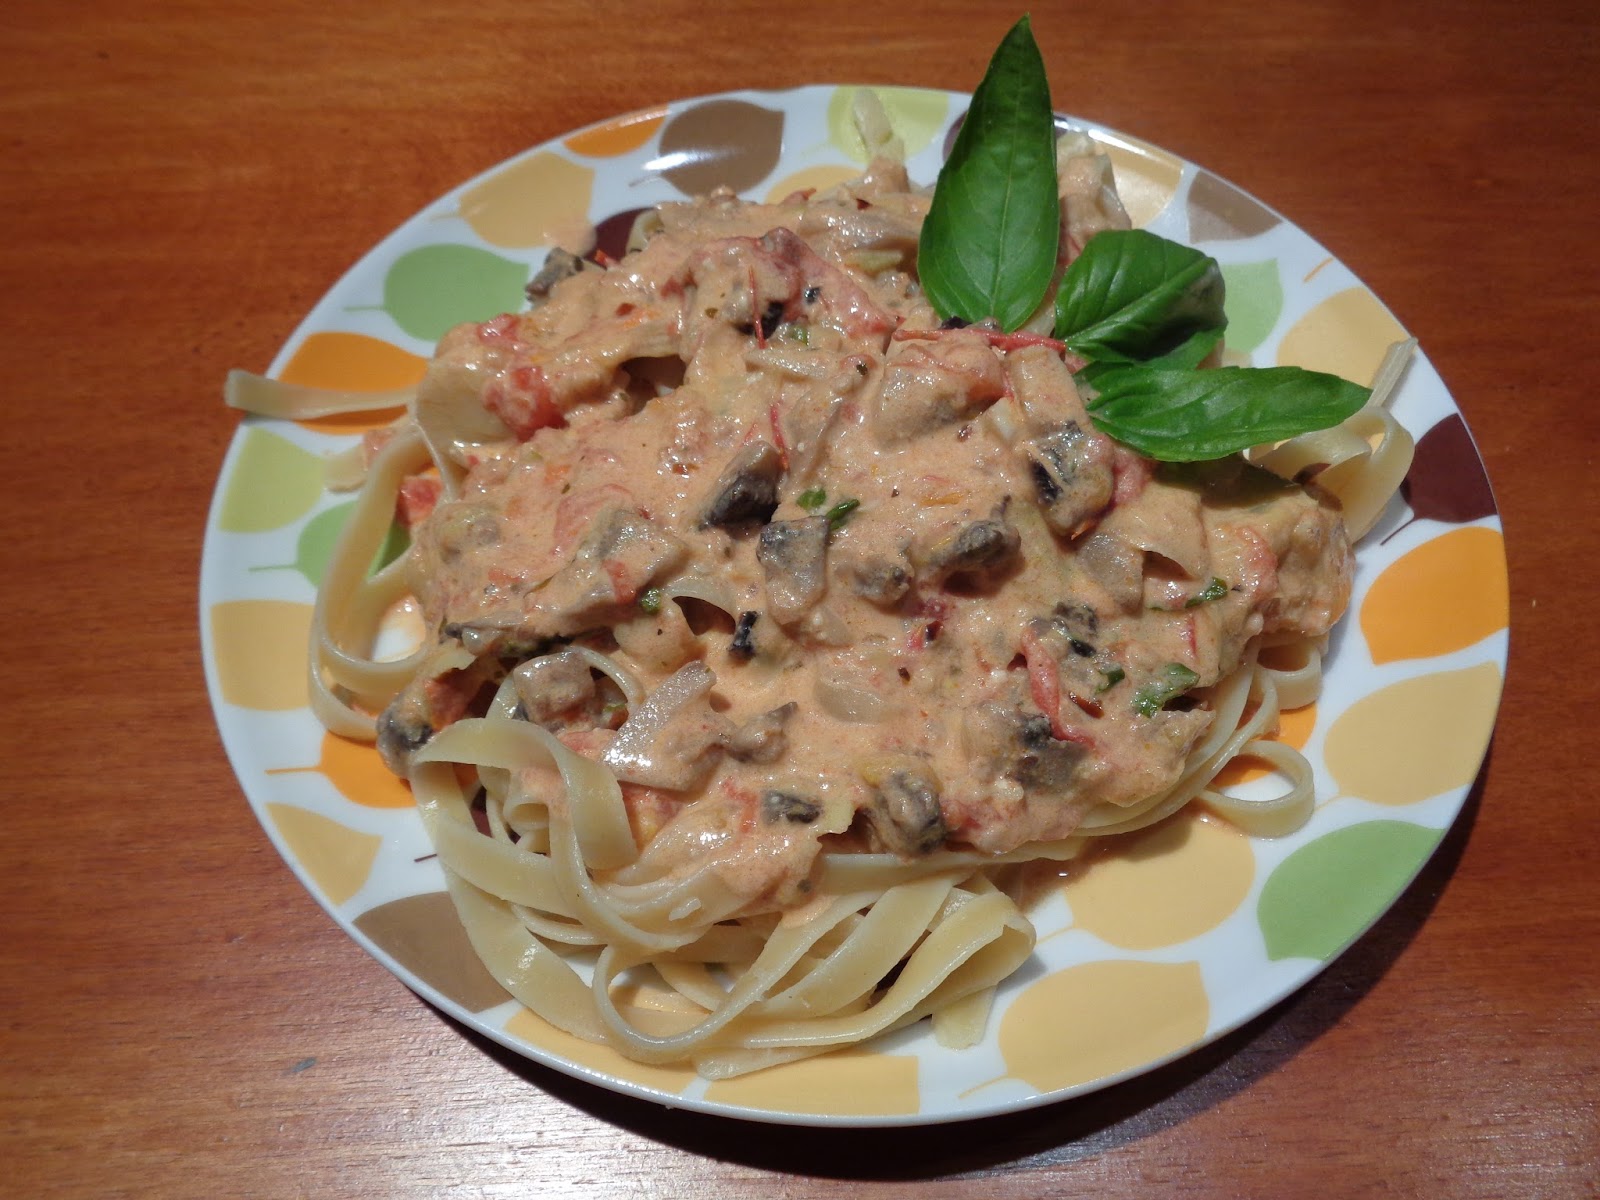
Fettuccine with Tomato and Artichoke Cream Sauce

     So being a Daddy is taking up exactly as much time as I expected, which is why updates are few and far between around here! I am trying to make up for it by posting more completely original recipes. We've been trying to use up the last of our garden's tomatoes, so I figured a nice tomato cream sauce would be a good idea. I added a few other veggies and a touch of seasoning and ended up with a real winner. The Wife had the brilliant idea to add the red pepper flakes. This was a stroke of genius as I think the sauce may have been a touch too bland otherwise. The spot of heat really adds depth to this dish. This will definitely end up in our regular rotation. There's a lot of flexibility here. You can probably swap in or out most veggies and the addition of shrimp or chicken wouldn't be amiss, either! As always, notes are in blue.


Fettuccine with Tomato
and Artichoke Cream Sauce
Ingredients

  • 1 pound tomatoes, roughly chopped (or two 14.5 ounce cans diced tomatoes, drained)
  • 2 large scallions, chopped
  • 4 ounces mushrooms, roughly chopped
  • 1 12-ounce can marinated artichoke hearts, drained and chopped
  • 3 cloves garlic finely chopped
  • 1 tablespoon olive oil
  • 1 cup heavy cream
  • 1/4 cup grated Parmesan cheese
  • 1/2 teaspoon red pepper flakes
  • 2 teaspoons Bridgeport seasoning from Spice House (follow the link to see what's in there)
  • bunch of fresh basil, chopped (or 1 teaspoons dried)
  • 1 pound fettuccine
Directions
  1. In a large pan, heat olive oil over medium heat. Add garlic and sautee 1-2 minutes, being careful to not let garlic get too brown.
  2. Add scallions and sautee another minute or two. Add mushrooms and continue to sautee for 2-3 more minutes.
  3. Add tomatoes and artichokes. Bring to a simmer and simmer for about 15 minutes.
  4. Lower heat a bit and add cream, cheese, pepper flakes, seasoning and basil. Cook on a very low simmer for 5-6 minutes.
  5. Cook pasta aldente and drain.
  6. Either toss pasta with sauce or serve a liberal amount of sauce over the pasta, whichever you prefer. 
Good times!

Wednesday, September 9, 2015

Slow Cooker Chicken In Rich Tomato Sauce

     Often, while I am perusing my slow-cooker cookbooks, I come across a recipe that sounds interesting. Then I make a bunch of changes and shrug my shoulders at the mediocre results. This time, I was really pleasantly surprised, as was The Wife. The sauce was really rich and had a nice tang. It was really nice over pasta. This was crazy easy to make and was declared a winner. As always, notes and changes are in blue.


Slow Cooker Chicken
in Rich Tomato Sauce

via Slow Cooker Magic in Minutes
Ingredients

  • 1 tablespoon olive oil
  • 2-1/2 pounds chicken pieces (we used leg and thigh quarters because I found them for 39 cents a pound. What a deal!)
  • 8 ounces sliced mushrooms (omitted. I used 1 can (about 3-4 ounces) sliced Kalamata olives, drained
  • 1 28 ounce can crushed tomatoes (omitted. I used a 24 ounce can of pasta sauce with mushrooms)
  • 1 envelope onion soup mix
  • 1/4 cup red wine (omitted. I'm not wasting good booze here. I used 1/4 cup red wine vinegar)
  • 1/2 teaspoon dried basil
Directions
  1. In a large pan, heat oil over medium-high heat and brown the chicken. (Get that skin nice and crispy since it's going in the slow cooker. Otherwise it's going to get really soft and unpleasant looking. Honestly, you're probably better off just taking the skin off the chicken. I don't even know why people insist on leaving the skin on chicken in the slow cooker. Feel free to just chuck the de-skinned chicken right in the slow cooker.)
  2. Mix all the other ingredients up in a big bowl. Pour over the chicken.
  3. Cook on HIGH for 5-6 hours. 
  4. Serve over rice or pasta. 
Good times!

Tuesday, March 31, 2015

Slow Cooker Chicken Parmesan Soup

     While Yahoo is one of the most worthless sources of reliable news reporting, they do have a fairly robust food section that I refer to on a regular basis. The Wife happened across this slow-cooker recipe in her search for quick and easy meals for the week. In addition to being quick and easy, this was also right tasty, which is something I don't often say about slow cooker fare. Throw down some good crusty bread with this and you're good to go. I do suggest you take the suggestion for the pasta you'll see later in the recipe; you'll thank us for it. Or not, if you're totally ungrateful. We give and give and give and all you do is take and take and take. As always, notes and changes are in blue.

Slow Cooker Chicken Parmesan Soup
via Yahoo Food
Ingredients
  • 3 garlic cloves, minced (we got lazy and used 3 teaspoons minced garlic from a jar)
  • 1 green bell pepper, chopped (The Wife doesn't like green peppers, so we went with red)
  • 14 1/2 ounces crushed tomatoes (we used a can of undrained diced tomatoes)
  • 1/2 pound raw boneless, skinless chicken breasts 
  • 3 cups chicken broth 
  • 1/2 cup chopped white onion
  • 1/3 cup shredded Parmesan cheese, plus extra for garnish
  • 1 tablespoon chopped fresh basil (none on hand, we used 1 teaspoon dried)
  • 2 teaspoons chopped fresh oregano (none on hand either, 1.5 teaspoons dried)
  • 1/8 teaspoon red pepper flakes 
  • 4 ounces uncooked dry gemelli or penne pasta
  • Chopped fresh basil or parsley, for garnish (no fresh on hand, omitted)
Directions
  1. In the slow cooker, stir together the garlic, bell pepper, crushed tomatoes, chicken, broth, onion, the cheese, basil, oregano, and red pepper flakes. Cook on high for 3 1/2 hours, or on low for 7 hours.
  2. Transfer chicken breasts to a cutting board and coarsely shred them; return them to the slow cooker; stir in the pasta. Cook on high for 30 minutes longer or until pasta is cooked al dente (adding the pasta at this step is a Bad Idea unless you plan on eating everything in one sitting. That pasta will turn to mush overnight if you put any aside for later. We suggest cooking the pasta separately and adding it as needed when you serve the soup. Unless you like mushy pasta. We won't judge. Yes we will. Don't do it.)
  3. Serve garnished with more Parmesan cheese and chopped basil or parsley.
Good times!

Tuesday, June 3, 2014

Chicken and Broccoli with Lemon Vinaigrette

The Wife really likes lemon. I mean really, really likes lemon. She also really likes broccoli. And pasta. She also likes reading Jane Austen books, so I guess nobody's perfect. I'm not sure where I'm going with this.  Anyway, we had a pound of broccoli and a bag of lemons that weren't going to survive much longer so I went to work making a new recipe. I figured I would go with the whole salty/tart vibe. The result was a very tasty pasta dish. Though I served it hot, I imagine this would be a pretty good cold pasta dish for summer. Give it a try! Tell me what you think. As long as it's positive feedback. I figure as long as nobody is paying me to do this, I don't have to listen to any negativity. As always, notes are in blue.

Chicken and Broccoli
with Lemon Vinaigrette
Ingredients

  • 1/2 cup olive oil (use as many virgins as you like)
  • 1 teaspoon balsamic vinegar
  • 1 teaspoon Worcestershire sauce
  • juice of 4 medium lemons
  • 1/2 teaspoon dried basil
  • 2 small crowns broccoli (about 1 pound)
  • 1-1/2 pound chicken (I used breast meat. There's no reason you can't use thighs if you prefer)
  • 3 cloves garlic, minced
  • 1 teaspoon capers, drained
  • 1/4 cup grated Parmesan
  • 1 pound rotini pasta
  • 1/4 cup shredded Parmesan (for garnish)
Directions
  1. Combine first 5 ingredients in a bowl. Whisk to incorporate.
  2. In a large pan, heat 1/4 cup of the vinaigrette. Add garlic and capers. Cook for about 3 minutes. Add the chicken. Cook until chicken is cooked through and juices run clear. 
  3. Drain the liquid from the chicken and cook another minute or two until the chicken starts to get a bit of brown.
  4. Cook the broccoli however you prefer (Some like to steam it. We prefer to give it a quick boil. Use a microwave bag of frozen if you want. I won't tell anyone.)
  5. Cook the pasta until al dente (I went to school with him. Nice guy). Drain the pasta and return it to the pot you cooked it in (If you didn't cook the pasta in a pot, I guess you're screwed. Just throw everything out and order a pizza)
  6. Now that you have a pot full of drained pasta, add the chicken, broccoli, a generous 1/2 cup of the vinaigrette (you'll have some extra vinaigrette. That's fine. You can use more on the pasta if you'd like or maybe use it as a salad dressing), then add the 1/2 cup grated Parmesan. Give it all a stir until the cheese incorporates. The pot should still be hot enough to melt the cheese.
  7. Garnish with the shredded Parmesan when serving.
Good times!

Tuesday, April 15, 2014

Sausage and Peppers Diavolo

    Fra Diavolo is one of my favorite ways to enjoy pasta. The simple combination of olive oil, garlic and red pepper is just fantastic. It's just the right combination of richness and heat. I figured that base could be used for any number of recipes. I'm pretty sure I've had chicken diavolo before. Maybe not. I'm not 100% sure. I might have hallucinated it. Regardless, I had a lot of bell peppers left over from the garden last season, so we decided to dig some out of the freezer and use them in this recipe. I figured combining sausage and peppers with pasta diavolo was a sure thing. I was right. This was delicious. If you don't like it, obviously you cooked it wrong or possibly have a damaged palate. I forgive you. This time. As always, any notes are in blue.


Sausage and Peppers Diavolo
Ingredients

  • 12 ounces Farfalle (that's what we cooking types call bow-tie pasta. Nothing impresses your dinner guests like pretentiousness) 
  • 1 pound Italian sausage, casings removed (the choice of sweet or hot sausage it up to you. Either will work here)
  • 1 yellow bell pepper, chopped
  • 1/2 red bell pepper, chopped
  • 1/2 red onion, chopped
  • 1/2 cup olive oil (use extra virgin if you happen to have a surplus of virgins in your house)
  • 4 cloves garlic, finely chopped
  • 1 teaspoon red pepper flakes (you can use less if you're a wuss)
  • 1/4 cup grated Parmesan cheese
  • 1/2 teaspoon dried basil 
  • grated Asiago cheese for garnish
Directions
  1. In a large, non-stick pan, brown Italian sausage and break into crumbles. On medium-high heat, this will take about 5-8 minutes. Make sure to drain off any excess oil. Add the garlic, onion and peppers about half way through.
  2. Cook pasta according to directions (the directions for the pasta, not the directions for anything else. Following instant pudding directions here would not be helpful)
  3. Drain pasta and return to pot. Add the sausage and pepper mix. Add the olive oil, red pepper, basil, and Parmesan. Toss to ensure everything is evenly coated.
  4. Throw a big helping on a plate and top with grated Asiago.
Good times!

Tuesday, December 10, 2013

Three Pork Meat Sauce (Tre Sugo Di Maiale)

     We recently bought into a share of an organically grown pig. The result was over 20 pounds of fine pork products. We decided the way to celebrate was by making a meat sauce with our go-to red sauce recipe. The result was delicious. We used ground pork, bacon and a neck bone. I used to watch my dad make sauce with neck bones and had never tried it myself. I'm glad I did. Thanks dad! Naming it wasn't hard. It's a sauce with three kinds of pork! I decided to throw in the Google Translate Italian version of the name. I think it literally comes out as just "Three Pork Sauce." Regardless, you can't go wrong throwing this over a bowl of your favorite pasta! As always, any notes are in blue.
Three Pork Meat Sauce
(Tre Sugo Di Maiale)
Ingredients

  • 1 quart prepared pasta sauce (it will add a bunch of cooking time to prep, but I suggest using this red sauce recipe)
  • 1 quart canned whole tomatoes, undrained
  • 1 pound ground pork
  • 1 pork neck bone
  • 6 ounces bacon, diced
  • 1/2 large sweet onion, finely chopped
  • 1 stalk celery, finely chopped
  • 3 cloves garlic, minced
  • 2 tablespoons chopped fresh basil
  • 1 tablespoon olive oil
  • 2 tablespoons red wine vinegar
Directions
  1. In a large Dutch oven, heat oil. Cook neck bone 3-5 minutes on each side, until browned. Remove and set aside. Add bacon, onion and celery. Cook over medium heat until bacon is crisp. Drain excess oil (don't just throw it away! Strain it into a jar for later use. I always have bacon grease in the fridge for all sorts of uses). 
    I could probably stop right here and still be happy with the meal.
  2. Turn heat to high. Deglaze the Dutch oven using the red wine vinegar. (Make sure to scrape up all the brown stuff off the bottom; you don't want to waste that extra flavor!) Bring heat to low.
  3. In a separate pan, cook ground pork until browned. Drain excess grease.
  4. Add ground pork and neckbone to Dutch oven. Add all remaining ingredients and bring to a boil. Reduce to a low simmer. Simmer with the lid off for at least one hour (the longer you simmer, the thicker the sauce will get. I let mine go for about two hours. Just stop simmering when it hits the desired consistency).
Good times!

Friday, November 29, 2013

Bacon and Lemon Herbed Turkey

     Nothing says Thanksgiving like a well-made turkey perfectly carved and served up on a fancy platter. One out of three isn't bad. I can give you well-made. The rest is up to you. I know many people love that crispy golden skin on a turkey. I don't really care about that. For me, the skin is there to help store all sorts of good things to flavor the meat. I've messed around with a couple versions of this type of turkey, but I feel this is the final iteration. I am very pleased. The meat is suspiciously tender and is infused with hints of lemon, bacon and herbs. This, my dear friends, is a winner. As always, any notes are in blue.
Bacon and Lemon Herbed Turkey
Ingredients

  • 1 turkey (we used a 13 pound bird for this recipe)
  • 1 pound thick cut bacon (use whatever kind you want. Applewood smoked, hickory, whatever)
  • 1 lemon, thinly sliced
  • 2 sticks butter, separated
  • 1 tablespoon dried Italian herbs (basil, oregano, thyme, marjoram, rosemary and sage)
  • 1 large onion, quartered
  • Uncle Joe's Rub Down
Directions
  1. Make sure the bird is defrosted and all the fun stuff is removed from inside. (I'll normally throw those spare parts in the roaster with the bird and serve them to the dogs later. I'll save the neck to throw at the unruly neighborhood children)
  2. Take your hand and slide it between the skin and the meat of the bird. Gently work your hand around to separate the skin from the meat the best you can without tearing the skin. (This whole process feels genuinely wrong. I always apologize to the bird when I do this)
    I know we've only just met...
  3. Mix one of the sticks of butter with the herbs until the herbs are evenly distributed through the butter. Start grabbing handfuls and get your hand back in under the skin. Spread the butter around under the skin the best you can. 
  4. Gently lift the skin and lay the lemon slices between the meat and skin. Do the same with a quarter pound of the bacon (It's going to get crowded under the skin. Don't worry too much about having it be neat and tidy under there. The important part is to get it evenly distributed without tearing the skin)
  5. Take the other stick of butter and the onion and put it in the cavity of the bird.
  6. Shake a coat of Uncle Joe's Rub Down over the skin of the bird (feel free to use any rub or seasoning mix you like. I'm just partial to this stuff)
  7. Take the remaining bacon and use it to cover the bird (I absolutely can't be bothered to make a bacon weave)
    See? No weave and it looks fine. I can't be bothered with frippery.
  8. Load the bird into a roaster and cover it with a tinfoil tent (if you have time, feel free to make yourself a hat to block government mind-control rays. It never hurts to be careful)
  9. Load the bird into an oven preheated to 325F. Cook until a meat thermometer reads an internal temperature of 165F (This took about 4 hours for our bird. It may take more or less time depending on your stove, size of the bird, altitude, relative humidity, astrological sign, etc. You could always use the old trick of seeing if the leg just pulls off. That usually means the turkey is done. Or has leprosy. It's not an exact science)
  10. Once the bird has reached the required temperature, take it out and let it rest for 15 minutes or so (You've already violated it quite a bit. Give it a moment or two before you attack it with the knife. This is a good time to make sure everything else for your meal is done, or to have a cocktail or six)
  11. Take the bacon off the top of the bird and set it aside for later snacking. Pull the skin off the bird and clear off the remaining bacon and lemon from under the skin. (Do not be alarmed when you see that you do not have a golden, crisp skin. It's going to be pretty squishy. Just pull it off. You want to get at the now tender and delicious meat).
  12. Inexpertly maul the turkey and throw the meat on a platter. Eat until sleepy.
Good times!

Thursday, September 5, 2013

Sparkling Basil Lemonade via BHG

     The Wife found a punch bowl and set of cups at a garage sale years ago and it has sat quietly in a cabinet since the day of purchase. On several occasions she has threatened to use it, but never had until now. We were having a party for our 10th wedding anniversary and she was determined to find a way to use the punch bowl. She searched around and found a recipe from Better Homes and Gardens. The original recipe called for jalapeno slices, but she figured that might be a little off-putting for our guests so she made an executive decision to replace them with lemon slices. It was the right decision. The basil and lemon made for a refreshing and delicious drink that benefited greatly from the addition of vodka! She did a double batch and we were only left with maybe a pint after the party. This recipe will definitely be made again. As always, any changes and notes are in blue.
Sparkling Basil Lemonade
via Better Homes and Gardens
Ingredients
  • 4 cups water
  • 3 cups sugar
  • 2 cups fresh basil leaves (about 1-1/2 ounces) (we used a combo of lemon basil and regular basil)
  • 2 1 liter bottlesclub soda, chilled
  • 2 cups lemon juice (we used bottled lemon juice)
  • Ice cubes
  • 1 fresh jalapeno chile pepper, sliced* (omitted, replaced with thin lemon slices)
  • Fresh basil leaves
  • Vodka
Directions
  1. For basil syrup, in a large saucepan combine water, sugar, and basil. Bring to boiling over medium-high heat. Reduce heat. Simmer, uncovered, for 20 minutes. Strain syrup and discard leaves. Cover and chill syrup for 2 to 24 hours (totally forgot how long the syrup needed to chill. It got thrown in the freezer for about an hour)
  2. For lemonade, in a very large punch bowl combine chilled syrup, club soda, and lemon juice. Serve over ice and garnish with jalapeno slices (lemon slices in our case) and fresh basil leaves.
Good times!

Sunday, September 1, 2013

Too Damned Easy Cucumber Tomato Salad

     This is the point in the summer where we start trying to use our garden produce in vast quantities. That's where the wife's recipe for cucumber tomato salad comes into play. This recipe couldn't be any more simple. Just about any tomato will work, but we have been using these orange tomatoes since they are super sweet and mild.

Too Damned Easy
Cucumber Tomato Salad
Ingredients
  • 2-3 large cucumbers, sliced
  • 1 large onion, cut into about 1” pieces
  • 3-4 tomatoes of your choosing, sliced
Vinaigrette:
  • 1 cup white vinegar 
  • ¾ cup water 
  • ¾ cup sugar (or six packets of your favorite carcinogenic sweetener)
  • 1 teaspoon salt 
  • 1/8 teaspoon black pepper 
  • dash cayenne pepper 
  • dash parsley 
  • dash basil
Directions
  1. Mix vinaigrette ingredients in large bowl until sugar is dissolved. 
  2. Add vegetables. 
  3. Let marinate in refrigerator 1-2 hours.
Good times!

Thursday, August 22, 2013

Penne with Veggies and Black Beans from the Wonderful Wife

NOTE: This is another guest post from my lovely wife. She's been on a roll using up garden vegetables. This is just a great recipe. I love what she did with it.

     The husband started back to work last week, and I wanted to make a big batch of something he could take to school for lunches. I vaguely remembered making a cold veggie pasta salad last summer that he really liked. I was positive it was in the Everyday Light Meals cookbook, but after going through it page by page, I wasn't able to find it. Huh… So, I went through it again – page by page. And there it was. Why couldn't I find it the first time, you ask? Simple. I made so many alterations to it the first time I made it that I didn't recognize it in the cookbook. I will give you the recipe as it was intended to be made and also my changes. Don’t worry. If it’s delicious my way, it’s probably more delicious when made properly.

Penne with Veggies 'n Black Beans
via Taste of Home Everyday Light Meals
Ingredients
  • 10 ounces uncooked penne pasta (Let the substitutions begin! I make this with elbow macaroni. Maybe we were out of penne when I made it the first time, or maybe I felt a veggie pasta salad could only be made with macaroni. Heck, use bow-ties if you want. It’s pasta. It all tastes the same.)
  • 1 cup sliced zucchini (I did a combo of zucchini and squash.)
  • 1 cup sliced carrots (The first time I made this, I believe I grated the carrots. Worked fine. This time, I didn’t have regular carrots – just baby. So I cut them lengthwise down the middle and then did it again, effectively quartering them.)
  • ½ cup fresh mushrooms (No fresh mushrooms in the house. I just omitted them entirely and made up the difference with other veggies. I’ve also used canned mushrooms, but I didn’t sauté them with the other veggies.)
  • ½ cup julienned green or sweet red pepper (I used green.)
  • 1 garlic clove, minced (I used 1 teaspoon of minced garlic from the jar.)
  • 1 tablespoon each minced fresh basil, oregano, and thyme or 1 teaspoon each dried basil, oregano, and thyme (We don’t grown thyme in the herb garden, but we did have fresh basil and oregano, so I used a tablespoon of each, and a teaspoon of dried thyme.)
  • ½ teaspoon salt
  • ¼ teaspoon pepper
  • 2 tablespoons olive oil, divided
  • 1 can (15 ounces) black beans, rinsed and drained
  • 2/3 cup chopped seeded tomatoes (I prefer to use halved cherry tomatoes.)
  • 1/3 cup shredded Parmesan cheese (I used 4 oz of cubed mozzarella cheese.)
  • 2 tablespoons minced fresh parsley
The aforementioned ingredients in no particular order.

Directions
  1. Cook pasta according to package directions.
  2. Meanwhile, in a large nonstick skillet, sauté the zucchini, carrots, mushrooms (omitted), green pepper, onion, garlic, and seasonings in 1 tablespoon of olive oil until crisp-tender. Stir in the beans.
  3. Add drained pasta to vegetable mixture. Add tomatoes and remaining olive oil; toss gently. Sprinkle with Parmesan cheese and parsley. (Here’s where I really deviate from the recipe. This dish is supposed to be served hot, but my husband said it was even better cold. So, after tossing the tomatoes and olive oil into the pasta mixture, I put the whole thing in the refrigerator for a few hours. In the meantime, I cube up the mozzarella cheese. After the pasta has had time to cool, I take it out and toss in the mozzarella and parsley.)

One serving (1 1/3 cup) equals 315 calories.
Good times!

Friday, May 17, 2013

Giant Garlic Bread Stick

     Today I'm posting the last recipe for last Sunday's Italian feast. It all started with what I thought was going to be a loaf of bread. I quickly changed my mind when I realized I was fundamentally making a pizza dough. I wound up messing around and making a honking big bread stick instead. It turned out really well and was wonderful for slopping up the red sauce from the ravioli and meatballs. So with no further delay, here it is.
Giant Garlic Breadstick
Ingredients
  • 3 cups flour, plus more for dusting
  • 1-1/2 teaspoon salt
  • 2 packets active dry yeast
  • 1/2 cup lukewarm water, plus more as needed (I'll explain later)
  • 3 tablespoons olive oil, plus more as needed (I'll explain later)
  • 1 tablespoon each, dried oregano, basil, parsley
  • 1/2 cup grated Parmesan cheese
  • Minced garlic, 3-6 cloves or 2 tablespoons jarred
  • 3 tablespoons butter, melted
Directions
  1. Put first seven items into a mixing bowl. Mix ingredients (If you have a Kitchenaid, you're golden. Chuck the first seven ingredients into the bowl, put on the dough hook, set to power level 2 and go. If not, you're going to be working the dough by hand.)
  2. This is basically an extension of the first step. Regardless of how you're working the dough, my method is woefully inexact. The dough will be very dry and crumbly to start. During the mixing, you're going to need to add in a little more oil and water. What we're looking for is a nice, elastic dough. It should pull everything off the sides and bottom of the bowl and work into a ball. Start by adding a teaspoon of oil. Then a scant 1/4 cup of water. Go back and forth between the oil and water until the dough hits that consistency we're looking for. If the dough gets sticky, sprinkle a little extra flour in there. The dough should NOT be sticky. You're going to work it for about 5 minutes.
    This is exactly what we're looking for here. Nothing stuck to the sides or bottom.
  3. Once the dough is the desired consistency take it out of the bowl and work it for a couple of more minutes. If it was in the mixer, take it out and work it by hand for a couple of more minutes. Put it back into the bowl and cover it with greased plastic wrap. Put the bowl in a warm place and let it rise for about an hour. If all goes well, the dough should double in size.
  4. Take out the dough and knock it down. Knead it for a couple more minutes. Then cut the dough into two equal pieces. Roll each piece out to about 12-15 inches. Lay them next to each other on a greased baking sheet. Try to twist them around each other into a quasi-braid sort of thing. (I'm completely cack-handed with this sort of thing and mine looked fairly horrifying at this stage. This is why the wife does the complicated braiding stuff when we bake).
    Like I said, not pretty.
  5. Take the minced garlic and throw it in the melted butter. Grab a brush and paint the top of the bread with a liberal dose of the garlic-butter mixture. Don't be shy. Hold a little of the mix back for later. Or go crazy and use it all right now. You can always make more later. Don't live in fear. 
  6. Throw the tray in a preheated oven at 375-400F. Give it 15-20 minutes. Keep an eye on it. Ovens vary and I am not a reliable source of information. Cooking times may vary. When it looks like it's about done (the outside should be getting golden and developing a nice crust), take it out and hit it with another round of garlic-butter mix. Go nuts. Put the bread back in the oven for another 3-5 minutes. Give it the old "tap on it and if it sounds hollow, it's done trick."
  7. Take it out and let it rest for a few minutes. Mostly to see if you can do it. We couldn't wait and wound up burning the crap out of the inside of our mouths. 
Good times!

Friday, May 10, 2013

Griddled Chicken with Chorizo and Butter Bean Mash via Channel 4

     I think part of the reason I like cooking so much is that I don't really know what I'm doing. Having no actual training, I have no idea if I'm doing something wrong. Unless the food comes out totally inedible I'm calling it a victory. This sort of became my attitude towards cooking. "Close enough is good enough" became my motto. It's served me well so far.
     A prime example is this recipe I pulled off Channel 4 when I was just starting more serious cooking. I misidentified ingredients, I left stuff out. Changes were made. The results were indisputably delicious. It doesn't have to be right to be good. So here is one of my first real attempts at cooking. As always, changes and notes are in blue.

Griddled Chicken with Chorizo and Butter Bean Mash
via Channel 4

Ingredients
(The original recipe is only intended to serve one. Double all ingredients if you're serving for two. The butter beans should be fine for two people without doubling)
  • 1 boneless, skinless chicken breast (preferably free-range or organic) (I used two. They were not free-range or organic. I guess technically frozen chicken breasts from Aldi count as "organic" inasmuch as they are not "synthetic.")
  • Fine sea salt and freshly ground black pepper 
  • 1 tbsp olive oil
  • 2 ounces chorizo (Spanish sausage), sliced (So I grabbed out a tube of Mexican chorizo. This is when I learned that Spanish chorizo and Mexican chorizo were not at all the same thing.)
  • ½ small red onion, peeled and sliced (I used yellow)
  • ½ small red pepper, deseeded and sliced (pretty sure I used red peppers from a jar)
  • ½ small yellow pepper, deseeded and sliced (Yellow peppers were nutty expensive. I used green.)
  • ½ garlic clove, peeled and finely chopped (I used a whole clove.)
  • ½ small red chilli, finely chopped (I used 1/2 teaspoon of red chili flakes)
  • 1 tsp sherry vinegar (At the time I figured red wine vinegar was close enough)
  • 3-4 fresh basil leaves, roughly shredded (Not something I had in the house. I went with 1/2 teaspoon dried basil.)
For the Butter Beans
  • 14.5 ounce can butter beans, drained and rinsed in a sieve (I actually had a can of these lurking in the back of the cabinet!)
  • ½ small garlic clove, peeled and finely chopped (I don't understand this "half a small garlic clove" nonsense. That's just weak. You can't live in fear. I used a whole clove).
  • 2 tbsp olive oil
Directions
  1. Heat a griddle pan (I used a nonstick fry pan. I had no idea what a griddle pan was at the time) on the hob (Hob? What the hell is a hob? Hobgoblin? Hobnails? I'm hoping they mean the stove, because there's not really anywhere else in the house to heat a pan). Carefully cut the chicken horizontally almost all the way through the middle and open out (butterflying was not in my skill set at the time. The chicken was getting cooked as is.) Season with salt and pepper.
  2. Drizzle the chicken with half the oil and add to the pan. Fry for 4-5 minutes then turn over and cook on the other side for about 3 minutes more until the chicken is cooked through.
  3. Add the remaining oil to a frying pan and cook the chorizo, onion and peppers for 5 minutes, stirring regularly. Add the garlic and chilli for the last minute of cooking time.
  4. Tip the butter beans into a saucepan with the garlic and add 5 tbsp of water. Bring to the boil and cook for 2-3 minutes until then beans are hot, stirring occasionally. Remove from the heat, add the olive oil and blend with a stick blender until smooth. Season to taste.
  5. Pour the vinegar into the pan with the chorizo and vegetables. Simmer for a few seconds. Stir in the basil and season.
  6. Spoon the butter bean mash onto a plate and top with the chorizo sauce and chicken. Serve.
Good times!

Saturday, May 4, 2013

Herbed Swirl Bread via Everyday Light Meals

     Who doesn't love bread! Obviously people with gluten intolerance, but you know what I mean. Every time I post a picture of bread on Facebook, people go nuts. Even just a picture of a ball of dough. People can't help but like it.
Oh boy! Bread!
     This was the case with the bread I baked today. Everybody responded in a very positive manner. This is a good thing since I don't think I could handle it if I got a tidal wave of comments about how awful that looked and how much it probably sucks. Anyways, I got the recipe out of the Taste of Home Everyday Light Meals cookbook, so if it's bad, blame them! As always, any changes or notes are made in blue.  With no further delay, I proudly present:
Herbed Swirl Bread
via Everyday Light Meals

Ingredients

  • 3 packages (1/4 ounce each) active dry yeast
  • 2-1/2 cups warm water, divided
  • 1 teaspoon sugar
  • 3-1/4 cups whole wheat flour
  • 1 tablespoon salt
  • 2-3/4 to 3-1/2 cups white flour
  • 6 green onions, finely chopped
  • 1 garlic clove, minced
  • 1 cup minced fresh parsley
  • 2 tablespoons minced fresh rosemary
  • 1 tablespoon minced fresh basil
  • 1 tablespoon minced fresh oregano
  • 1 teaspoon minced fresh thyme
  • 1/4 teaspoon pepper
  • 2 tablespoons butter
  • 1 egg, beaten

Directions
  1. In large mixing bowl, dissolve yeast in 3/4 cup warm water. Add sugar, let stand for five minutes. Add whole wheat flour, salt, and remaining water. Beat until smooth. Stir in enough bread flour to form a soft, sticky dough. (I ended up using the minimum amount of white flour called for in the recipe, 2-3/4 cup)
  2. Turn out onto floured surface; knead until smooth and elastic, about 6-8 minutes (I just chucked it all in the Kitchenaid and let the dough hook take care of it. My work ethic extends only so far.) Place in a bowl coated in non-stick spray, make sure to coat top (Of the bread, not YOUR top. Unless you're in to that sort of thing. I'm not here to judge.) Cover and let rise in a warm place for about an hour.
  3. In a nonstick skillet, saute onions, garlic, herbs and pepper in butter until tender. Set aside. (I only had fresh green onions. I substituted dried for everything else and doubled the amount of butter. Remember to use smaller amounts if you're switching to dry. You can find equivalents online. I also completely forgot to put in the pepper.)
  4. Punch dough down onto floured surface. Cut into two pieces. Roll each piece out to about 14"x9". Brush with some egg, put the rest of the egg in the fridge for now. (Make sure the egg bowl is CLEAN before you put it in the fridge. I just tossed mine in there and apparently there was some drippage. The wife let me know about said dripping in a very loud and annoyed voice.) Spread herb mixture over dough to within 1/2" of the edges. Roll up jelly-roll style, starting on the short side. Pinch seams to seal and tuck ends under. Place seam-side down in two greased loaf pans. Cover and let rise until doubled, about 45 minutes.
  5. Brush with reserved egg. Bake at 375F for 40-50 minutes or until bread sounds hollow when tapped. (Mine took 46 minutes.) Remove from pans to wire racks. 
At 12 slices a loaf, you're looking at about 135 calories a slice.

Good times!

Monday, April 22, 2013

Monday Recipe: Salmon and Shrimp in Chili-Lime Tomato Sauce

     Normally I like to work from a recipe. I may make omissions and substitutions or add something here and there, but I like to have that framework to build on. Sometimes, I just wing it. This was one of those times.  Last week I wanted something fairly low in calories but big on flavor. I wanted to feel like I was really eating something substantial.  I figured that chili-lime was a classic combo. However, I decided on an alternative lime source. I thought Rose's Lime juice from the bar would be a nice compliment to the sriracha and sweet onion. I was right. This was fantastic and healthy to boot!
Salmon and Shrimp in Chili-Lime Tomato Sauce
Ingredients
  • 4 salmon fillets
  • 1/2 lb. medium shrimp, cleaned and de-tailed
  • 1 large, sweet onion, diced
  • 1 rib celery, diced
  • 3 cloves garlic, chopped
  • 2 pints tomatoes, roughly chopped
  • 1 teaspoon dried basil
  • 1 tablespoon Sriracha sauce
  • 1 teaspoon Rose's Lime Juice
  • 1 tablespoon heavy cream
  • 1 tablespoon olive oil
  • 1 tablespoon grapeseed oil
Directions
  1. Heat olive oil in pan, add garlic, celery and onion. Saute until tender. 3-5 minutes.
  2. Take medium saucepan. Add tomatoes.  Stir in basil, Sriracha, and Rose's Lime. Blitz with an immersion blender until smooth. Add onion, celery and garlic. Bring to boil, lower to simmer and let simmer uncovered for about 25 minutes.
  3. While sauce is simmering, heat grapeseed oil in pan and cook salmon on medium heat until fish flakes easily with a fork. Add shrimp near end of cooking time and cook until pink.
  4. Take immersion blender and blend sauce until smooth, add heavy cream and stir. 
  5. Put salmon on plate, place shrimp on salmon. Cover with tomato sauce.
Serves 4 (or two really hungry people)
Good times!

Monday, March 25, 2013

Recipe: Pistachio-Basil Pesto (via Rachael Ray)

     You can never go wrong with pesto. It goes with just about anything. I've used it with pasta, chicken, fish and beef. It's just incredibly versatile. I found this particular recipe in my good friend Rachael Ray's magazine. I was drawn to it because it used pistachios instead of pine nuts. I don't normally keep pine nuts in the house. I do, however, keep pistachios by the pound. We also had a huge supply of basil from the garden, so we made a lot of this.
     We did find that this is cannable! We doubled the amount of lemon juice when making the recipe for canning. We then loaded it to about 1/4" shy of the top in a half-pint jar. Process in a boiling water canner for about 15 minutes. We haven't gotten sick from it yet, even using pesto that was about a year old! Granted, if you can it and manage to get sick, obviously I never recommended canning in the first place and you probably did something wrong, so I can't be held responsible.

Pistachio-Basil Pesto
(via Rachael Ray)
Ingredients 
  • 2 garlic cloves 
  • ½ cup shelled pistachios 
  • 2 cups loosely packed basil 
  • 1 tablespoon lemon juice 
  • ½ teaspoon salt 
  • 1/3 cup extra-virgin olive oil 
  • ¼ cup Parmigiano/Romano cheese 
Directions
  1. Pulse garlic in food processor until chopped 
  2. Add pistachios, basil, lemon juice and salt. Pulse until nuts are finely chopped 
  3. Add olive oil gradually through food chute and process until well combined 
  4. Add cheese and pulse 2 or 3 times 

Makes about 1 cup.
Per tablespoon: 70 calories, 7g fat

Good times!

Recipe Monday: Pesto Roasted Salmon with Spinach and Orzo

     This particular meal came about as a last minute change. I had originally planned on making a very rich pasta dish for dinner. I decided to go with something lighter because I ended up going out to breakfast at Huddle House and eating two sausage, egg and cheese biscuits. That burned through about half of my allotted calories for the day. The orzo still gave me my pasta fix, which was nice. I wound up substituting a pistachio-basil pesto I canned last season for the pesto mentioned in this recipe. It came out wonderfully. I'll definitely be making this again. I do so love a nice piece of fish.

Pesto Roasted Salmon with Spinach and Orzo
(via McCormick & Schmick's Seafood Restaurant Cookbook)

Ingredients
• 1 pound salmon fillets
• 3/4 cup pesto (I used a pistachio-basil pesto)
• 1 1/4 cups orzo pasta
• 5 oz. frozen, no-salt-added spinach
• 1/8 tsp. ground nutmeg
• 1/4 cup shredded part-skim mozzarella cheese
• Freshly ground black pepper
• Lemon slices

Pesto
• 1 cup fresh basil
• 1/4 cup freshly chopped garlic
• 1 cup chopped walnuts
• 1/4 cup Extra virgin olive oil
• 1/4 cup grated Parmesan cheese
Combine and blend thoroughly in a blender or food processor

Directions
  1. Preheat oven to 400°F. 
  2. Cut salmon into 4 portions and rinse. Set aside while preparing pesto. 
  3. Lightly coat baking dish with cooking spray. 
  4. Pat fish dry with paper towels. Cut each salmon steak in half, removing as much of bone, cartilage and skin as possible. 
  5. Coat fillets in pesto and roast for approximately 8 minutes or until the fish flakes. 
  6. Meanwhile, cook orzo and spinach according to package directions. Drain pasta well. 
  7. Squeeze out excess moisture from spinach then combine together with pasta. Stir in nutmeg, cheese and pepper and combine with pasta. 
  8. Divide onto 4 plates. Place salmon portions on top of pasta.
Good times!

Monday, March 4, 2013

Monday Recipe: Salmon with Tomato-Basil Salsa

     This is one of the first recipes I tried when I started to really get into serious cooking at home. It was on the back of a health newsletter my wife got from the NEA. I had just begun a 1,600 calories a day diet and was looking for filling recipes that were super low in calories. Salmon and vegetables was a sure thing.  Everyone really likes the tomatoes and onion. The red wine vinegar works well with the veggies and gives a nice tang to the salmon. You could use fancy salmon steaks if you wanted, but what you're seeing here uses the bagged salmon fillets from Walmart. Serve this up with a nice salad and a side of garlic bread; you've got a solid, healthy meal.

Salmon with Tomato-Basil Salsa

Ingredients
  • Cooking spray 
  • 4 salmon fillets (about 4 ounces each) rinsed and patted dry 
  • 3 tablespoons light mayonnaise 
  • 2 tablespoons chopped fresh basil 
  • ½ teaspoon garlic powder 
  • ½ teaspoon paprika 
  • 6 ounces grape tomatoes 
  • ¼ cup fresh basil 
  • 1 to 1 ¼ ounces sweet onion 
  • 1 tablespoon red wine vinegar 
Directions 
  1. Preheat oven to 375F 
  2. Spray shallow baking pan with cooking spray, place fish in pan 
  3. Stir remaining spices and we ingredients, lightly spread on each fillet 
  4. Bake 15-20 minutes until fish flakes easily 
  5. Chop tomatoes, basil and onion. Put in small bowl with vinegar. Stir to combine and spoon over cooked fillets 
4 servings, 200 calories per serving.

Good times!

Monday, December 31, 2012

Recipe Monday: Cheddar-Topped English Muffin Bread

     During the winter season I really enjoy having fresh, hot bread in the house. There's something comforting about a slice of freshly made bread with a nice soup or stew. I found this particular recipe in the Taste of Home Everyday Light Meals Cookbook.  It's fairly simple, and with a few minor changes to the recipe, is a great addition to most meals. Anything I've added to the recipe will be marked with an asterisk.
"Asterisk," not "Asterix." This is an important distinction. 
The wife asks for this bread a lot during this time of the year. So here it is for your enjoyment:

Cheddar Topped English Muffin Bread

Ingredients
  • 2 tablespoons cornmeal 
  • 5 cups all purpose flour 
  • 2 packages quick rise yeast 
  • 1 tablespoon sugar 
  • 2 teaspoons salt 
  • ¼ teaspoon baking soda 
  • 2 cups warm milk 
  • ½ cup warm water 
  • ½ cup shredded cheddar cheese 
  • 2 tablespoons bacon bits*
  • 2 tablespoons dried minced onions*
  • 1 tablespoon dried basil* 
Directions
  1. Coat two loaf pans with non-stick cooking spray. Sprinkle with cornmeal 
  2. In a mixing bowl, combine 3 cups flour, yeast, sugar, salt, baking soda, bacon bits, onion and basil. Add milk and water, beat until smooth 
  3. Stir in remaining flour 
  4. Transfer to pans, cover and let rise for 30 minutes 
  5. Sprinkle with cheese, bake at 400F for 25-30 minutes 
  6. Remove from pans to cool on wire rack 
About 150 calories per slice

Happy New Year and good times!

Monday, October 8, 2012

Monday Recipe: Pistachio Basil Pesto


     Sometimes all you need to put together a nice meal is a good jumping-off point. Some simple ingredient that can be used for dozens of different purposes. One of my favorites is pesto. Pesto is so simple and versatile. Now, you could be lazy and go buy a pre-made pesto from the store, but there's really no reason for that. Pesto is super easy to make. It only has a handful of ingredients and you don't need to actually cook it.

     I like this recipe a lot because I'm not a huge fan of pine nuts. I do, however, love pistachios.  Fair warning, if you make more than one batch at a time, you're likely to develop repetitive stress disorder from shelling all those pistachios. You could just buy them already shelled, but that's a bit more expensive. A two pound bag of shelled pistachio costs a dollar more than a four pound bag of unshelled. And shouldn't "shelled" mean the shell is still on, not off? Just saying.

     There's a lot you can do with this pesto. If you want to be lazy, just toss it with a little melted butter and pasta. Add some shrimp. Crust a piece of salmon. Or tofu. Throw it in some tomato soup. Eat it straight from the container with a spoon. 

     For the life of me, I can't remember where this recipe came from.  I either picked it up from Bon Appetit or my good friend Rachael Ray. 

     I don't have a picture of the pesto handy, so I'll include a grainy screencap of Pesto from the Animaniacs. Try to imagine him tossed with shrimp and rotini. Good times!

mmm...delicious

Pistachio Basil Pesto (via Bon Appetit or Rachel Ray)

Ingredients
2 garlic cloves
½ cup shelled pistachios
2 cups loosely packed basil
1 tablespoon lemon juice
½ teaspoon salt
1/3 cup extra-virgin olive oil
¼ cup Parmigiana/Romano cheese

Directions
  • Pulse garlic in food processor until chopped
  • Add pistachios, basil, lemon juice and salt. Pulse until nuts are finely chopped
  • Add olive oil gradually through food chute and process until well combined
  • Add cheese and pulse 2 or 3 times

Makes about 1 cup.
Per tablespoon: 70 calories, 7g fat