Showing posts with label turmeric. Show all posts

Wednesday, January 6, 2016

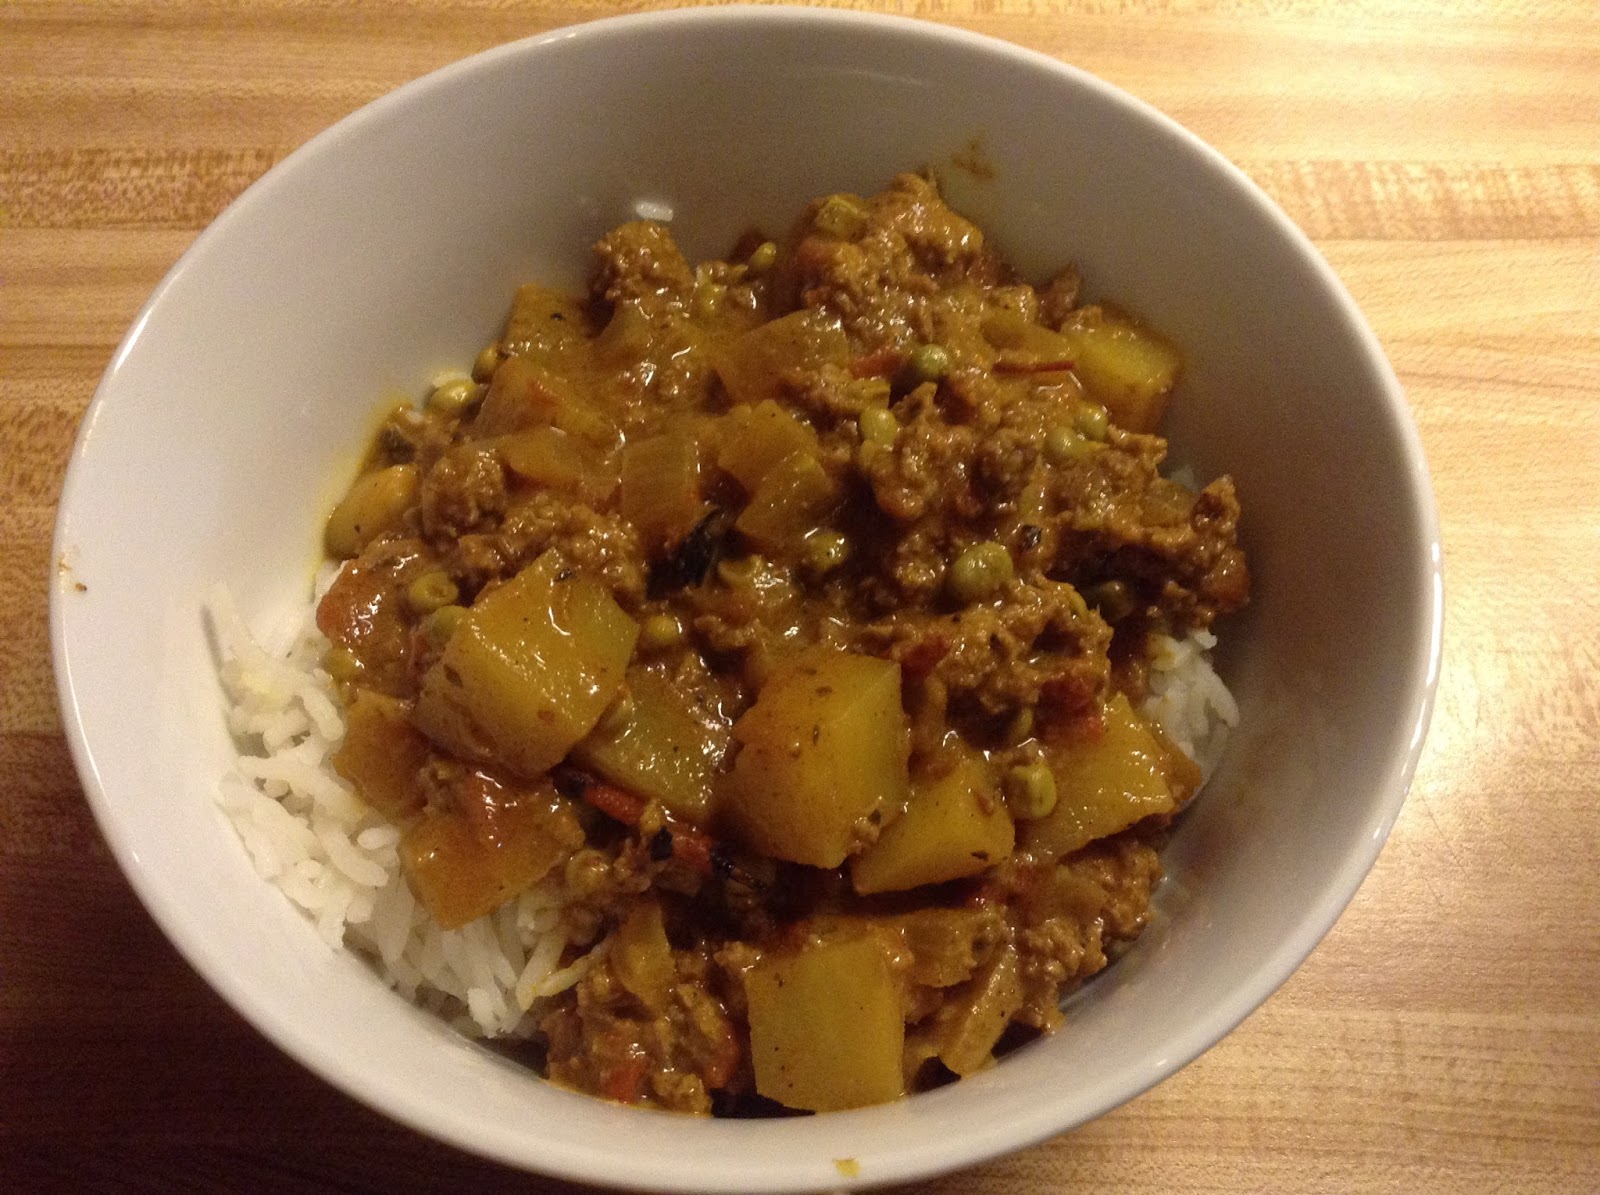
Indian Spiced Stew

     I have to give thanks to my Mother-In-Law (henceforth, MIL). When The Spud was born, she bought a house 20 minutes away and moved down here to provide day care while The Wife and I worked. Since she's in the area, we have her over for dinner regularly. This particular visit, she inexplicably brought a pound and a half of cooked ground turkey. I was considering Indian food for dinner and decided to go with that theme with the turkey. This turned out to be a really good stew. We had it over some basmati rice and it made for a good, filling winter meal. If you're not a fan of carbs over carbs, you can certainly serve it without rice. No matter what, serve it with naan so you can slop up the dregs! As always, notes are in blue.

Indian Spiced Stew
Ingredients

  • 1-1/2 pounds ground turkey (feel free to use ground beef or pork, you're not going to hurt my feelings. I used turkey because my mother-in-law (MIL) brought it for me to use up)
  • 2 medium potatoes, cut into 1/2" cubes
  • 1/2 large red onion, chopped
  • 3 cloves garlic, minced
  • 1" fresh ginger, grated finely
  • 1/2 cup frozen peas
  • 1 can (14.5 ounce) diced tomatoes, undrained (I used fire-roasted tomatoes.)
  • 1 teaspoon cumin seeds (if you don't have the seeds, just use the same amount of cumin powder)
  • 1 teaspoon ground coriander
  • 1/2 teaspoon turmeric
  • 1/2 teaspoon cayenne (add more if you want a bigger kick. I was cooking for The Wife and MIL and kept the heat down)
  • 2 teaspoons garam masala
  • 2 tablespoons freshly chopped cilantro (or 1 teaspoon dried)
  • 2 teaspoons curry powder
  • 1/2 cup plain yogurt
  • 1 cup water
  • 3 tablespoons olive oil
  • 1/4 cup red wine (if you don't want the booze, just use water here)
  • If you want more heat, chop up a hot green chili pepper or two 
Directions
  1. Brown meat. Drain any grease and set aside.
  2. In a deep pan (I used a 3 quart cast-iron deep pan. A Dutch oven would work well here too). heat oil. Add garlic, ginger, onions,peas and potatoes. Sautee for around 10 minutes. 
  3. Add in reserved meat and everything else except for the yogurt. Mix it up and set to simmer. 
  4. Simmer, covered, for about 20-25 minutes or until potatoes are tender. 
  5. Add yogurt and cook for another 5 minutes.
Good times!

Thursday, October 30, 2014

Chicken in Spicy Red Sauce Lal Shorve Vala Murgh

     The weather is starting to get cold, so it's time to cook more Indian food! Nothing warms you up like a belly full of fine spices. This couldn't be a more satisfying dish. Chicken and potatoes in tomatoes packed with flavor. I served it over rice because starch. I'm definitely going to make this again, but when I do, I'm adding more heat and cutting back the water to get a thicker sauce. As I made it, it was pretty mild. I wound up adding some sauce made from Carolina Reapers. That helped! Despite the wide array of spices, this dish was really a snap to cook. Give it a try. Or don't. Ignore this and go to McDonald's. You won't hurt my feelings. No, seriously, you'll hurt my feelings. Try it. As always, notes and changes are in blue.

Chicken in a Spicy Red Sauce
Lal Shorve Vala Murgh
via Madhur Jaffrey's Quick and Easy Indian Cooking
Ingredients

  • 2-1/4 pounds chicken pieces (we went with thighs. You can use whatever you want)
  • 1 teaspoon salt or to taste
  • freshly ground black pepper
  • 7 good-sized cloves of garlic, peeled and coarsely chopped
  • 2-inch piece of ginger, peeled and coarsely chopped (we grated our ginger, but more importantly, why is fresh ginger always measured in inches? What if you have a piece 2 inches long but sixty feet wide? Seems kind of inconsistent)
  • 1/4 cup vegetable oil
  • Generous pinch ground asfetida. optional (no it's not. Find an Indian grocer or get it online. Trust me.)
  • 1 teaspoon cumin seeds
  • 2-inch stick cinnamon
  • 6 cardamom pods (didn't have any on hand, but I did have cardamom seeds. We used about a teaspoon worth)
  • 5 whole cloves
  • 3 dried, hot red chiles (we went with dried cayenne)
  • 1/2 teaspoon turmeric
  • 1/8-1/4 teaspoon cayenne pepper (in retrospect, I should have gone with 1/2 teaspoon. It could have used a bit more heat)
  • 1-1/2 cup canned, chopped tomatoes (I used a 14.5 ounce can. I didn't drain it, which I will do next time, or cut some of the water that gets added later)
  • 12 ounces potatoes, peeled and cut into 1-1/2 inch chunks (my chunks were about 1/2-3/4 inches. I do what I want)
Ingredients
  1. Sprinkle chicken with salt and black pepper and set aside.
  2. Put the garlic and ginger into a blender with 3 tablespoons water; blend into paste.
  3. Put the oil in a wide, nonstick pan and set over medium-high heat (we went with the trusty cast-iron enameled Dutch oven). When the oil is hot, put in the cumin seeds. Wait for 10 seconds and put in the cinnamon stick, cardamom, cloves and red chiles. Stir for a few seconds until the larger spices begin to turn darker. Put in the garlic and ginger paste. Stir and fry for about 2 minutes.
  4. Add the chicken, turmeric, and cayenne. Stir and fry for another minute (I gave it a few minutes to get a nice brown on the skin of the chicken). Add the tomatoes, potatoes, 1-1/4 cup of water and 1 teaspoon salt (I omitted the salt and will likely cut the water a bit, since I kept the liquid from the canned tomatoes)
  5. Bring to a boil. Cover, turn the heat to low and simmer gently for 25-30 minutes or until the chicken and the potatoes are tender (I live in constant fear of poisoning myself with undercooked chicken, so I gave it an extra 5 minutes or so). 
  6. Make sure to remove the cloves, pods and dried chiles, or at least warn your diners. Remember, much like bay leaves, large spices=DEATH.
Good times!

Sunday, June 29, 2014

Onion Fritters (Pyaz Ki Bhajia)

     I had no idea that the food fritter actually is named accurately. Merriam Webster has an archaic definition of fritter as: verb divide (something) into small pieces. That's what fritters are! Small pieces! I had no idea. The Wife is an English teacher. She should have pointed this out to me. Oh well. These particular fritters are an Indian recipe and filled with oniony goodness. These would be great with the All Purpose Curry Sauce for dipping! There is a fair amount of work in this recipe and thus will earn it P.I.T.A. status. Totally worth it, though. As always, any notes or changes are in blue.

Onion Fritters
pyaz ki bhajia
via Madhur Jaffrey's Quick and Easy Indian Cooking
Ingredients

  • 1 large egg
  • 4 tablespoons water
  • 1 tablespoon fresh lemon juice (I used the bottled kind. Don't judge me harshly)
  • 1 cup chickpea flour (I actually keep this in the house. Since I started cooking Indian food regularly, this just seemed like a good thing to keep in stock)
  • 3/4 teaspoon salt
  • 1/2 teaspoon cayenne pepper
  • 1/2 teaspoon garam masala
  • 1/2 teaspoon cumin seeds
  • 1 teaspoon ground cumin
  • 1/4 teaspoon ground turmeric
  • 1 fresh, hot green chile, finely chopped (I used a jalapeno from the garden. You leave the seeds in there or you're a huge baby)
  • 2 tablespoons chopped fresh cilantro (my cilantro isn't doing particularly well this season; I used 2 teaspoons dried)
  • 1 medium-large onion, peeled and chopped into medium sized dice (I tried chopping them into dice but it was too hard to draw those little pips on the side. I just chopped them and called it a day)
  • vegetable oil for frying
Directions
  1. Break the egg into a bowl and beat well. Add the water and the lemon juice. Mix. Add the chickpea flour and mix very well with a whisk. Put in the salt, cayenne, garam masala, cumin seeds, ground cumin, green chile, and cilantro. Mix and set aside for at least 10 minutes. The batter should be of a droppable consistency (technically, anything is "droppable" consistency. It could be light and fluffy or hard as a rock and I can just drop that shit right on the floor and let the dogs have it)
  2. Put the oil in a wok or deep fryer (I used my trusty cast iron skillet) set over medium heat. You should have at least 3 inches of oil in the center of the wok (obviously this will vary based on the size of your wok/skillet. If I used 3 inches of oil, I'd have a spectacular fire on my hands. And face. And stove.) When the oil is hot, put the onion in the batter and mix. This should always be done just before frying (well, duh. If you tried to add the onion to the batter after you fried it, you'd look like a total schmuck.)
    If you've gotten to this point, it's probably for the best if you don't attempt to add the onions now.
  3. Drop heaping teaspoons of the batter into the hot oil. Use up all the batter this way (resist the urge to put it all in at once and make an Uber-Fritter!)
  4. Stir and fry the fritters (turning them over if you're not using deep oil) for 7-8 minutes or until they are a golden red. Remove the fritters with a slotted spoon and drain on a plate lined with paper towels. Serve hot, as soon as the fritters are made (this is generally not an issue in our home as anything coming out of the frier is quickly shoved into our craws as soon as it is safe)
Good times!


Tuesday, June 10, 2014

Red Lentils Tarka (Masoor Dal)

     The humble bean. There are so many different kinds and so many different ways to prepare them. In the end, however, they all give me wicked gas.
You know I'm not going to make it through a bean recipe without a fart reference.
     This particular bean recipe is another Indian recipe by way of Madhur Jaffrey. It is an extremely simple recipe and makes for a nice side dish. It's not packing a ton of flavor, but I think that's the point. It's a nice mild side to take some of the edge off a spicier dish. Granted, it does use dried cayenne, but they don't really bring a ton of heat. The wife and I both really liked it, so it's likely this will find a place in our Indian cooking rotation. As always, any notes are in blue.

Red Lentils Tarka
Masoor Dal
via Madhur Jaffrey's Quick & Easy Indian Cooking
Ingredients

  • 1-1/2 cups red lentils
  • 1/2 teaspoon ground turmeric
  • 1-1/4 - 1-1/2 teaspoons salt (I went with the lower amount of salt since it makes me hold water like a sponge)
  • 3 tablespoons vegetable oil or ghee (as I am too lazy to make clarified butter, I went with the vegetable oil)
  • Generous pinch of asafetida (if you're going to cook Indian food, you probably should get yourself a small jar of this stuff)
  • 1 teaspoon cumin seeds (NOT the powder! They are not interchangeable. Or do what you want. It's your food. Throw Pop Rocks in there for all I care. Don't say I didn't warn you)
  • 3-5 dried, hot red chiles (I used the cayenne I dried from my garden since I have about 56,000 of them on hand)
Directions
  1. Pick over the lentils and wash in several changes of water. Drain. (How about no?)
  2. Put lentils in a heavy saucepan. Add 5 cups water and the turmeric. Stir and bring to a simmer. Do not allow to boil over (does a recipe really need to clarify that? Have you ever gone to cook something and said to yourself, "Fuck it, I'm just letting the whole thing boil over.) Cover, leaving the lid slightly ajar. Turn heat to low and let simmer gently for 35-40 minutes or until tender. Stir a few times during the cooking (this is good advice, especially if you have the heat up a bit too high. No stirring = bean caulk fused to the pan). Add salt and mix. Leave covered on low during the next step.
  3. Put the oil in a small frying pan and set over medium-high heat. When the oil is hot, stick your face directly in the oil for 8-10 seconds (just kidding. I wanted to see if you were paying attention. DO NOT STICK YOUR FACE IN THE HOT OIL.) Put in the asafetida, then, a second later, add the cumin seeds. Let the cumin seeds sizzle for a few seconds. Put in the red chiles. As soon as the turn dark red, lift the lid of the lentil saucepan and pour in the contents of the frying pan, oil as well as spices (Watch out here. There's going to be some water in the bean saucepan, so the oil is going to splatter a bit) Cover the saucepan immediately to trap the aromas. (When the aromas have died of asphyxiation, the beans are ready to eat and you may uncover the saucepan)
Good times!

Wednesday, March 26, 2014

Smothered Beef (or Pork, or Lamb if you're a Rockefeller)

     "Smothered" foods always struck me as unfortunately named. "Smothered beef" conjures images of someone in a field holding a pillow over a cow's face. This particular smothered dish comes by way of Madhur Jaffrey. This is just packed with all sorts of wonderful flavors and made for a tremendous meal when served over some basmati rice. If you haven't given Indian food a try, I can't recommend it enough. As always, any notes or changes are in blue.

Smothered Beef 
labdhara gosht
via Madhur Jaffrey's Quick and Easy Indian Cooking
Ingredients
  • 1 pound boned shoulder of lamb (AHAHAHAHAHA! I'll have the butler get that out of the fridge as soon as he's done wiping my ass with hundred dollar bills. I used stewing beef. Pork will work, too) cut into 1 inch cubes
  • 1 small onion, peeled and finely chopped
  • 1 inch piece fresh ginger, peeled and finely chopped (we just grated it to save time)
  • 1 medium sized tomato, peeled and finely chopped (can't be bothered peeling. We just chopped it)
  • 1/2 cup finely chopped cilantro
  • 1-2 fresh, hot green chiles, cut into fine rings (leave the seeds in there, you big baby)
  • 1/4 teaspoon ground turmeric
  • 2 teaspoons garam masala
  • 1 teaspoon ground cumin
  • 1/4 cup plain yogurt
  • 1 tablespoon tomato paste
  • 3/4 teaspoon salt, or to taste
  • 3 tablespoons vegetable oil
  • 4 cloves garlic, peeled and finely chopped
  • 1/2 cup water
  • Freshly ground black pepper
Directions
  1. Put all the ingredients except the oil, garlic and black pepper in a bowl and mix well (I love recipes that are basically "throw all the shit together and apply heat.")
  2. Put the oil in a Dutch oven and set over medium high heat. When the oil is hot, add the garlic and stir until the pieces turn medium brown.
  3. Throw in the meat mixture and stir a couple times. Add the 1/2 cup water. Bring to a simmer and cover. Cook for about 90 minutes, or until the meat is tender. 
  4. Uncover and turn heat to high until sauce is thick. Sprinkle in black pepper to taste.
Good times!

Thursday, October 3, 2013

Corn Relish

     I've loved corn relish ever since I was little. It was on a salad bar in a rib joint. It was thick, almost like a chutney. This recipe is not. I guess I wasted your time with that little bit of nostalgia. This version is not thick, probably due to the fact that it doesn't use a ton of sugar or cook for very long. I suppose if you let it cook for a lot longer. It is, however, delicious. It is just the right combination of sweet and tangy. Plus it looks great. You can toy with the ingredients, shifting different kinds of peppers in and out. The last batch we made added a couple of chopped jalapenos. Fair warning, this stuff stains the crap out of anything it touches. If you're a sloppy eater, I hope you're a fan of little yellow spots on your clothes.
Corn Relish
Ingredients
  • 2 quarts sweet corn kernels 
  • 4 cups chopped cabbage 
  • 1 cup chopped onion 
  • 1 cup chopped green bell pepper (sometimes we'll use yellow pepper in place of green)
  • 1 cup chopped red bell pepper 
  • 1 cup white sugar 
  • 2 tablespoons ground dry mustard 
  • 1 tablespoon celery seed 
  • 1 tablespoon mustard seed 
  • 1 tablespoon salt 
  • 1 tablespoon ground turmeric 
  • 1 quart apple cider vinegar 
  • 1 cup water
Directions
  1. In a large saucepan, mix corn, cabbage, onion, green bell pepper, red bell pepper, white sugar, ground dry mustard, celery seed, mustard seed, salt, turmeric, apple cider vinegar and water. Bring to a boil. Reduce heat and simmer 20 minutes. 
  2. Transfer the mixture to sterile containers. Seal and process in boiling water bath. Process 25 minutes for quart jars. As always, refer to the National Center for Home Food Preservation for tips on how to not accidentally poison yourself or loved ones.
Good times!

Tuesday, August 27, 2013

Caribbean Hot Sauce via Hot Sauce!

     One can never have too much hot sauce available. I was excited to try my hand at a Carribean-style recipe in my Hot Sauce! cookbook. I even went out and bought a mango just for the purpose of using it to make hot sauce. The book and several people said that this style of sauce can turn plain old scrambled eggs into a transcendental experience. I'll let you know when I try it! I can tell you this sauce packs a wallop up front. There's a blast of heat followed by the sweet fruitiness of the mango. Just underneath all of that is a tiny hint of mustard. It's a tremendous combination that makes the heat totally worth it. This recipe will yield a bit over a pint of sauce. As always, any changes or notes are in blue.

Caribbean Hot Sauce
via Hot Sauce!

Ingredients
  • 5 fresh Scotch bonnet or habanero chiles (preferably yellow, red, or orange), stemmed and seeded (I used 6 red habaneros that I froze whole last season)
  • 1 ripe papaya or mango, peeled, seeded and coarsely chopped (I went with mango)
  • 1 small yellow onion, coarsely chopped
  • 2 garlic cloves, chopped
  • 1 (1-inch) piece of fresh ginger, peeled and chopped
  • 1/2 cup cider vinegar
  • 1/2 cup water
  • 2 teaspoons honey
  • 1 tablespoon dry mustard
  • 1/2 teaspoon ground turmeric
  • 1/2 teaspoon salt
  • Pinch of ground cumin
  • Pinch of ground coriander
Directions
  1. Add all of the ingredients into a blender and puree until just smooth, taking care not to aerate the mixture too much. 
    Fire in the hole!
  2. Pour into a nonreactive saucepan, bring to a boil, and then lower the heat and simmer uncovered for 10 minutes.
  3. Let cool and pour into bottles. Refrigerated, the sauce will keep for 6 weeks. (If you're planning on canning it, you will need two half-pint jars. Fill them to about 1/4" inch from the top and seal them. I process mine in a boiling water bath for about 10-12 minutes. As always, if you're not familiar with water-bath canning, please go to the National Center for Home Food Preservation and read up on canning before you accidentally give yourself food poisoning and I disavow any knowledge of posting this recipe)
Good times!

Monday, July 1, 2013

Chicken Vindaloo

     Many moons ago, when I was in college, I used to eat Indian food all the time. There was a tremendous buffet that opened up my world to this fantastic food. Once I got back from college I sort of forgot about Indian food. Since I've been doing this food blogging thing, I've started to see the familiar recipes again and the urge to indulge in Indian is back.
     I started looking around for a recipe to try and eventually decided on vindaloo. I settled on a chicken vindaloo recipe from Currytastic.  This recipe would be my starting point. I have to say I was terribly pleased with the results. There was plenty of heat, but there were so many layers of flavor that you were willing to work past the heat. The wife and I sat at the table pouring sweat and moaning (I assure you, we were having dinner), and slopping up the vindaloo sauce with some tremendous naan bread I made from a recipe from Allrecipes.  This was truly a fantastic meal. Was it truly authentic? I have no idea, nor do I care. It tasted great and the wife loved it. That's all that matters. As always, any changes from the original recipe and notes are in blue.


Chicken Vindaloo
Ingredients
Vindaloo Paste
  • 1 tsp ground cumin
  • 1 tsp ground turmeric
  • 1/4 tsp ground cinnamon
  • 2 tsp mustard powder
  • 1 tsp ground coriander
  • 1 tsp cayenne pepper
  • 3/4" cube of peeled ginger (no fresh ginger in the house, I used 1/2 tsp grated ginger)
  • 1 or 2 tsp Garam Masala (I never have this in the house. I used 1/4 tsp each of ginger, cinnamon, black pepper, cumin, coriander, nutmeg and ground cloves. These amounts are on top of the already listed amounts above)
  • 3 tbsp white wine vinegar (I used malt vinegar at the suggestion of several other recipes)
  • 1 tsp sugar
Vindaloo Base
  • 3/4 cup vegetable oil
  • 4-8 garlic cloves, crushed or blended (We used 8. No sense in screwing around)
  • 3 red onions, sliced finely, preferably blended (Our red onions were freaky big, so I only used two. I also went ahead with just slicing them)
Everything Else
  • 4+ red chilies, finely chopped (I changed this up. I wound up using 2 jalapenos and 1 naga jolokia. The naga alone would have provided a fair amount of heat.) WARNING: If you're messing with hot peppers, make sure to wash your hands afterwards. If you have open cuts on your hands, wear gloves. I assure you that if you get naga jolokia in your eyes or cuts you will wish you were dead.
    The naga jolokia is around 1 million Scoville units. For comparison, a cayenne is  50,000 at the high end. So this one pepper is equivalent in heat to about 15-20 cayenne.  Rectum? Damn near killed 'em. 
  • 4 skinless chicken breasts cut into bite sized pieces (I used 3. I don't normally skimp on breasts, but these breasts were HUGE. *snicker*)
  • 1 pound good quality chopped tomatoes or canned tomatoes (don't drain the canned)
  • 1-2 tsp tomato puree to taste (I used about 3 tablespoons of tomato paste)
  • 1-4 tsp hot chili powder (optional) (no it's not optional. Don't even put it in there if you may not want people to do it. I used 4 tsp. I didn't even tell my wife. Granted, she suspects. She'll know for sure once she reads this. Wish me luck.)
  • Salt and pepper to taste (HILARIOUS. If you need to augment the flavor at this point just give up)
Directions
  1. Grate or slice the ginger finely and add the cumin, cinnamon, mustard, coriander turmeric, garam masala and cayenne pepper into a bowl and add the vinegar and sugar and mix thoroughly.
  2. Heat the oil in a wok or large frying pan. (There's going to be a lot of stuff in here. I used my 6 quart enameled cast iron Dutch oven) Add the garlic and the onion and cook over a medium heat until they have softened for approx 5-7 mins, but take care not to let them burn or brown too much.
  3. Once the onion and garlic have softened, add the chicken pieces and cook for approx 2-3 minutes until the chicken starts to color. (If you're using the Dutch oven, everything may be a bit crowded at the bottom. The chicken took closer to 10 minutes before it was all colored. Cooking times may vary.)
  4. Now add the chilies, tomatoes, tomato puree, and begin to stir in the pre-prepared Vindaloo paste.
  5. Add salt and pepper to taste, and bring to the boil. Once boiling, lower the heat and simmer whilst stirring occasionally for approx 1 hour. During this period, it’s important not to let the chicken vindaloo dry out, so add a 1/2 cup of water as necessary (I didn't need it. At least I don't think I did. I'm pretty awesome, so I probably got it right). If you do want to make it hotter than the recipe (HELLS YES I DO), then during the simmering time is the right time to gradually add the chili powder to taste.
Good times!