Showing posts with label tomato. Show all posts

Monday, October 25, 2021

Best Ever (FIGHT ME) Slow Cooker Tomato Soup

 I don't normally bandy around the term "BEST EVER." It's trite. It's overused. It generally denotes a slow cooker recipe that is, in fact, not the best ever. HOWEVER, this recipe is, based solely on my experience with tomato soups, the BEST EVER. I will gladly fight anyone who says differently. How do I know it's the BEST EVER? I really fucking hate tomato soup and this was actually pretty good. I know The Wife enjoyed it immensely. The Spud enjoyed it, but all she's ever had was canned tomato soup from Aldi, so the bar was set pretty low there. Other than the caramelizing of onions, this recipe is super easy. Just remember not to add the cream until the end. As always, notes are in blue.

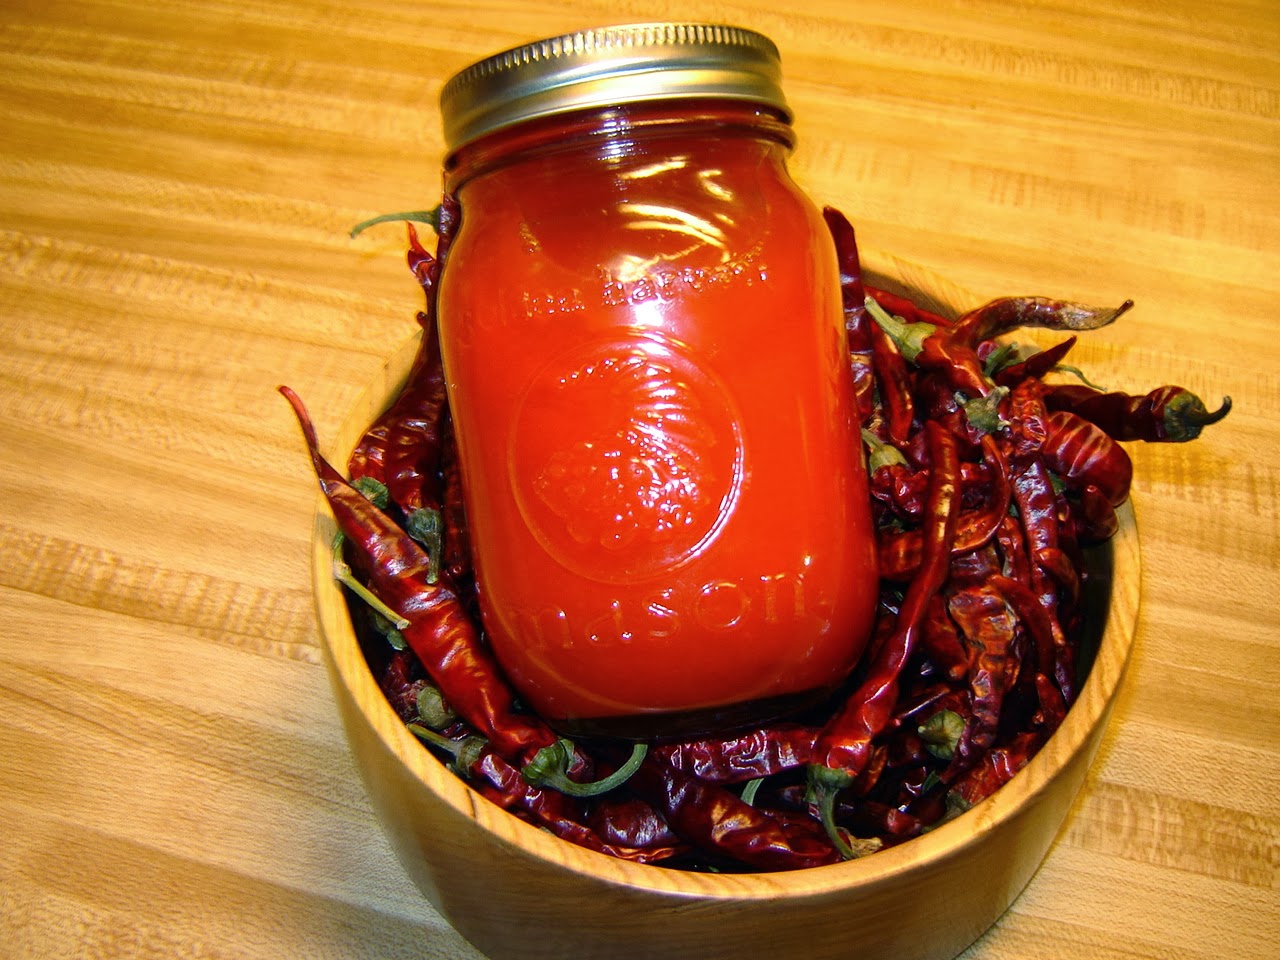
I can say without fear of contradiction, this is the
Best Ever*
Slow Cooker Tomato Soup

Ingredients

  • 1 quart canned tomatoes, undrained (we used our own canned tomatoes. If you don't have home canned, just use an equivalent amount of canned stewed tomatoes)
  • 1 can (14.5 ounce) fire roasted tomatoes, undrained
  • 1 quart reduced sodium chicken stock
  • 1 tablespoon dried basil
  • 2 teaspoons Ukrainian Village seasoning from the Spice House (if you can't or won't get the seasoning, use a mix of Kosher salt, garlic, onion, bell peppers, and pepper. No clue as to what ratios you'd use. That's why I'm using the seasoning). 
  • 2 tablespoons butter
  • 1 medium onion, sliced into half rings
  • 2/3 cup heavy cream
Directions
  1. In a pan, melt butter and sauté onions on medium heat until they caramelize, about 7-10 minutes. 
  2. Add the onions and everything else other than the cream into a slow cooker (I used a 5 quart)
  3. Cook on LOW for 4-1/2 hours.
  4. At the end of the 4-1/2 hours, use and immersion blender to completely blend the soup. It should be completely smooth. (if you don't have an immersion blender, you're going to have to transfer the soup to a blender and do it in batches)
  5. Once the soup is blended, add the cream and stir. 
Good Times? THE BEST

*In the highly unlikely event you don't feel this soup is the BEST EVER, it is likely due to some sort of failing on your part. Probably an unrefined palate or some sort of taste bud injury from a microwave burrito.

Monday, May 18, 2020

Red Sauce with Yellow Squash, Zucchini, and Pork

Bad news, we're still stuck at home. Good news, the garden is in! This means we need to start using up the veggies we put aside last season to make room for the glut (hopefully) of new produce! This recipe was really nothing more than a desperate attempt to use up two pounds of squash and zucchini. It actually was quite tasty and works really well with rotini pasta (yes, I know the picture shows linguine. We had it with rotini the next day). My only complaint was that we used sliced squash and zucchini that we had frozen. I wasn't a huge fan of the consistency, and in the future will chop them instead. The Wife said they were fine and I was just being nitpicky. That could be. I have some weird consistency issues with some food. That aside, it was easy to make and good. It also converts easily to vegetarian by simply leaving out the meat. This sauce could also be served over rice if you wanted a more goulash vibe.

Red Sauce with Yellow Squash, Zucchini,
 and Pork
Ingredients
  • 2 tablespoons olive oil
  • 1 pound ground pork (ground beef or ground Italian sausage would work, too)
  • 1 pound zucchini, chopped
  • 1 pound yellow squash, chopped
  • 1 medium onion, chopped
  • 2 red bell peppers, cut into 1" strips
  • 1 can (14.5 ounces) diced tomatoes, with liquid
  • 1 can (8 ounces) tomato sauce
  • 1 can (6 ounces) tomato paste
  • 1 teaspoon dried oregano
  • 1 teaspoon dried basil
Directions
  1. In a large pan (I used a 5 quart Dutch oven), heat oil over medium heat. Add ground meat and brown (my meat did not yield much grease, so I didn't drain it. You may find you need to depending what you used).
  2. Add zucchini, squash, onion, and peppers. Cook for about 7-10 minutes, stirring regularly to make sure the veggies cook evenly. (If you like the veggies with more snap, shorten the time. Lengthen the time if you want your veggies to be a bit mushier.)
  3. Add the tomatoes, paste sauce, and seasoning. Stir to get the tomato paste evenly mixed. 
  4. Bring to a simmer and let simmer for 10-15 minutes.

Tuesday, April 14, 2020

The World Needs Another Cheese Dip Recipe

As the world slowly descends into utter madness, I realize what we need now, more than ever, is another Rotel-style cheese dip. There's a pretty good chance I've managed to create something that already exists, which begs the existential question:

If I created something that has already been created, but I had never known about it, was it still an original creation?

Honestly, who the fuck cares. It's really good dip and that's all that matters.

Objectively Original Cheese Dip
Ingredients

  • 1 pound cooked and shredded/crumbled meat of your choice (Seriously, almost any meat will work. We used pork loin. Chicken, ground beef, ground turkey, fake crab, shrimp, go nuts. Maybe not like salmon or clams, but the sky's the limit. Or leave out the meat if it's not your thing)
  • 1-10.5 ounce can cheddar cheese soup
  • 1 -10 ounce can diced tomatoes with jalapenos, drained 
  • 4 ounces cream cheese
  • 1 cup shredded cheddar cheese
Directions
  1. Throw everything in a slow cooker and cook on LOW for 2-3 hours, stirring occasionally
    OR
    Put everything in a deep saucepan and cook on medium heat, stirring regularly, for about 7-10 minutes, until the cream cheese and cheddar are incorporated. Don't let it simmer or it's going to scorch in the pan.
  2. There is no step #2
Good times!

Tuesday, September 13, 2016

T-Bird Hot Sauce

     Every year I plant way too many hot peppers and every year I find myself desperate to find ways to use them up. I have bags and bags of peppers that I've dried, but those really start to take up space. I am always looking for new and exciting ways to use up lots of peppers in one go. This particular sauce certainly fits the bill, using five dozen peppers. It also uses up some tamarind concentrate that I mistakenly bought when I was shopping for tahini. For whatever reason, I'm always mixing tahini and tamarind up, which generally doesn't end well in a recipe. Though very spicy, this sauce has a wonderful deep and mellow flavor underneath from the tamarind and guajilo. This is a go-to sauce for chicken or pork dishes. It's thick enough to hold up on the barbecue or hot wings. As for the name? I used Thai peppers in the recipe. I know "bird" specifically refers to the dried pepper, but the name was too good to pass up. "T" for Thai or Tamarind and "Bird" for the alternate pepper name. I am so damned clever it hurts. As always, notes are in blue.


Ingredients
  • 1 tablespoon tomato paste
  • 2 tablespoons red wine vinegar
  • 1 Tablespoon tamarind concentrate
  • 1 cup cider vinegar
  • 1/3 cup water
  • 60 Thai bird chili peppers, stemmed (cayenne or serrano can be substituted, but you may need to use less, as those peppers are generally larger)
  • 1 dried Ancho chili
  • 2 dried Guajillo chilis
  • 4 tomatoes, chopped
  • 1 onion, chopped
  • 1 carrot, chopped
  • 1 rib celery, chopped
Directions
  1. Add all ingredients to a food processor (make sure it is a large capacity processor, at least 7 cups. 10 would be better, unless you're a fan of leaking and caustic messes. Caustic Mess would be an outstanding punk band name). Process until smooth.
  2. Transfer mixture to a nonreactive pot and bring to a boil. Reduce to a simmer and let simmer for about 10 minutes. (If you're not planning on canning this sauce for storage, you're done. If you want to store this sauce long term, go on to the next steps)
  3. Prepare a boiling water canner and submerge 4 half pint jars (or two full pint jars) to sterilize in the boiling water. (You can be doing this while the sauce is simmering)
  4. Remove the jars and fill with the warm sauce. Leave 1/4" headspace in each jar.
  5. Seal the jars with a 2 piece lid and process in the boiling water bath for 12 minutes (If you're doing full pints, go for about 16 minutes).
  6. After 12 minutes, remove from the bath and set on a wire rack to cool. Eventually, you'll hear the satisfying "pop" that tells you the jar has sealed. If after a few hours, a jar hasn't sealed, put on a new lid and try reboiling for another 12 minutes. If it doesn't seal after that, just give up and use the sauce. It will hold for a long time in the fridge. Properly processed and sealed, the sauce is good for at least a year. As always, double check everything with the National Center for Home Food Preservation to ensure you don't poison anybody.

Good Times!


Thursday, June 30, 2016

Spicy Black Bean Gazpacho

     I'm not sure how I feel about gazpacho.
Wrong Gazpacho.
The idea of cold soup has never really appealed to me. Granted, there are exceptions. There's an Indian cold yogurt cucumber soup I'm a fan of, but the idea of a bowl of raw veggies in tomato juice doesn't really call out to me. I wound up making this soup because we had a bunch of veggies on hand and The Wife suggested it. On a hot summer day, I suppose it made sense. I gave in and whipped it up. I used my Bloody Mary mix since it had all the seasonings already in it and I wasn't about to run out and buy V8. I have to admit this was pretty good. It had a nice spicy kick and I particularly like the way the beans offset the crunchiness of the other veggies. If you're looking for an easy, healthy summer soup, I'd have to say this is a big winner. As always, notes and changes are in blue.

Spicy Black Bean Gazpacho
via Everyday Light Meals
Ingredients

  • 3 cans (5-1/2 ounces each) spicy hot V8 juice. (Nope. We don't have V8 in the house since the gold-plated hovercraft was in the shop. We opted for 18 ounces of The Wife's Choice Bloody Mary Mix. It's worth the extra trouble to make this, especially if you like a good Blood Mary.)
  • 1 can (15 ounces) black beans, rinsed and drained (has anybody ever seen a recipe that said not to rinse and drain black beans? I feel like maybe I have. You know, "reserve mucousy water for proper texture.")
  • 1 medium onion, chopped (I used yellow, though I feel a sweet onion would have been good here)
  • 2 large tomatoes, seeded and chopped (seeded? I don't have time for that sort of nonsense)
  • 2 medium zucchini, chopped
  • 2 tablespoons olive oil
  • 2 tablespoons white wine vinegar
  • 1 garlic clove, minced
  • 1/4 teaspoon salt
  • 1/4 teaspoon black pepper (omitted since it's already in my Bloody Mary Mix)
  • 1/4 teaspoon cayenne pepper (omitted since it's already in my Bloody Mary Mix)
Directions
  1. In a large bowl, combine all ingredients. Cover and refrigerate at least 8 hours. (Feel free to serve with a sprinkle of Parmesan cheese. We did, and we should be the benchmark for all your decision making.)
Good Times!

Thursday, October 15, 2015

Fettuccine with Tomato and Artichoke Cream Sauce

     So being a Daddy is taking up exactly as much time as I expected, which is why updates are few and far between around here! I am trying to make up for it by posting more completely original recipes. We've been trying to use up the last of our garden's tomatoes, so I figured a nice tomato cream sauce would be a good idea. I added a few other veggies and a touch of seasoning and ended up with a real winner. The Wife had the brilliant idea to add the red pepper flakes. This was a stroke of genius as I think the sauce may have been a touch too bland otherwise. The spot of heat really adds depth to this dish. This will definitely end up in our regular rotation. There's a lot of flexibility here. You can probably swap in or out most veggies and the addition of shrimp or chicken wouldn't be amiss, either! As always, notes are in blue.


Fettuccine with Tomato
and Artichoke Cream Sauce
Ingredients

  • 1 pound tomatoes, roughly chopped (or two 14.5 ounce cans diced tomatoes, drained)
  • 2 large scallions, chopped
  • 4 ounces mushrooms, roughly chopped
  • 1 12-ounce can marinated artichoke hearts, drained and chopped
  • 3 cloves garlic finely chopped
  • 1 tablespoon olive oil
  • 1 cup heavy cream
  • 1/4 cup grated Parmesan cheese
  • 1/2 teaspoon red pepper flakes
  • 2 teaspoons Bridgeport seasoning from Spice House (follow the link to see what's in there)
  • bunch of fresh basil, chopped (or 1 teaspoons dried)
  • 1 pound fettuccine
Directions
  1. In a large pan, heat olive oil over medium heat. Add garlic and sautee 1-2 minutes, being careful to not let garlic get too brown.
  2. Add scallions and sautee another minute or two. Add mushrooms and continue to sautee for 2-3 more minutes.
  3. Add tomatoes and artichokes. Bring to a simmer and simmer for about 15 minutes.
  4. Lower heat a bit and add cream, cheese, pepper flakes, seasoning and basil. Cook on a very low simmer for 5-6 minutes.
  5. Cook pasta aldente and drain.
  6. Either toss pasta with sauce or serve a liberal amount of sauce over the pasta, whichever you prefer. 
Good times!

Friday, February 20, 2015

Braised Chicken and Tomato

     The early 1990's must have been an interesting time to cook. Based on cookbooks from the era like my well-worn copy of Pol Martin's Supreme Cuisine, everything looked like a hot mess. Lots of earth tones and frightening sauces. I love that sort of shit. This recipe comes from the aforementioned book and is super easy to make. It turns out a really nice sauce that's good over rice or egg noodles. Give it a try and relive the days of grunge rock, Tamogotchis and Hypercolor shirts! As always, notes and changes are in blue.

Braised Chicken and Tomato
via Pol Martin's Supreme Cuisine
Ingredients
  • 3-4 pounds chicken, cut into sections, washed and skinned
  • 1/2 cup flour
  • 3 tablespoons butter (I wound up using 5 for reasons still not entirely understood)
  • 2 dry shallots, peeled and chopped (None on hand. I used one chopped red onion)
  • 1/2 pound fresh mushroom, cleaned and halved
  • 2 garlic cloves, smashed and chopped
  • 3 plum tomatoes, quartered
  • 1 cup dry white wine
  • 1/2 cup chicken stock, heated
  • 1-1/2 teaspoon basil
  • salt and pepper to taste
  • (I substituted the previous 6 items with one quart of my own garlic basil canned tomatoes and 1/2 cup water. Nothing really groundbreaking, my canned stuff pretty much had everything they asked for all in one)
Directions
  1. Preheat oven to 375F (180C, Gasmark 4)
  2. Dredge chicken pieces in flour
  3. Heat butter in ovenproof pan (I used my trusty cast iron enameled Dutch oven) over medium heat, Add chicken pieces and sear on all sides for 8-10 minutes.
  4. Add shallots (or onions), garlic, mushrooms, onions, and tomatoes. Season and cook 6 minutes over medium heat (since I used my own mix, I added the onions and mushrooms for 4-5 minutes, then dumped my canned tomatoes in)
  5. Incorporate wine, chicken stock and basil (I skipped this part since I was kind of doing my own thing at this point). Bring to a boil. Cover and cook for 25-30 minutes in the oven.
Good Times!

Friday, August 8, 2014

Braised Eggplant with Bacon and Tomatoes

     I'm forever on the fence about eggplant. On its own, I really want nothing to do with it. I do, however, love The Wife's Eggplant Parmigiana.  The reason I'm going on about eggplant is that our garden is yielding an unprecedented bumper crop of these bad boys. Desperate times call for desperate measures. I consulted my copy of The Thousand Recipe Chinese Cookbook and found an intriguing recipe involving eggplant, bacon and tomato. This recipe was good on a number of different levels. For one thing, it was very easy to make. It called for a few simple ingredients and came together easily. Second, it was packed with flavor. We served it on brown rice and the first thing we both said was that it tasted very much like fried rice you would get in a restaurant. This one is definitely a winner and will grace our table again! As always, notes and changes are in blue.


Braised Eggplant with Bacon and Tomatoes
via The Thousand Recipe Chinese Cookbook
Ingredients

  • 6 bacon strips, cut into 2-inch sections
  • 4 tomatoes, peeled and quartered (we didn't peel them because we're lazy. We also cut them into eighths because they were really big). 
  • 1 eggplant, peeled and cut into 1-inch cubes (we also soaked them in water and teaspoon of salt for about half an hour. Then we drained the water. The Wife assures me this is some form of sorcery that removes the "impurities" and "humours" from the eggplant)
  • 1 to 2 garlic cloves, crushed (there is no such thing as too much garlic. If you want 12 cloves in there, go crazy. I'm definitely using more garlic next time)
  • 1/4 teaspoon salt
  • pepper to taste
Directions
  1. Place bacon in a cold pan (we used our enameled cast iron dutch oven), then heat and brown lightly. Do not pour off the fat. Add garlic and stir-fry for a couple minutes.
  2. Add eggplant cubes and stir-fry to coat with the bacon fat. Reduce heat to medium and cook, covered about 5 minutes, or until eggplant has softened (we left the lid off, because that's what badasses do). Stir once or twice during this time.
  3. Gently stir in tomatoes. Reduce heat to low and cook, covered, until eggplant is done, about 5 minutes more. Season with salt and pepper (we added the salt as soon as we put in the tomatoes, since this helps to break the tomatoes down a bit). 
  4. Serve over brown rice. Or white rice. Or noodles. Or Cap'n Crunch. Whatever floats your boat. 
UPDATE: Here's a link to the YouTube video for this recipe! You're welcome!

Good times!

Friday, February 28, 2014

Slow Cooker Margarita Chicken and Black Beans

     I'm pretty sure there's about 150,000 different slow-cooker Mexican style chicken recipes floating around the interwebz, so I figured why not add another? This particular recipe assembles quickly and makes for a fairly versatile meal. We served it over rice, in tortillas and as a nacho topping. Just make sure to drain off any excess liquid if you're using it in tortillas, tacos or nachos, otherwise everything will get soggy. This is very mild. I wound up adding habanero hot sauce to mine, but I really like the heat. As always, any notes are in blue.


Slow Cooker Margarita Chicken
and Black Beans
Ingredients
  • 1 pound boneless, skinless chicken
  • 1 can (15 ounces) black beans, rinsed and drained
  • 1 can stewed tomatoes, with liquid
  • 1/2 onion, chopped
  • 1/2 bell pepper, chopped (any color is fine; we used red)
  • 1 tablespoon pepper in adobo sauce (you can find these canned in the ethnic section of most grocery stores)
  • 2 ounces tequila (optional if booze isn't your thing)
  • 1 tablespoon lime juice (I used the stuff from the little plastic lime. I love that sort of thing)
  • 1 teaspoon Pilsen Latino Seasoning (from The Spice House)
  • for those who don't have access to the above seasoning, it includes: coarse Kosher flake salt, garlic & onion powders, Mexican oregano, Tellicherry black pepper, hot red pepper flakes.
Directions
  1. Place chicken in bottom of slow cooker.
  2. Unceremoniously dump all other ingredients on top of chicken.
  3. Give a quick stir. Cook on LOW 6-8 hours.
  4. Remove chicken from cooker, shred and return to cooker. 

UPDATE: Now there's a YouTube video for this recipe!

Saturday, February 15, 2014

Bacon Swiss Mini Tarts

     I keep expecting the whole bacon craze to play out, but it is still going strong. People will eat just about anything these days if it incorporates bacon. I'm fairly sure I could serve up cat turds wrapped in bacon and somebody would eat them. What I'm getting at is that there's no shortage of bacon recipes. The wife bought me a book of 101 bacon related recipes for my birthday. I only just got around to trying one out. This particular snacketizer was pretty good. However, I think there was far too much mayo going on here. It managed to overpower most of the other flavors, which is a bit gross. I think a swap out with a bit of cream cheese would be the fix. As always, notes and comments are in blue.

Bacon Swiss Mini Tart
via: 101 Things To Do With Bacon
Ingredients
  • 8 strips bacon, cooked and crumbled
  • 1 tomato, chopped
  • 1/4 cup finely minced onion
  • 3/4 cup grated Swiss cheese
  • 1/2 cup mayonnaise (I'm going to tell you again that this is WAY too much mayo. I'd cut it back to 1/4 cup mayo and add 1/4 cup cream cheese)
  • 1 tablespoon chopped fresh basil (I used a teaspoon of dried)
  • 1 can (16 ounces) refrigerated flaky buttermilk biscuits (I don't think mine were "flaky." They may have just been regular old biscuits)
  • 1-2 teaspoons hot sauce of your choice
Directions

  1. Preheat oven to 375F degrees and grease a mini muffin pan (this marks the very first time I have used the mini muffin pan. To this point it has sat sullenly in the back of the cabinet)
  2. In a bowl, combine bacon, tomato, onion cheese, mayo and basil (Wouldn't it have been easier to say "combine everything except the biscuits?" Why do people needlessly complicate things? This is why I can't leave the house without sedating myself first)
  3. Separate biscuits horizontally (I'm not laying on the ground to separate biscuits. I just stood right at the counter and did it) and press halves into mini muffin pan. Fill each biscuit half with some of the bacon mixture. 
  4. Bake for 10-12 minutes or until golden brown (we went about 15-18 minutes)
Good Times!

Sunday, December 15, 2013

Too Damned Easy Baked Brie and Chutney

     I subscribe to several cooking magazines. Occasionally I will find recipes and make them exactly as described. More often than not, I will modify the recipe to fit what I have in the house and what I am willing to spend money on. Naturally, certain recipes never make it into the rotation because of these restrictions. One recipe in particular involved brie, fruit preserves and puff pastry. I generally don't stock these items. However, as luck would have it, I found very reasonably priced (nine bucks for almost two pounds!) brie at the Sam's Club in town. I didn't feel like looking for the actual recipe, so I decided to wing it with what I had. I grabbed some of my chutney and a tube of ALDI biscuit dough and went to work. The end result was much greater than the sum of its parts. This looked super fancy and tasted amazing. The melted brie mixed with the chutney for a sweet and mild taste. The biscuit dough held it all together perfectly. I hope you enjoy this as much as we did! As always, notes are in blue.


Too Damned Easy
Baked Brie and Chutney
Ingredients
  • 6-8 ounce piece of brie, rind removed
  • 2 tablespoons roasted pepper and tomato chutney (feel free to use some other chutney or preserve. You're not going to hurt my feelings)
  • 1 7.5 ounce tube of buttermilk biscuits
Directions
  1. Preheat oven to 400F. Lightly grease a baking sheet.
  2. Take half the biscuit dough, wad it up and roll it out big enough that you can lay the brie on and have enough dough to fold up the sides of the brie. 
  3. Put the brie on the dough (duh). 
  4. Spread the chutney over the top of the brie.
  5. Wad up the other half of the dough and roll it out to the same size as the first piece. Lay it over the top. Tuck the bottom dough under the top. Use a sharp knife to make three slashes on the top of the dough (this will vent any steam and makes this look way fancier than it actually is.)
  6. Cook for 20-25 minutes or until golden brown. (If you're feeling ultra-fancy, give the dough an egg wash before putting it in the oven)
BONUS: Watch in horror as we make this recipe on YouTube!
Good times!

Tuesday, November 19, 2013

Slow Cooker Cajun Stew

     Now and again I like to totally improvise a recipe. The inspiration came about from the desire to burn through a surplus of pork that had been building up in our freezer. I also had a can of okra I don't remember buying. I figured pork+okra=Cajun food. I suppose it could also equal porkra, which sounds like something Godzilla would fight.
From the 1964 classic, "Godzilla vs. Porkra"
     You can ramp the heat up or down on this recipe by changing out the spices. I used some generic Cajun seasoning along with some local stuff. Feel free to use whatever you want. Cayenne would certainly be at home here. Hell, go nuts and throw in some Old Bay seasoning. Serve it over rice. Or noodles, or on its own. I won't tell. Just enjoy it as much as I did!

Slow Cooker Cajun Stew
Ingredients

  • 1 lb spicy ground pork sausage
  • 1 lb boneless pork loin chops, cut into 1"cubes
  • 13 ounces (one package) smoked sausage (I used a bacon and cheddar smoked sausage), cut into 1/2" thick slices
  • 8 ounces peeled shrimp, tails removed
  • 2 cups chicken stock
  • 1 red bell pepper, cut into 1" pieces
  • 1 green bell pepper, cut into 1" pieces
  • 1 onion, chopped
  • 1 can (14.5 ounces) diced tomatoes, undrained
  • 3 sliced jalapenos
  • 1 can (14.5 ounces) sliced okra, rinsed
  • 2 tablespoons white vinegar
  • 1 can (15 ounces) tomato puree
  • 2 teaspoons Cajun seasoning
  • 1/2 teaspoon smoked paprika
  • 1/2 teaspoon garlic powder
  • File powder (optional)
Directions
  1. Cook ground pork sausage until browned, drain and add to 5 quart slow cooker.
  2. Brown cubed pork 2-3 minutes, add to slow cooker along with smoked sausage.
  3. In a saucepan, combine okra, diced tomatoes, jalapenos and white vinegar. Bring to a boil; reduce heat and simmer for 5 minutes then add to slow cooker.
  4. Add all remaining ingredients except shrimp to slow cooker. Heat on LOW for 6 hours. Add shrimp during last 20 minutes of cooking.
  5. Add file powder when serving, if desired.
Good times!

Monday, November 11, 2013

Fruit Punch Hot Sauce

     Some time ago I held a little contest to determine the name of a hot sauce I had created. I picked a winner and then subsequently forgot all about it. I even managed to misplace the recipe. Having finally located the recipe, I am finally posting it! This is a cayenne sauce with a strong citrus base. It's excellent on seafood and chicken. I haven't tried it on anything else, but fully intend to. As far as heat, on a scale of 1 being no real heat to 10 being "Oh God, eventually this has to come out my anus," I'd give this a 4-5. As always, any notes are in blue.
Fruit Punch Hot Sauce
Ingredients

  • 5 ounces cayenne peppers, seeded and roughly chopped
  • 10 ounces red banana peppers, seeded and roughly chopped (not sure where you're going to find these; these peppers were mutants out of our garden)
  • juice of 2 lemons
  • 1/4 cup orange juice
  • 1 medium tomato, roughly chopped
  • 2 cloves garlic
  • 1 teaspoon salt
  • 2 cups cider vinegar
Directions
  1. Throw everything into a blender and blend the living shit out of it.
  2. Pour the blended mixture into a non-reactive saucepan and bring to a boil; boil for 2 minutes.
  3. Strain mixture into bottles/cans (This will make a little over a pint of sauce)
  4. If you are intending to store long term, process canning jars in a boiling water bath for 12 minutes for 1/2-pints and 15 minutes for pints (as always, please refer to the National Center for Home Food Preservation for detailed instructions and tips for giving everyone dysentery) 
Good times!

Sunday, September 1, 2013

Too Damned Easy Cucumber Tomato Salad

     This is the point in the summer where we start trying to use our garden produce in vast quantities. That's where the wife's recipe for cucumber tomato salad comes into play. This recipe couldn't be any more simple. Just about any tomato will work, but we have been using these orange tomatoes since they are super sweet and mild.

Too Damned Easy
Cucumber Tomato Salad
Ingredients
  • 2-3 large cucumbers, sliced
  • 1 large onion, cut into about 1” pieces
  • 3-4 tomatoes of your choosing, sliced
Vinaigrette:
  • 1 cup white vinegar 
  • ¾ cup water 
  • ¾ cup sugar (or six packets of your favorite carcinogenic sweetener)
  • 1 teaspoon salt 
  • 1/8 teaspoon black pepper 
  • dash cayenne pepper 
  • dash parsley 
  • dash basil
Directions
  1. Mix vinaigrette ingredients in large bowl until sugar is dissolved. 
  2. Add vegetables. 
  3. Let marinate in refrigerator 1-2 hours.
Good times!

Thursday, August 29, 2013

Molho Sauce via Hot Sauce!

     I'm so happy the wife got me the Hot Sauce! cookbook. I've been using it to go through the boatload of peppers that have been coming out of the garden. Normally, I'd just be packing them in vinegar and calling it a day. Now I can start putting them to much better use. This particular sauce is apparently regularly found in Brazilian and Portuguese kitchens. It is pretty versatile. Molho is a rich, thick sauce that can be added to foods or used as a topping. The heat is fairly mild when you first make it. The longer it sits, the more heat it gets. The heat is not up front like many sauces. It builds slowly through the oil. As always, notes or changes are in blue. 


Molho
via Hot Sauce!
Ingredients

  • 1/2 cup olive oil
  • 1 medium yellow onion, thinly sliced
  • 2 garlic cloves, minced
  • 1 medium ripe tomato, peeled, seeded and chopped
  • 2 tablespoons red wine vinegar
  • 3 fresh serrano chiles, chopped (no serrano on hand, we went with jalapeno. The heat and flavor profile are similar)
  • 1 teaspoon minced fresh cilantro
  • salt
Directions
  1. Heat the oil in a saucepan over medium heat. Add the onion, stirring until it softens. Add the garlic, stir for a minute, then reduce the heat to low and add the tomato and vinegar. Add the chiles, cilantro and salt to taste. Bring sauce to a boil, then remove from the heat.
  2. When cool, pour into a blender and puree (you can also use an immersion blender if you have one. If you don't have either, I'm not sure what you're going to do. Sorcery is not out of the question)
  3. Transfer to a bottle. If not consuming right away, store in the refrigerator. If storing for longer periods, store in a cool, dark place (I processed mine for 15 minutes per half pint in a boiling water bath. I'm not sure how it will hold for the long haul. There's not much vinegar in there to get the acid up. If I kill myself with food poisoning, I'll let you know right away. In the meantime, check out the National Center for Home Food Preservation for more information. Anything they say will certainly supersede anything I tell you here. When you're canning, better to be safe than vomiting uncontrollably in front of your horrified family)
Good times!

Wednesday, August 7, 2013

Tomato and Hot Pepper Jam

     We are currently experiencing a glut of tomatoes. That's fine, because it's one of our favorite things to can. In the past we've canned sauce, chili tomatoes, chutney and preserves from tomatoes. This time we decided to try our hand at jam! We pulled this recipe from Preserve It! The jam came out a touch savory; the heat from the cayenne and the Italian herbs gave it a nice flavor. You could certainly omit the peppers (if you're ok with being lame) and mess around with the herb choice and come up with a flavor that suits you. As always, notes and changes are in blue.
Tomato and Hot Pepper Jam
via Preserve It!
Ingredients

  • 1-1/8 lb tomatoes, plunged into boiling water for 1 minute and then peeled and coarsely chopped
  • 1 teaspoon crushed red chile pepper (we took 4 fresh cayenne peppers and pasted them in the food processor)
  • 1 teaspoon dried mixed herbs (we went with an Italian seasoning blend)
  • Juice of 1 lemon
  • Pinch of salt
  • 1-1/4 cup granulated sugar
Directions
  1. Add all the ingredients except the sugar to a preserving pan or a large heavy bottomed sauce pan (I just used a stainless steel pot). Bring to a boil and simmer gently for about 8 minutes or until the tomatoes break down and soften (it almost sounds like an interrogation)
  2. Add all the sugar and heat gently, stirring until the sugar has dissolved. Turn up the heat and bring to a boil. When jam reaches a rolling boil, cook for 10-15 minutes or until it starts to thicken and become glossy and reaches the setting point. Stir occasionally to keep the jam from sticking or burning (if you haven't done this before, leaving this on the boil for this long will give you an anxiety attack. Just stir it regularly, it won't boil over). Remove the pan from the heat while you test for a set
  3. Ladle the jam into warm sterilized mason jars, leaving 1/4" headspace (this recipe yielded a bit over a half pint. Too much for a half pint jar, not enough for a full pint. We canned a half pint and put the rest in a container in the fridge for immediate use). If you are canning for long term storage, seal the canning jar and process in a boiling water bath for 5 minutes (again, if you're unfamiliar with this process, check with the National Center for Home Food Preservation for more information)
Good times!


Monday, July 8, 2013

Zucchini Boats

     I do most of the cooking in the house. This is by design. The wife doesn't approve of my cleaning methods, which consist largely of wiping everything off the counter on to the floor. We have struck a bargain. I cook, she does the bulk of the cleaning apart from my non-stick pan and cast iron skillet. There was an incident years ago in which her enthusiasm with a scouring pad resulted in the untimely demise of my Emeril non-stick egg pan.
     There are times when I insist the wife step up and cook. I have a couple of meals that, even though I am fully capable of cooking them myself, I prefer that she make them. I consider them her recipes. She made them first. It's only right that the onus of cooking them always fall to her. Among these recipes are a wicked good tuna casserole, zucchini bread, potato casserole and zucchini boats. She found the recipe for these zucchini boats on an ancient CD-ROM: "Easy Chef's One Million Recipes." She actually made a couple of modifications (a girl after my own heart); the changes and notes will, as always, be in blue.


Ingredients

  • 3 lg. zucchini
  • 2 tbsp. onion, minced
  • 3 tbsp. butter
  • 1 c. soft bread crumbs (she uses an equal amount of dry Italian bread crumbs. You know, the ones in the cardboard tube)
  • 1/2 c. tomatoes, cooked and chopped (she just sauteed them in a little olive oil for a few minutes)
  • Salt & pepper to taste
  • 1/2 lb. Monterey Jack cheese, shredded (she subs in cheeses at a whim. Hardcore. Sometimes she'll use Mozarella. This time she used a 6-cheese Italian mix.)
Directions
  1. Cook zucchini in boiling salted water 10 minutes. 
  2. Cut in halves and scoop out centers. Mix pulp with remaining ingredients. 
    Don't completely gut the zucchini.
    You're just scooping a trench down the middle to hold the filling.
  3. Fill zucchini and top with cheese. 
  4. Bake in 350 degree oven for 15 minutes. 
These are great served with marinara sauce!

Serves 6.

Good times!

Friday, June 28, 2013

Pork Chop Roll-Ups with Cream Cheese and Yellow Squash and Tomato Chutney

     My wife has accused me of having an odd thought process. After coming up with this recipe, I think she's right. I originally started looking at rolled chicken recipes. Then I thought I didn't have any boneless chicken and didn't feel like boning the chicken. So I figured I could use pork instead. Then I started to get goofy. I'm not sure what compelled me to use cream cheese and chutney, but it worked. The flavors all complemented each other. I have no idea how or why, but they did. But who am I to question success?

Pork Chop Roll-Ups with Cream Cheese and
Yellow Squash and Tomato Chutney
Ingredients
Directions
  1. Pound chops thin with a meat mallet. (I love whacking stuff with the mallet. Just make sure to put a piece of waxed paper over the chop unless you're a big fan of bits of meat and juice flying all over the kitchen. Also make all loose objects are secure, because you're going to be rattling the counter top whaling away on the pork)
  2. Spread 1 tablespoon of cream cheese over each chop. Leave a little space around the edge. Spread 1 tablespoon of chutney over the cream cheese.
  3. Roll chops up jelly-style 
  4. Mix flour and bread crumbs in a bowl; whisk egg in another bowl
  5. Dredge roll in flour/crumb mixture, dip roll in egg wash, dredge again in flour/crumb mixture
  6. Place rolls on a cookie sheet covered with non-stick cooking spray. 
  7. Cook 25 minutes at 375, turning once during cooking. If you see any dry spots on the rolls during cooking, just paint them with some of the melted butter. Let rest for 5 minutes before serving.
Good times!

Friday, June 21, 2013

Shrimp Lafayette via Pol Martin

     We love shrimp. We are never without a couple of pounds in the freezer. The are low in calories and so versatile. More often than not, when we're trying to figure out what's for dinner and we're feeling lazy, we end up making some sort of shrimp dish.  There's just so much you can do. Appetizers, entrees, even children's toys!
Not monkeys, SHRIMP! I know, right?
     This particular shrimp recipe comes from my close, personal friend, Pol Martin* and his quintessential 1990's-era cookbook: Pol Martin's Supreme Cuisine. This is a great mid-week meal. The ingredients are simple and should be in most kitchens at any given time. It also comes together quickly, probably about 45 minutes or so start to finish. It does have a bit of heat, so if you are of weak constitution you may want to back off on the peppers on this recipe. As always, changes and notes appear in blue.

Shrimp Lafayette
via Pol Martin's Supreme Cuisine
Ingredients
  • 2 tablespoons butter
  • 2 green peppers, chopped (my wife isn't a huge fan of green peppers, so we used red)
  • 1 tablespoon chopped jalapeno pepper (if the heat is going to be an issue, you could probably get away with poblano.)
  • 4 tomatoes, peeled, seeded and chopped
  • 2 garlic cloves, blanched, peeled and chopped (didn't blanch the garlic. Don't judge me.)
  • 1/4 teaspoon cayenne pepper (if you're considering omitting this AND the jalapeno, don't tell me. Just make sure you're strapped securely into your high chair, you big baby.)
  • 1/4 teaspoon black pepper
  • 1/4 teaspoon white pepper
  • 1/4 teaspoon brown sugar
  • 1/4 cup shrimp stock (If you bought tail-on shrimp, you can make basic shrimp stock. Take the tails and boil them in some water. PRESTO! Low-rent shrimp stock!)
  • 1-1/4 pound fresh shrimp, peeled and deveined (we used tail-on frozen. We survived.)
  • salt
Directions
  1. Heat half of butter in a cast iron pan over medium heat. Add onion and both peppers, Cook 10 minutes over low heat, stirring occasionally.
  2. Add tomatoes, garlic, spices and brown sugar. Mix well and cook 10 minutes over low heat.
  3. Add shrimp stock and continue cooking 10 minutes, stirring occasionally. Remove from heat and set aside.
  4. Have a nice glass of wine. Go ahead, you deserve it.
  5. Heat remaining butter in frying pan over medium heat. Add shrimp and cook 3-4 minutes. Mix once during cooking.
  6. Add shrimp to tomato mixture, mix and let simmer 2 minutes over low heat. Serve over hot pasta (we used farfalle. Bow-tie pasta is awesome.)
Good times!

*I totally don't know Pol Martin. I'm not even sure if he's still alive.

Monday, June 10, 2013

Yellow Squash and Tomato Chutney

     At the end of last summer, we found ourselves with an alarming surplus of produce. We had more squash and tomatoes than we knew what to do with. Fortunately, we have learned the benefits of canning our own food. This weekend, it was nice to pop open a jar of food we canned last year and enjoy the tastes of last summer. One of our favorite things to can has become chutney. It's versatile and delicious. The Yellow Squash and Tomato Chutney recipe I'm sharing today comes from PreserveIt! from DK Publishing.
     I'm not going to give all the details for canning. It would take forever. However, go to the National Center for Home Food Preservation for full details on how to safely can food. PreserveIt! also has lots of good information on safely processing food for canning. Please take the time to read up and familiarize yourself with the procedures involved in canning. Safety first. Always remember, if you poison yourself by preserving the food incorrectly, I had nothing to do with it.
As always, notes and substitutions are in blue. 

Yellow Squash and Tomato Chutney
via PreserveIt!

Ingredients

  • 1 lb. summer squash, trimmed and diced
  • 1/2 lb. onions, coarsely chopped (we used sweet onions, figuring it would be a nice complement to the overall flavor)
  • 3/4 lb. ripe tomatoes, coarsely chopped
  • 1-3/4 cups granulated sugar
  • 1-1/4 cup white wine vinegar
  • 1 garlic clove, peeled and finely chopped
  • 1/2 inch piece of fresh ginger, peeled and finely chopped (I have no recollection of using ginger in this, but if I did, it wasn't fresh. I never have fresh ginger on hand. It would have been a comparable amount of ground ginger, or a piece of candied ginger. Maybe I'll consider making this sober next time.)
  • 1/4 teaspoon crushed red pepper
  • Good pinch of sweet paprika (what qualifies as a good pinch? Maybe it's regional. I probably used a bit less than a 1/4 teaspoon)
  • Good pinch of ground white pepper (again with the good pinch! Can I do a bad pinch? Is that where I spill it all over the place trying to get it out of the jar with my fingers?)
  • 1/2 teaspoon sea salt 
Directions
  1. Put all the ingredients in a preserving pan or large, heavy-bottomed, stainless-steel saucepan
  2. Bring slowly to a boil, stirring to dissolve the sugar. Reduce the heat and simmer for 2-1/2 hours or until a wooden spoon drawn across the base of the pan leaves a trail. Stir frequently toward the end so the chutney doesn't burn (or you could be OCD like me and stir every 15 minutes or so). If necessary, turn up the heat toward the end of cooking and boil rapidly until thick and glossy (every time I've made chutney I've had to do this. It always takes me longer than the stated time to get the desired results. I think on average, my total cooking time on this is closer to 3 hours. As always, start with the original recipe suggestion, then go from there). 
  3. Pack the chutney into warm, sterilized mason jars (use half-pint or pint jars, a quart jar of chutney is going to take forever to process in a boiling water bath). Leave 1/4 inch headspace (if you've never canned, headspace is referring to the space between the top of the food in the jar and the rim of the jar. If you over fill, the jar can pop the lid or burst when you process it), make sure there are no air gaps in the ingredients (just poke around in the jar with a chopstick or butter knife to work out the air bubbles)
  4. Seal with a two-part top and process in a boiling water bath for 10 minutes (for half-pint jars. Do closer to 12-13 for pints. Then comes the best part, you take the jars out and put them on a towel. When you hear a loud, metallic "thunk!" the jars have sealed. We love that sound.)
  5. Store in a cool, dark place. Allow to sit for one month before opening. Refrigerate after opening.
Good times!